
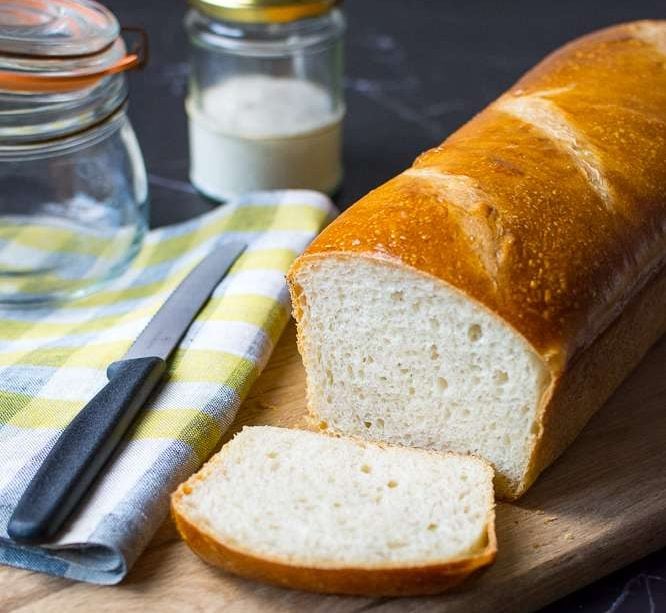
Whilst a traditional Sourdough Loaf is the best crusty bread that's perfect for open sandwiches and as a sidekick to your soups and stews, it isn't always fit for purpose when you want to make a sandwich or a toastie. Here, we are sharing a simple Soft Crust Sourdough Bread recipe, that has a texture similar to brioche, a wonderful sourdough tang and is made in a loaf tin. This is a perfect Sourdough Sandwich Bread for breakfast toast and lunch on the go!

Jump to:
As an Amazon Associate I earn from qualifying purchases, at no extra cost for you! Thank you!
Can You Make Sourdough Bread Soft?
A great way to transform your traditional everyday Sourdough Bread into a fluffy Sourdough Sandwich Bread is to substitute the water in the dough with milk.
Take it a step further and add a good knob of butter, and you have yourself a wonderfully soft enriched sourdough that not only makes a perfect sandwich but is great served slathered in butter for your breakfast toast.
The last step in creating this loaf is brushing the top with an egg wash to keep the sourdough sandwich bread crust soft (as opposed to crusty sourdough).
You can also choose to brush it with milk, but it won't be as soft and will be a bit lighter in colour.
Ingredient Notes
Here are all the simple ingredients you'll need to make this great bread. Find the quantities, full instructions and nutritional information in the recipe card at the bottom of the post.
- strong white flour: you can substitute up to ¼ of white bread flour with whole wheat flour.
- active sourdough starter: use 100% hydration that is super active and bubbly. It replaced commercial yeast and the bread solely relies on it for its rise.
- milk: you may replace half of the milk with warm water for a less rich loaf of bread. You may also use evaporated milk by following our Evaporated Milk Sourdough Bread recipe.
- unsalted butter.
- clear honey: may be replaced with maple syrup or a little white sugar.
- salt.
- egg (beaten): for egg wash.
Equipment
The most important thing is to choose a loaf pan that's the right size. This recipe was baked in a 1.8l (4lbs) loaf pan. Depending on how tall you want your loaf, you may choose different shaped loaf pans, or make 2 x 2lbs loaves.
We also recommend a Kenwood Stand Mixer!

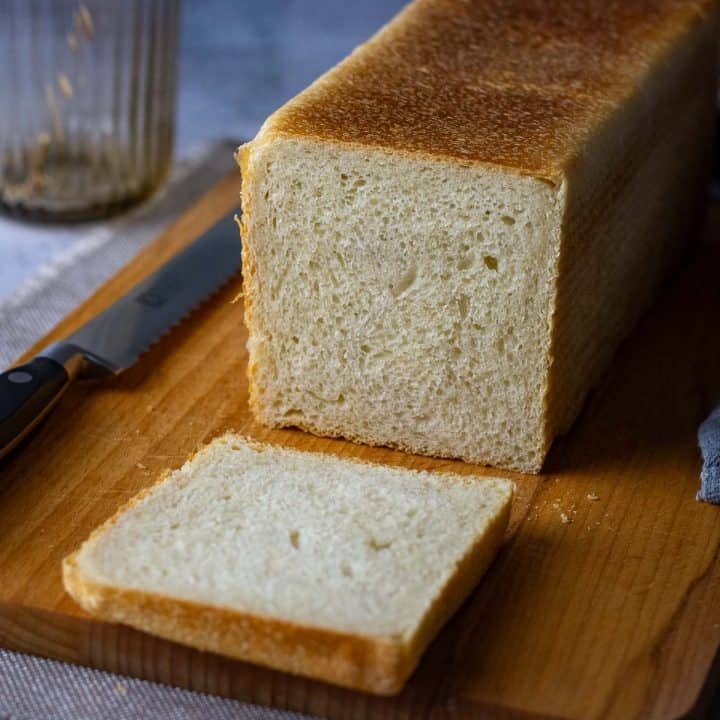
Want to make a sourdough sandwich bread with perfectly square edges that slices like a dream? You must try our Sourdough Pullman Loaf, also known as Sourdough Pain De Mie.
Tips for Making the Best Sourdough Sandwich Loaf
This Soft Sourdough Sandwich Loaf recipe is not a complicated bake, but if it is your first time making it, make sure to read through these tips to achieve a perfect loaf:
- It may go without saying, but make sure you use your sourdough starter at its peak. Once you fed your starter, make sure it at least doubles in size and use it before it starts deflating. This will ensure the wild yeast in your starter is at its strongest and can do its job in rising the dough properly.
- Warming the milk before using it to make the dough I've sit the head start and helps with the rise by increasing the dough temperature slightly. This is especially helpful if the temperature in your kitchen is below 20°C. However, if you're in no rush, use cold milk, and leave it to prove for longer.
- For the best results, brush the top of your loaf with egg wash before baking. Whilst milk also works, the crust will be softer and deeper golden brown colour if you use eggs (or egg yolk only).
- We used a tablespoon of honey (approx.10g) in our Soft Crust Sourdough Sandwich Bread. It doesn't make the bread sweet but adds to the depth of flavour. You can skip the honey or substitute it with a level tablespoon of sugar.
- Do not skip the coil folds (or stretch and folds) to avoid dense sandwich bread. Folding the dough during the fermentation process redistributes the yeast and gasses in the dough, creating a softer and airier loaf.

Step-By-Step Method
Day 1: Make the Dough and Stretch and Fold
1. First thing in the morning, feed your starter in the ratio of 1 part starter: 1 part flour: 1 part water and leave it for 4-6 hours to at least double in volume. Alternatively, feed your starter the night before in the ratio of 1 part starter : 2 parts flour : 2 parts water and leave it to grow overnight.
2. Once your starter has doubled in volume, heat the milk and butter in a small saucepan until the butter melts, then leave to cool down to just warmer than room temperature.
3. Mix flour, salt milk mixture, starter and honey in a bowl of a stand mixer (we love Kenwood). Fit the mixer with a dough hook attachment. Start running the stand mixer on low speed until the ingredients are incorporated, then increase the speed and knead for 6-7 minutes.
4. Tip the bread dough onto a clean work surface and using a dough scraper tuck the sides under in swift motion to form a tight ball of dough.


5. Place the dough in a lightly greased bowl, cover with a damp kitchen towel or plastic wrap and leave in a warm room temperature for 30 minutes. After 30 minutes, with wet hands, lift one side of the dough and fold it into the centre. Repeat with the other three sides. Then flip the dough over. Alternatively, perform coil folds. Cover and leave again for 30 minutes.
6. After 30 minutes, fold again using your preferred method. Do so two more times (4 sets of stretch and folds or coil folds). Cover and let the dough rest in a warm place for 2 hours for bulk fermentation (also known as bulk rise or first rise). The dough should have considerably risen during this time. If not, give it a little bit more time.

7. Cover the dough very well and pop it in the fridge to let the dough rise overnight at a colder temperature.
Day 2: Shape, Proof and Bake
1. The next morning, take the dough out of the fridge in the morning and leave it at room temperature whilst you lightly grease a large loaf tin (ideally 3-4 lbs) with some oil.
2. Turn the dough out onto a lightly floured surface. Trying to keep the air in the dough as much as possible, stretch the dough into a rectangular shape, the length of your loaf tin. Then roll the dough to form a tight long tube.
3. Place the dough log into the bread pan, cover with a damp tea towel or oiled cling film and leave in a warm spot for a second rise until the dough is doubled in size, about 2-3 hours. It should be reaching the rim of the pan. Head to our article about how to know when your sourdough is done proofing to learn more.
TIP: If your loaf tin isn't quite non-stick, you can brush it with a little olive oil or butter and dust it with flour, before placing the shaped loaf into it. Alternatively, line the loaf neatly with parchment paper, leaving the sides overhanging a little.
4. Preheat the oven to 180°C Fan. Uncover the dough. Using a very sharp knife, a razor or a bread scorer, make a couple of slashes across the top of the dough. Brush the top of the loaf with a beaten egg.


5. Bake 30-35 minutes until golden brown. If you have a kitchen thermometer, check that the internal temperature is 88-93° C. Leave the loaf to cool down in the tin for 10 minutes, then transfer it onto a cooling rack to cool completely before slicing.
Serve fresh bread as it is, or toast and butter it the next day.

Ways to Use Soft Crust Sourdough Bread
There are a number of things this Sourdough Sandwich Loaf can be used for. Try the following:
- It is a perfect sandwich bread to stuff with your favourite fillings.
- Take toasties!
- Serve it toasted with butter and jam at breakfast time.
- Any leftovers are perfect for French toast a couple of days after baking!
- Soft Crust Sourdough Bread is perfect for making softer Sourdough Croutons (you don't even need to cut the crusts off!).

Recipe FAQs
This time, I am sharing a Soft Crust Sourdough Bread recipe, made with white strong flour, but if you wish you can replace up to ¼ of white flour with rye or wholewheat for a healthier option with more fibre. Adding spelt flour will work very well too!
Yes, but you may need to reduce the amount of milk by about 10-20 ml, as strong bread flour with higher protein content is a little more thirsty than ap flour with lower gluten content.
Using sourdough to make a sourdough sandwich loaf will completely transform your bread! Don't get me wrong, your bread will not taste sour - but it will have a slightly tangy aftertaste! What is more, I always recommend keeping a sourdough starter relatively low acidity (high acidity can really slow the rise, more on this topic here). But just a bearly noticeable sourdough tang does wonders to otherwise quite plain and unmemorable loaf.
Storage
To store soft crust sourdough sandwich bread, keep it in a plastic bag at room temperature. It's best served the day it's baked, but if you have some left, you can toast it the following morning and add butter or creamy sandwich fillings.
Unlike store-bought bread, it doesn't have a long shelf life because it doesn't contain artificial preservatives or highly processed ingredients. If you need to keep it longer, the best way is to freeze it. Slice the bread first, place it in a plastic bag, and freeze. When you're ready to eat it, just thaw and toast.
Reader Review
"This is the best soft sourdough bread I've ever made! I also make it with cinnamon sugar and raisins and it is so delicious!"
⭐⭐⭐⭐⭐
Recipes Using Active Sourdough Starter
For other Sourdough recipes using active starter to try next time, have a look at our other recipes below:
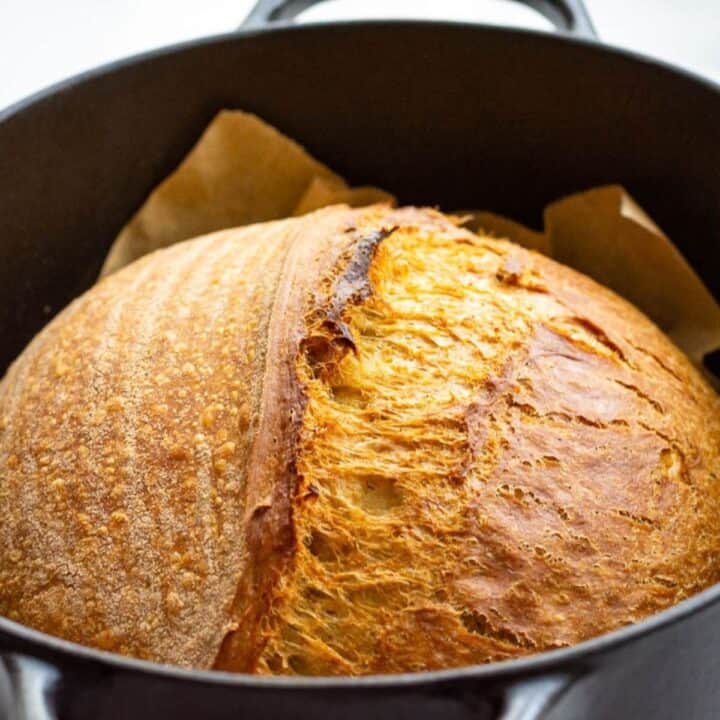
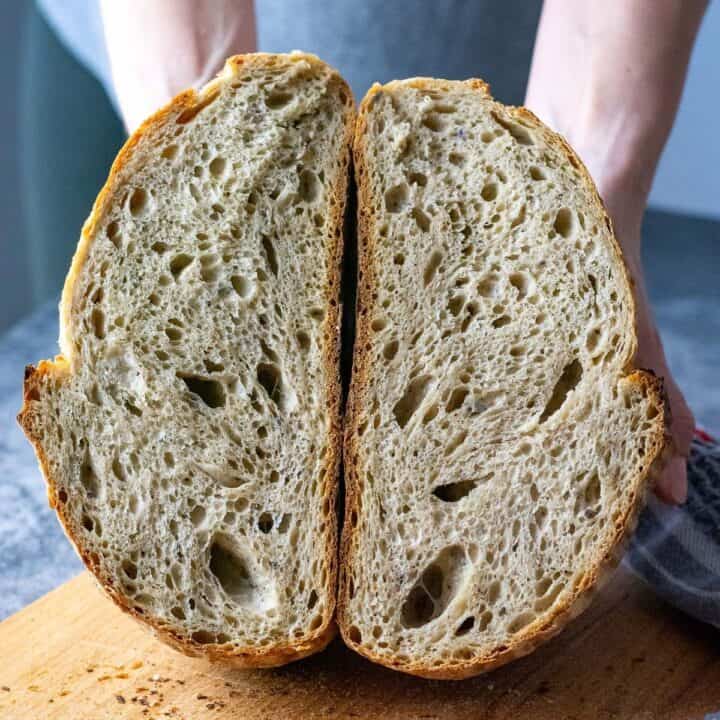
- Rustic Seeded Sourdough Bread Recipe
- Apple & Cinnamon Sourdough Buns
- Sourdough Bagels
- Sourdough Ciabatta
- Sourdough Focaccia with Herbs & Olives


Recipes Using Sourdough Discard
If you are looking for ideas to use up that Sourdough discard, we would like to tempt you with the recipes below:
Flavoured Sourdough: How, When and What Mix-Ins To Add To Your Sourdough?
Discover a variety of mix-ins and learn how they affect hydration and bulk fermentation, master the art of substituting water with coffee and tea, and explore a plethora of creative mix-in ideas. Plus, get 2 exclusive bonuses that will inspire you to create the most flavoursome and unique sourdough!


Soft Crust Sourdough Bread
Equipment
- Large Loaf TIn 3-4 lbs
Ingredients
- 360 g (2.8 cups) strong white flour
- 220 g (1⅛ cups) active sourdough starter 100% hydration
- 240 ml (1 cups) milk
- 30 g (1.06 oz) butter unsalted
- 1 tablespoon clear honey
- 1½ teaspoon salt
- 1 egg (beaten) for egg wash
Instructions
Day 1:
- First thing in the morning, feed your starter in the ratio of 1 part starter: 1 part flour: 1 part water and leave it for 4-6 hours to at least double in volume. Alternatively, feed your starter the night before in the ratio of 1 part starter : 2 parts flour : 2 parts water and leave it to grow overnight.
- Once your starter has doubled in volume, heat the milk and butter in a small saucepan until the butter melts, then leave to cool down to just warmer than room temperature. Mix flour, salt, milk mixture, starter, and honey in a bowl of our standing mixer. Fit the mixer with a dough hook attachment. Start running the stand mixer on low speed until the ingredients are incorporated, then increase the speed and knead for 6-7 minutes.
- Tip the dough onto a clean surface and using a dough scraper tuck the sides under in swift motion to form a tight ball of dough.
- Place the dough in a lightly greased bowl, cover and leave in a warm spot for 30 minutes. After 30 minutes, lift one side of the dough and fold it into the centre. Repeat with the other three sides. Then flip the dough over. Alternatively, perform coil folds. Cover and leave again for 30 minutes.
- After 30 minutes, fold and stretch again using your prefered method. Do so two more times (4 times in total). Cover and leave in a warm spot to prove for 2 hours. The dough should have considerably risen during this time.
- Cover the dough very well and pop it in the fridge to continue slow proving overnight.
Day 2:
- Take the dough out of the fridge in the morning and leave it at room temperature whilst you lightly grease a large loaf tin with some oil.
- Turn the dough out onto a lightly floured surface. Trying to keep the air in the dough as much as possible, stretch the dough into a rectangle, the length of your loaf tin. Then roll the dough to form a tight log.
- Place the dough log into the tin, cover with a damp tea towel or oiled cling film and leave in a warm spot to rise until the dough is doubled in size, about 2 hours.
- Preheat the oven to 180°C Fan. Uncover the dough. Using a very sharp knife, a razor or a bread scorer, make a couple of slashes across the dough. Brush the top of the loaf with beaten egg.
- Bake 30-35 minutes until golden brown. If you have a kitchen thermometer, check that the internal temperature is 88-93° C. Leave the loaf to cool down in the tin for 10 minutes, then transfer it onto a cooling rack to cool completely before slicing.
Nutrition




Toni says
This is so perfect!! It really turned out amazing!
Ieva says
That's great, Toni! Thanks for trying the recipe 🙂
Natalie says
I love making homemade bread, and your sourdough recipe is definitely a keeper, thanks!
Ieva says
Homemade bread is the best! Thanks for the feedback, Natalie!
Sisley White - Sew White says
I adore sourdough and this loaf I just ate fresh and still warm with lots of butter.
Ieva says
Being able to have the bread still warm is one of the best things about making it at home for us! So glad you enjoyed it!
Amanda Wren-Grimwood says
Your breads are always amazing! I didn't know you could make a soft sour dough and it's such a great idea for sandwiches. Gorgeous bread.
Ieva says
Thanks, Amanda! What a lovely feedback 🙂
Kate says
What a delicious looking loaf - you've inspired me to dig out my sorry looking starter from the back of the fridge and start feeding it. Yum!
Ieva says
Kate, I'm so glad you feel inspired! Hope you revive your love for making sourdough! 😀
madison says
can I use plant based milk instead?
Ieva says
I have not tried using non-dairy milk myself, but one of my readers advised that it worked well with high-fat plant-based milk, like cashew or coconut 🙂 Let me know if you try, I would love to know what milk works/ doesn't work! 🙂
Oscar says
This bread is a game-changer for sandwiches! The soft crust and hint of sourdough flavor make it a perfect lunch option.
Deborah says
This is by far the best recipe I’ve ever tried! My 8 children at home love it so much. I even tried one third of sifted rye flour and it worked out perfectly. Thank u so much for this!! Lots of love from Sweden ❤️
Ieva says
Thank you so much, Deborah! Such wonderful feedback - it really made my day! I've tried this bread with a 1/3 of spelt flour, but I cannot wait to try it with rye too! Love the earthy nutty rye flavours in bread! ❤️
Kaitlyn says
I’m in the process of making this and am so happy with how the dough looks already! One question, I started the dough this morning (fed my starter last night), is it ok to go into the fridge so long (it will be about 2pm today until tomorrow morning), or is it best if I just leave it on the counter to proof quicker and bake it tonight?
Ieva says
I would recommend placing the dough in the fridge this afternoon. It should be fine cold proofing in the fridge for up to 36 hours (after that the bread tastes too sour for my liking). Hope this helps and your bread has a beautiful rise! 😍
Kaitlyn says
I ended up doing it on the counter for a quicker rise) I was too excited and impatient to leave it overnight in the fridge! Oh my goodness, it is amazing! This is definitely my new go-to recipe for sourdough!! Thank you!!
Ieva says
Thank you for such kind feedback, Kaitlyn! So glad you liked our recipe 🙂
Pat says
Glad to see this recipe was successful for so many, but I cannot find anywhere in the instructions when to add the salt. Please update to include this information. Thanks.
Ieva Greber says
Thanks for spotting our mistake, and lettign us know - much appreciated 🙂 I have now updated the recipe (but in short, we mix the salt with the flour).
Hen says
Hi I was just wondering if you could use the mixer until you achieve “window pane” result instead of stretch and folds? Thanks jen
Ieva Greber says
Hi. Yes, you can! However, I find that skipping the folds will produce the dough that is slightly more difficult to handle when it comes to shaping it into a log, and the baked result is ever so slightly denser (folds really help with distributing the wild yeast and gas pockets in the dough, giving your loaf airier crumb), but it will still be delicious, and you may not want the crumb too airy for sandwich bread anyway! Happy baking! 🙂
Linda Carroll says
This is the best soft sourdough bread I've ever made! I also make it with cinnamon sugar and raisins and it is so delicious! Thank you so much for sharing!
Ieva Greber says
Thank yo so much for taking the time to leave such kind comment! So glad you like this recipe 🙂
Susan Kuipers says
is there a video? I'm a visual learner. I kinda understand the recipe.
we enjoy sourdough bread.
Ieva Greber says
Unfortunately I don't have a video for this particular recipe, but I will make sure to make one next time I make this bread 🙂
Stacey says
Thank you for the great instructions. I was really hopeful but the time in fridge made my giant domed dough collapse into putty. Any idea why this would happen? Everything went perfect until the overnight time in the fridge. I’m so sad!
Ieva Greber says
Oh no, such a shame! I can imagine your disappointment... The main reason why dough collapses is over-fermentation, which may be due to higher temperature (both room temperature and fridge temperature) or/and length of time fermenting (some flours ferment quicker too, plus honey in this recipes speeds up the process further).
Here are a few things you can do: 1. reduce the amount of starter you use in the dough and keep the timings the same. 2. reduce the time of fermentation (I generally suggest sticking your dough in the fridge before it doubles, so it can carry on rising slowly in the fridge without the risk of collapsing).
Hope you can make some delicious flatbreads with the collapsed sourdough though 🙁
Joy says
Question in the recipe it says 360 g flour is 2.8 cups, but 220 g of starter is.88 cups?? Those are not the same ratio. I did is by grams, not volume. What are the correct cups. The dough seemed very sticky with 360 g. I'm wondering if I didn't have enough flour. This is my first try. Thank you. I hope you still mind this mailbox.
Ieva Greber says
Thank you for spotting the mistake - the recipe convertor must have automatically converted it to sourdough discard volume. Apologies for that, it should say 1 + 1/8 of a cup of active sourdough starter. However, I am glad you weighed your ingredients. Sourdough starter is difficult to quantify in volume, since starters may have more or less gasses in them depending on how much they rise (some amay double, other triple in the same amount of time).
The dough starts off very sticky, but with each set of folds it transforms into very soft and elastic dough as the gluten networks start to develop. After a slumber in the fridge overnight the dough will firm up too, so it should be relatively easy to shape it into a log for a second proof in the loaf pan.
Joy says
Thanks, that's helpful. It's in the fridge now and appeared to be firming up when I put it in. I can't wait for the final product.
Joy says
I followed the recipe to the letter except I doubled it for 2 loaves. They turned out perfectly. Amazing. It was exactly the way I wanted it. I do want to try it with some 7 grain cereal in it next.
Thank you
Ieva Greber says
So glad it all worked out 💗. Please do let us know how the 7 grain loaf turns out when you get to it, sounds like a lovely loaf to make!
Joy says
I made the multigrain loaf bread by substituting 1/4 of the flour with multigrain. I made 2 loaves. I was perfect and moist. You have to soften the multigrain with hot, close to boiling water. Instead of using milk, I used 1/2 boiling water (to soften the cereal) and 1/2 heavy whipping cream.
Nicole Kendrick says
This bread is absolutely delicoius. I love the tang the starter gives it.
Liz says
What a marvelous recipe! It's definitely going to be our go-to sandwich bread!
Shandy Bulmer says
I doubled the recipe and made 2 loaves. I didn’t have enough active starter for the 440g so I added discard from the previous feeding to bring it to 440g. Everything else I followed as written. They turned out beautifully. They will make delicious turkey sandwiches for work lunches this week. This was my first time coming across your site, I love your story and have already selected my next recipes to try! Thank you!
Shandy
Ieva Greber says
Shandy, I'm so pleased you liked the recipe. Good thinking about adding extra discard! Hope you enjoy the other recipes too 😀
Marie-Pierre says
This bread was dreamy and with this special tang touch! A must keep recipe!
Swathi says
Soft crust sourdough bread is delicous love that crumb. I too make with tangzhong.
Ieva Greber says
Yes! We love baking with tangzhong, like making sourdough shokupan - it makes the softest of breads! 🙂
Sonja says
This is so much better than the tasteless storebought sandwich bread! The softness was rather astonishing, considering I usually make crusty breads, but was utterly perfect for sandwich. I made one with cheese and ham first and frankly wanted another one right away.
Ieva Greber says
Oh, I know the feeling.... I sometimes worry about the amount of sourdough I eat - it's just so good! 😀
Izzy says
Delicious! We used this for grilled cheese sandwiches and they were so good!
Jill says
This soft sourdough has a light, brioche-like texture that’s perfect for sandwiches and toasties. You still get that lovely sourdough flavor in every slice.
Katy says
It was my first time making sourdough sandwich bread and the recipe worked perfectly. The tips are super helpful, thank you!
Ieva Greber says
So glad you found it helpful and it worked great! And so grateful for a lovely comment! 🙂
Claudia says
I baked this soft crust sourdough sandwich bread, and it came out fluffy with a tender crust—perfect for everyday sandwiches.
Ieva Greber says
Thank you for giving this recipe a go! Glad you enjoyed it 🙂
Mag says
It was my first time making soft sourdough. The recipe was easy to follow and it came out delicious.
Ieva Greber says
So glad to hear your first go was a success! You must be a natural 🙂