
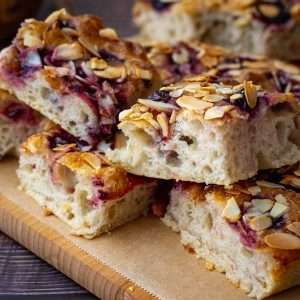
This sweet sourdough focaccia is a soft, airy twist on the traditional flatbread, perfect for those who love a little fruit and crunch in their bake. Our Cherry Almond Focaccia combines juicy cherries, golden almonds, and a hint of sourdough tang for a simple yet satisfying treat.

Jump to:
As an Amazon Associate I earn from qualifying purchases, at no extra cost for you! Thank you!
Sweet Sourdough Focaccia
While focaccia is usually a savoury affair, it turns out this pillowy flatbread makes a surprisingly lovely sweet treat too - especially alongside a mid-morning coffee. Just like our Sourdough Almond Croissant Focaccia, Sourdough Cinnamon Roll Focaccia and Sourdough Baklava Focaccia, this cherry almond version proves that sweet sourdough focaccia deserves a spot in your baking rotation
Unlike classic sourdough, focaccia doesn't need shaping into a boule or batard. No tight surface tension, no fancy shaping techniques. Just let it puff up, and stretch it out in the tray. It's stress-free and perfect for beginners.
Ingredient Notes
- active sourdough starter: 100% hydration. Wild yeast is the only leavening agent here, so you need your starter at its peak!
- strong white bread flour: with at least 12% protein content.
- almond extract: optional.
- salt and caster sugar.
- olive oil: use good quality but not overly strong-tasting olive oil, not to overpower other flavours.
- frozen cherries: thawed, juices reserved. We used dark sweet cherries from ALDI.
- unsalted butter: melted.
- flaked almonds: a.k.a. sliced almonds.
- demerara or granulated sugar: coarser sugar works better for topping.
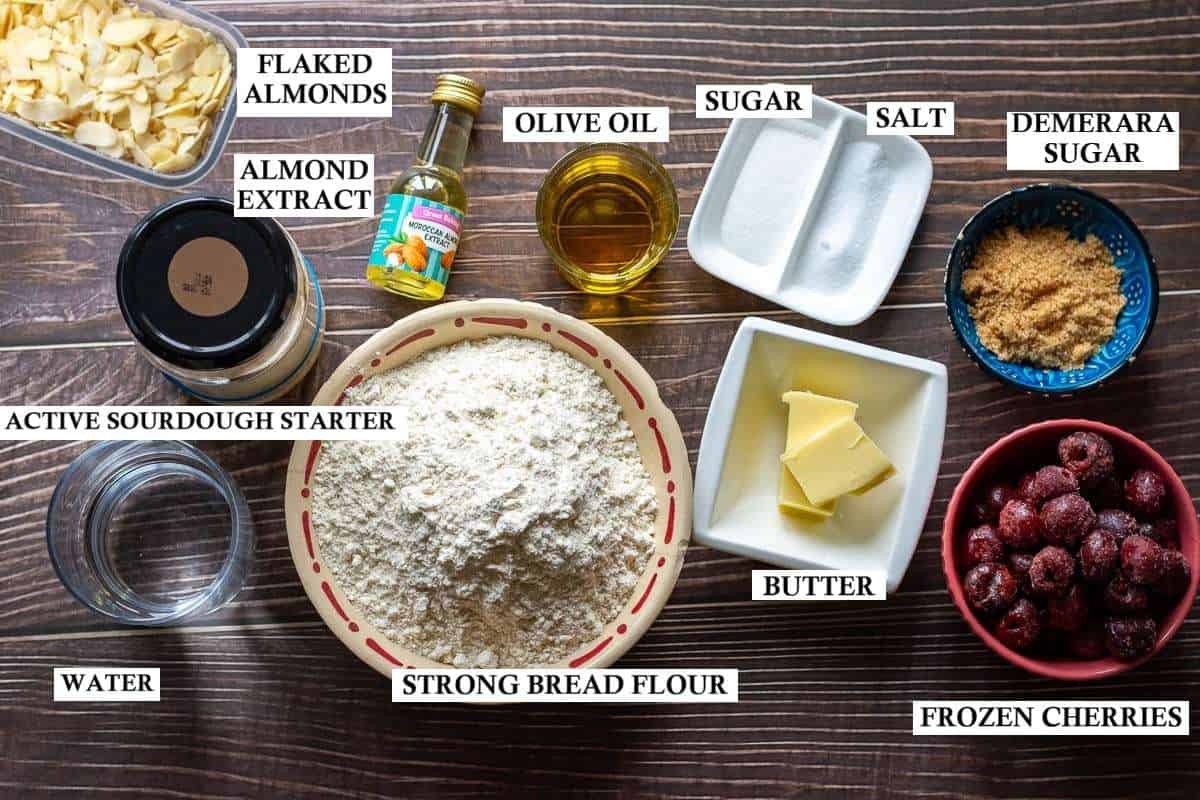
Find ingredient quantities, detailed instructions and nutritional information in the recipe card at the bottom of the post.
Equipment Needed
- Stand Mixer Fitted with A Dough Hook Attachment
- Large Rimmed Baking Sheet (9x9in/ 23x23cm)
- Plastic Wrap (Cling Film) or a Damp Kitchen Towel.
- Parchment Paper
- Small Saucepan for melting the butter
- Pastry Brush
Tips For Great Sourdough Focaccia Dough
🥖 1. Don't Be Afraid of High Hydration: High hydration dough (meaning a higher water-to-flour ratio) is what gives sourdough focaccia its soft, airy interior and chewy edges. It may feel sticky and unmanageable at first, but trust the process-every fold will make the dough easier to handle.
If you're using extra high-protein bread flour (13%+), it can take on more water, so don't be afraid to adjust sourdough hydration slightly depending on your flour.

🔁 2. Coil Folds Are Non-Negotiable: These gentle stretches and tucks:
- Redistribute wild yeast for an even rise,
- Strengthen gluten to trap those glorious gas bubbles,
- And help build structure without overworking the dough.
Skipping the coil folds means saying goodbye to that open, pillowy interior - so don't!
🔄 3. Oil Goes in by Hand, Not Mixer: Adding oil? Don't pour it in and rely on your stand mixer. Oil and dough don't play nice unless coaxed properly.
The best way? Use your hands to squish the oil into the dough before mixing again. It's messy, but it prevents the dough from splitting and makes for better texture later on.

⏱️ 4. Watch the Dough, Not the Clock: Focaccia dough can ferment a bit faster than regular sourdough because of high hydration and a small amount of sugar added to the dough. Sugar feeds the wild yeast and speeds things up - so keep an eye on the dough on Day 1. Look for volume increase, bubbles, and jiggly movement. That said, focaccia is flatbread, so even if it overproofs slightly, it's more forgiving than a tall loaf.
🧈 5. Dimple Like a Pro: Use oiled fingers when dimpling your dough to avoid sticking and tearing. Dimpling not only creates those signature pockets for toppings to nestle into. Press dough with your fingers to also gently degass the surface and help the focaccia rise evenly in the oven.
And don't just scatter cherries on the dough surface, press them into those dimples - you don't want them to fall out when you slice your sweet sourdough focaccia.
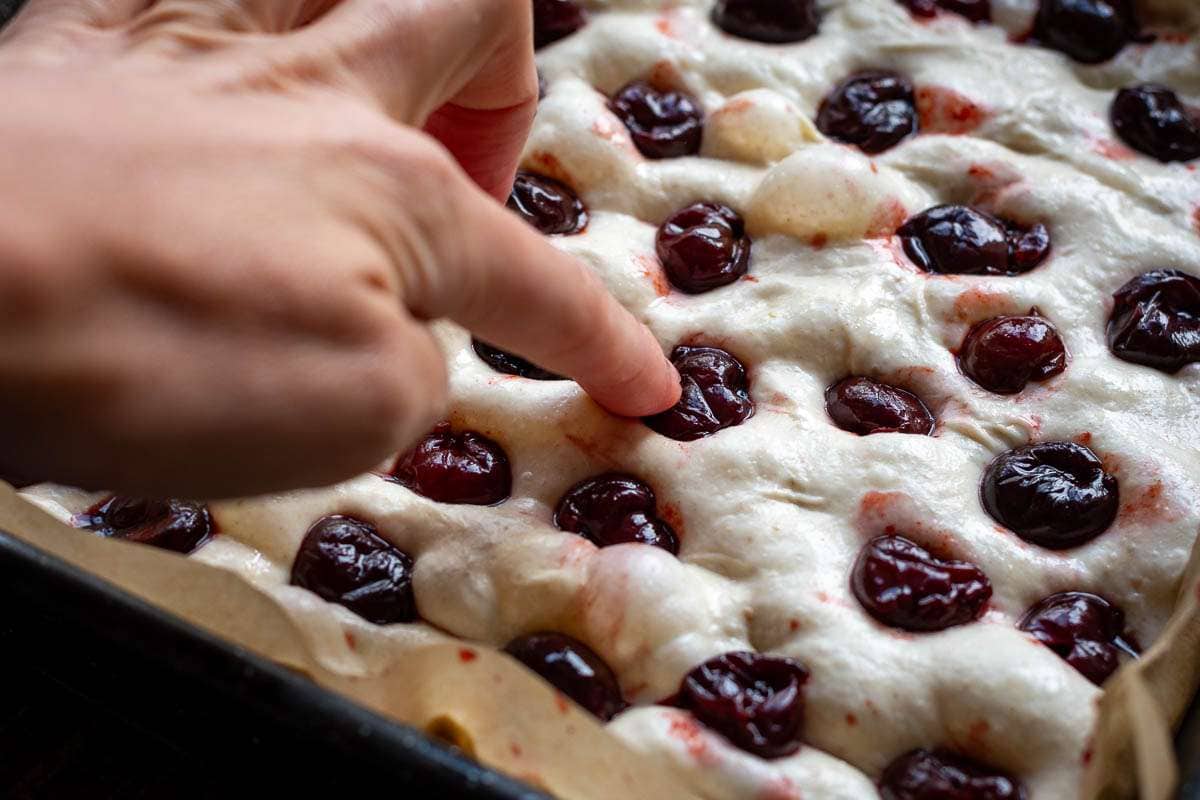
📏 6. Use the Right Tray and Cover Smart: Use a high-rimmed baking tray (something like 23x23 cm or similar) to contain your dough during the second rise. When proofing, cover the dough with cling film or a damp tea towel - but make sure it doesn't touch the surface!
🔥 7. Bake in the Middle of the Oven: Position your tray in the middle of oven for the most even bake. Too close to the top and delicate toppings like flaked almonds or sugar can burn before the focaccia is cooked through; too low and the bottom may cook unevenly while the top stays pale.
Storage
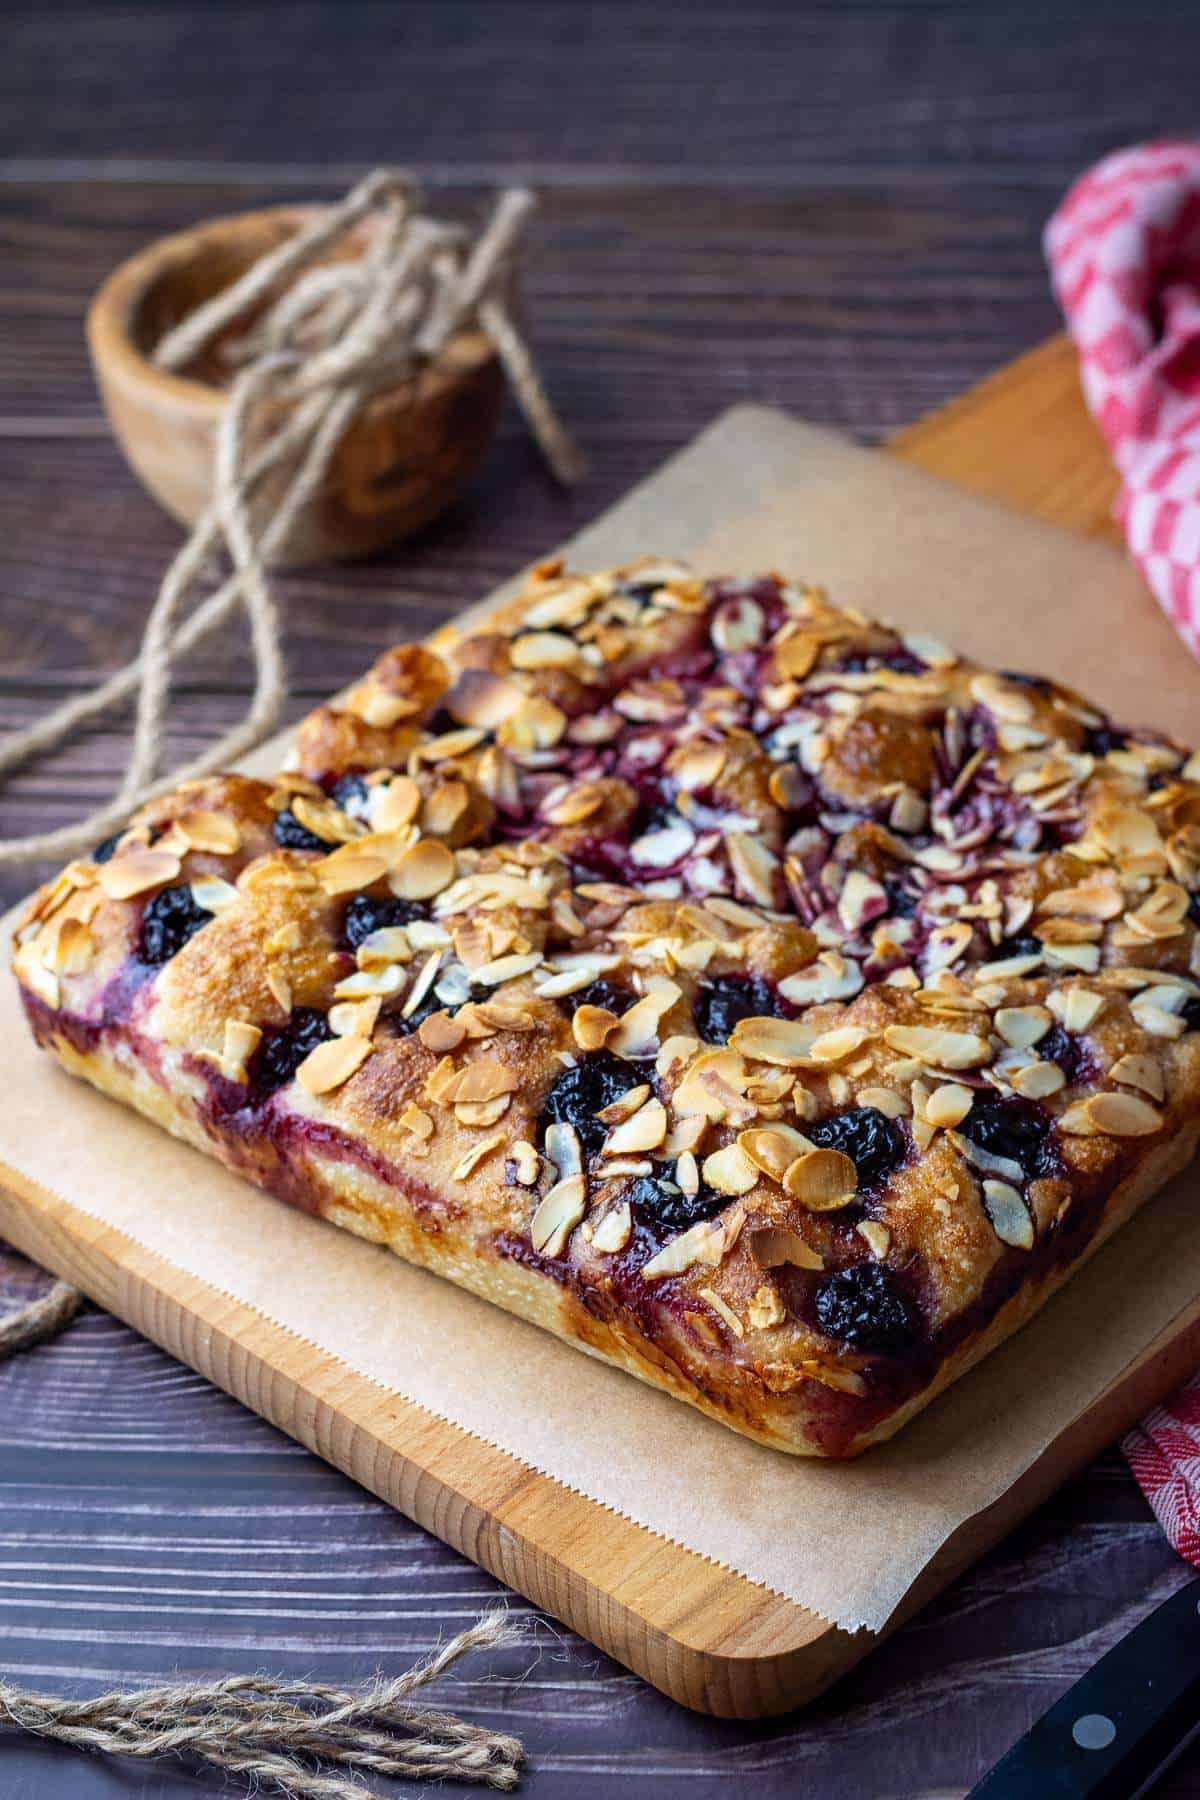
This Cherry Almond Sourdough Focaccia is best served slightly warm or at room temperature on the day that it is baked.
But if you have leftovers, store it in an airtight container in a dark cupboard for up to 2 days. We don't recommend freezing this sweet sourdough focaccia.
More Focaccia Recipes To Try Next Time
Looking for summery focaccia for the tomato season? Try our Sourdough Cherry Tomato Focaccia with Rosemary! Autumn? Try Sourdough Apple Focaccia! More recipes below:


Sourdough Cherry Almond Focaccia
Equipment
Ingredients
- 110 g active sourdough starter 100% hydration
- 260 g strong white bread flour
- 160 g water
- 1 teaspoon almond extract optional
- 5 g salt
- 5 g caster sugar
- 25 ml olive oil
Topping:
- 150 g frozen cherries thawed, juices reserved
- 30 g unsalted butter melted
- 30 g flaked almonds a.k.a. sliced almonds
- 1-2 tablespoon demerara or granulated sugar for topping
Instructions
DAY 1:
- First thing in the morning, feed your sourdough starter and leave it in a warm spot to at least double in volume. We typically feed our starter in a ratio of 1 part starter: 1 part water: 1 part flour, and it doubles (or even triples) within 4 hours.
Fermentolyse and Mixing The Dough
- In a bowl of a stand mixer, combine flour, water, almond extract (optional) and active sourdough starter. Mix the dough in a stand mixer fitted with a dough hook attachment for a few minutes on low speed, until the flour is hydrated. Cover the bowl with a damp tea towel and leave the dough to fermentolyse (a type of sourdough autolyse where sourdough starter is added too) for an hour.
- After an hour, scatter the salt and sugar on top of the dough. Drizzle the olive oil all over, and using your hands, squish the salt and oil into the dough, aiming to distribute it evenly.TIP: Don't be tempted to just mix the oil in by running the stand mixer - the dough will split, separated by oil layers.
- Once incorporated, run your mixer on medium speed for 10-12 minutes, until you have a very smooth and elastic dough. It will be wet, but should start gathering around the dough hook attachment.
Coil Folds, Bulk Fermentation, Cold Retardation
- Scoop the dough into a lightly oiled bowl (we like to use a heavy shallow dish - it helps with coil folds later). Cover the dough with a damp tea towel or cling film (plastic wrap) and leave it in a warm spot for 30 minutes.
- Over the next 3 hours, at 30-minute intervals, perform a set of coil folds, using wet hands. See the coil folding video below.
- After all 6 sets of coil folds are completed, cover the dough and let it finish its bulk fermentation undisturbed for 1.5-3 hours, depending on the temperature of your kitchen.
- Place the dough in the refrigerator for 8-24 hours (or simply overnight).
- At this point, place the cherries in the fridge to thaw overnight too.
DAY 2:
- The next day, line a baking tray (approx 24x24cm) with parchment paper.
Second Rise
- Take the dough out of the fridge and very carefully transfer it into the prepared baking tray, trying not to deflate it too much. Stretch it out into the corners of the baking dish.
- Cover it again and leave it in a warm spot to proof for another 1-2 hours. It will increase in volume, puff up and have very noticeable blisters across the surface.
Topping and Baking
- Preheat the oven to 200°C (400°F). Oil your fingers and dimple the top of the dough all over.
- Drain the cherries, reserving the juices, and press them into the dimples.
- Mix the melted butter with 1-2 tablespoon of the reserved cherry juice. Then brush this mixture all over the dough.
- Sprinkle sugar on top, then spread the flaked almonds across the surface, pressing down gently to stick.
- Bake the cherry almond focaccia for 20-25 minutes. Cool it for at least 15 minutes before taking it out of the baking tin and slicing. It is delicious warm, with a dusting of icing sugar.
Video
Nutrition


Lora says
Really lovely focaccia recipe. The cherry/almond combination is one of my favorites! Making again!
Ieva Greber says
Same same - it always reminds me of a cherry bakewell tart! 🙂
Anonymous says
This cherry almond focaccia is amazing! Cherry and almond is such a great combination.
Swathi says
Sourdough cherry almond focacia is delicious I tried with my sourodugh starter so good. Great recipe.
Ieva Greber says
Thank you so much - so glad you enjoyed this one 🙂
Ashley says
This was fantastic! Such a great combo of flavors!
Ieva Greber says
Thank you, Ashley! You will love our Almond Croissant Sourdough Focaccia too, I'm sure 🙂