
Worried this Lavender Sourdough Bread will taste like a bath bomb? That's the first thing everyone asks, and it's a fair worry if you get the quantity wrong. Get it right, and it tastes like standing in a lavender field in July, not walking past the bathroom aisle. The trick is honey: it takes the sharp edge off lavender's floral intensity and turns this from a novelty bake into a loaf you'll actually want to make again (I've been quietly obsessed with lavender for months, and even Seb, sceptical at first, now asks for it).
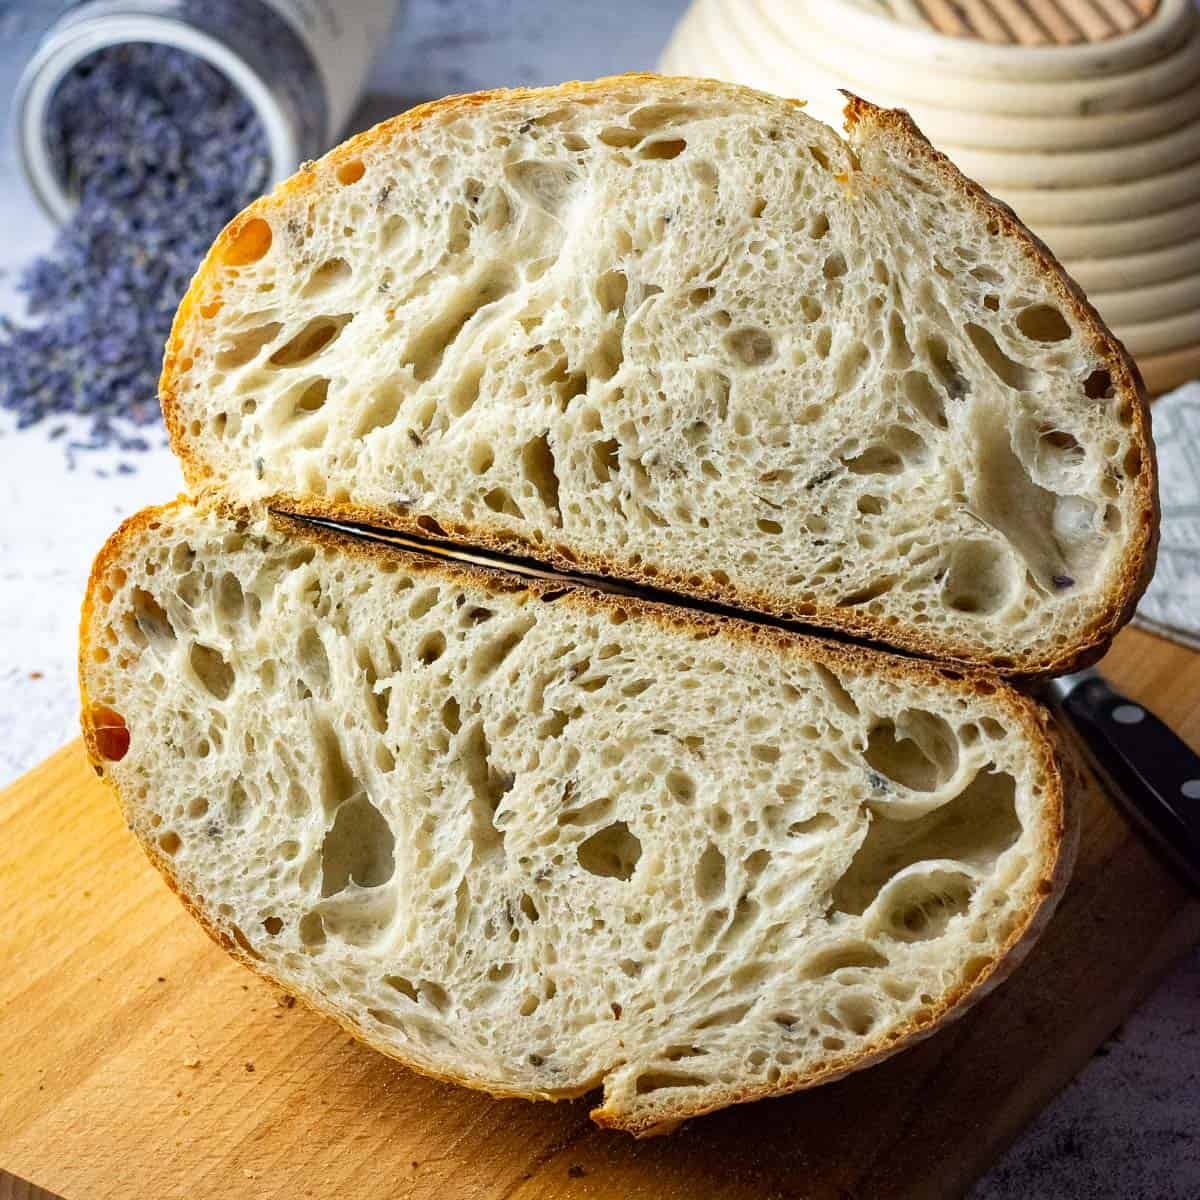
This is a standard Dutch oven sourdough with dried culinary lavender and a spoon of honey folded through after a short autolyse. Below: how much lavender to use, why this dough ferments faster than usual, and what to actually serve it with.
Jump to:
As an Amazon Associate I earn from qualifying purchases, at no extra cost for you! Thank you!

Recipe Highlights
TASTE: Subtly floral, honeyed, very gently sweet
SOAP FACTOR: None, if you get the dose right
BEST FOR: Summer cheese boards and afternoon tea
SEB'S RATING: Sceptical at first, now asks for seconds

Why Honey and Lavender Work Together
Lavender on its own can read as herby, or worse, soapy. That's down to linalool, the aromatic compound responsible for lavender's scent, which also happens to be a common note in soap and perfume. In small, well-judged amounts it's a beautiful floral flavour. In the wrong amount, your brain flags it as "bathroom" before your tastebuds get a say.
Moderation and honey fix this. Its sweetness rounds lavender's sharper edges into something more recognisably floral and pleasant.
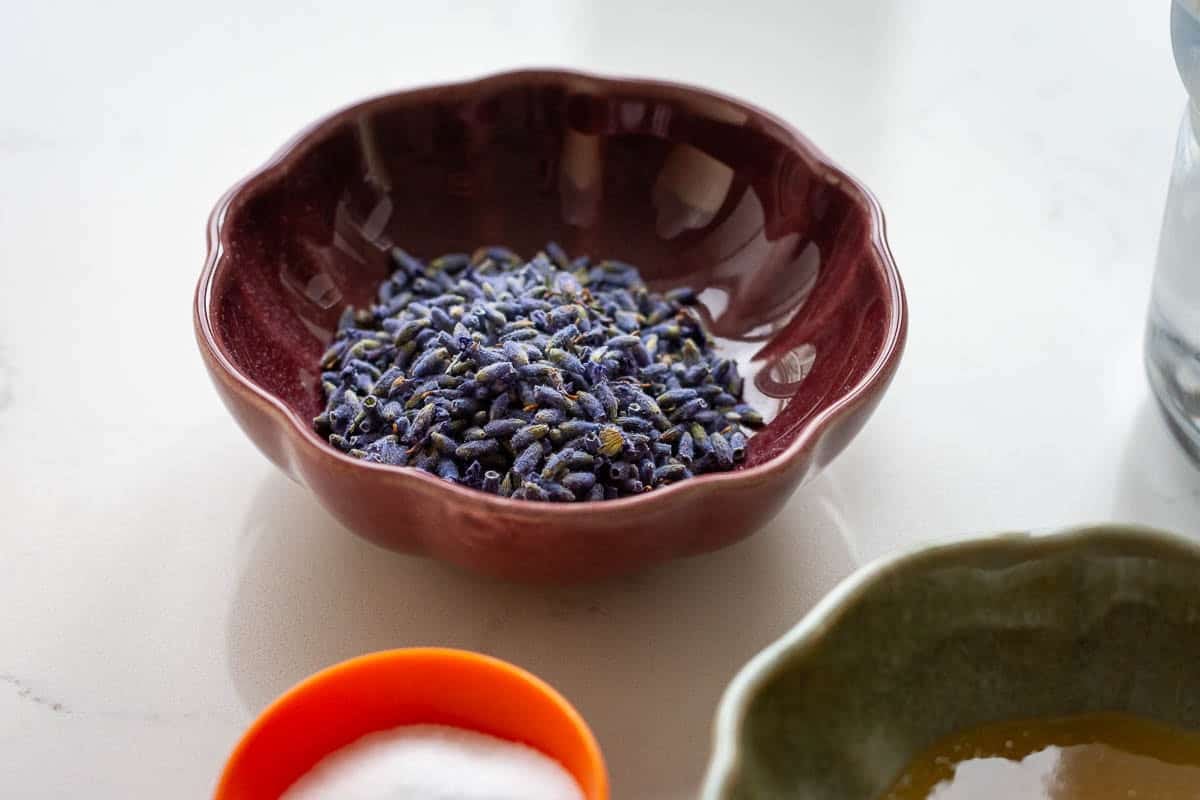
This isn't a sweet bread. It's a proper, savoury-leaning sourdough with just enough honey to soften the lavender and add a barely-there warmth.
One practical note worth mentioning: honey feeds your yeast. This dough moves through bulk fermentation faster than a plain loaf, especially in a warm kitchen in July. More on managing that in the tips below.
Ingredient Notes
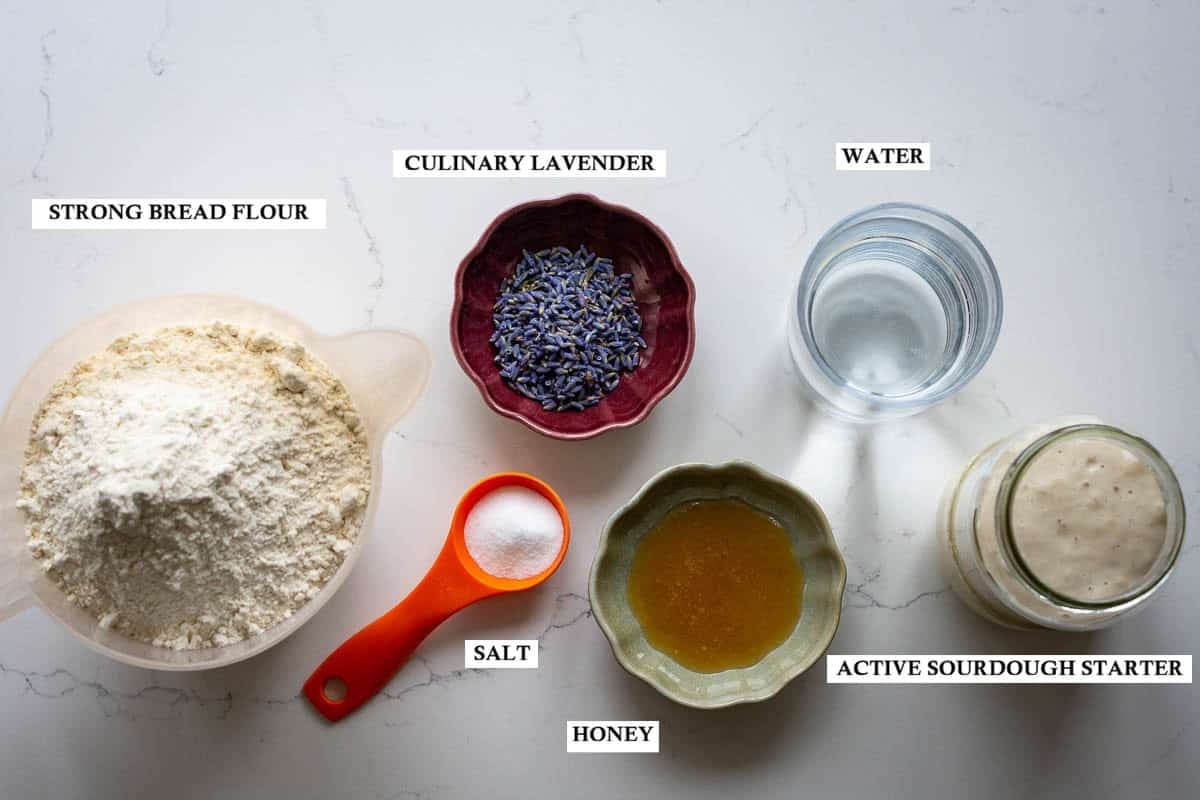
You'll find the full ingredient list in the recipe card below, but a few things are worth explaining first.
Dried culinary lavender. Must be food-grade, not the dried lavender from a craft shop or a decorative bundle. In the UK, Steenbergs and Sous Chef both sell culinary lavender online, and some Waitrose stores and independent health food shops stock it too. Potency varies by brand and by how long it's been sitting in your cupboard, so if your lavender smells strongly floral straight out of the packet, start at the lower end of the quantity given. We used Vital Forest Lavender. Try our Parmesan and Lavender Pasta and London Fog Sourdough Cookies if you end up with a bigger bag than you need.
Clear honey. This distributes evenly through the dough. If you only have set or raw honey, warm it gently first so it mixes in rather than sitting in lumps. Any mild honey works well here, but go for lavender honey if you can. Wildflower and acacia are both good. Manuka is wasted in a bread dough, in my opinion.
Strong bread flour. At least 12% protein.
Active sourdough starter. Fed, active and properly bubbly, not discard.
Does Lavender Sourdough Bread Taste Like Soap?
Not if you get the dose right. This is the question that stops most people for making this, so it deserves a straight answer rather than a buried footnote.
Lavender's floral scent comes from linalool, the same compound found in a lot of soap and perfume fragrance. At high concentrations, or with a sensitive palate, that reads as soapy rather than floral. It's a dosing problem, not a lavender problem.
For this recipe, 3g of dried culinary lavender in a 500g flour dough is enough to be clearly present without tipping into soap territory. If you're lavender-shy or trying this for the first time, start at 2g. If you've used culinary lavender before and want a bolder floral hit, go up to 4g, but don't push much further than that.
Honey helps too. A plain lavender loaf, with no honey to round it out, is more likely to taste herby or slightly odd. Pairing it with honey turns lavender into a proper, recognisable flavour rather than a strange floral experiment.
One more thing: buy from a reputable culinary lavender supplier. Cheap or old lavender tends to have a more chemical, harsher edge, which is often what people are actually tasting when they say lavender bread "tastes like soap."
Tips for the Best Honey and Lavender Sourdough
🔁 The short autolyse (mixing flour and water and letting it rest before the starter goes in) isn't strictly necessary, but it makes the dough noticeably easier to handle and gives better structure for very little extra effort.
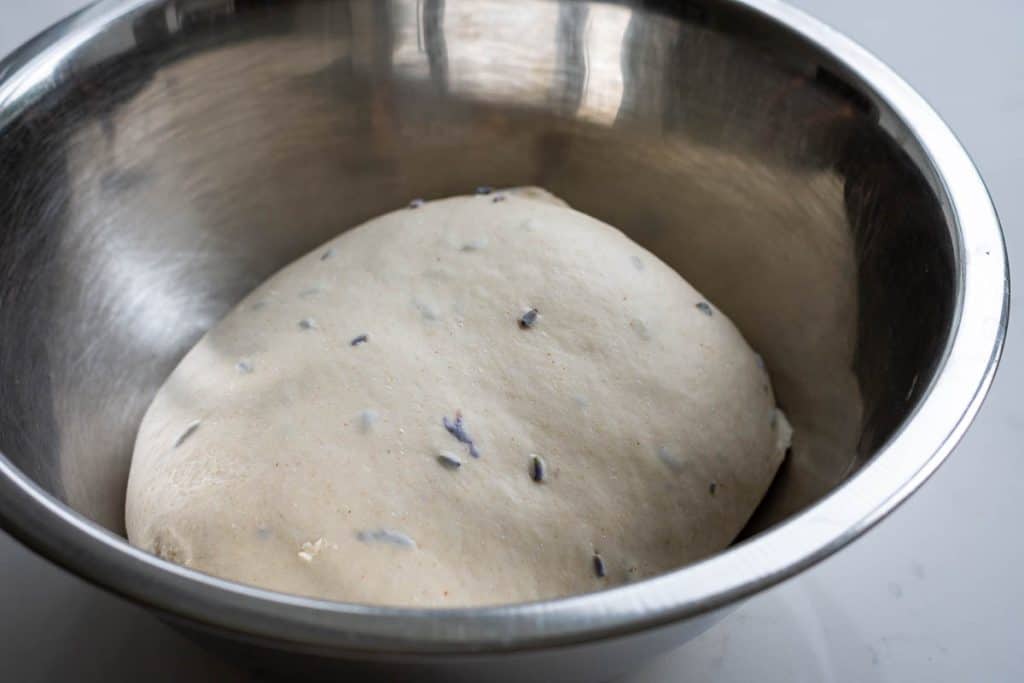
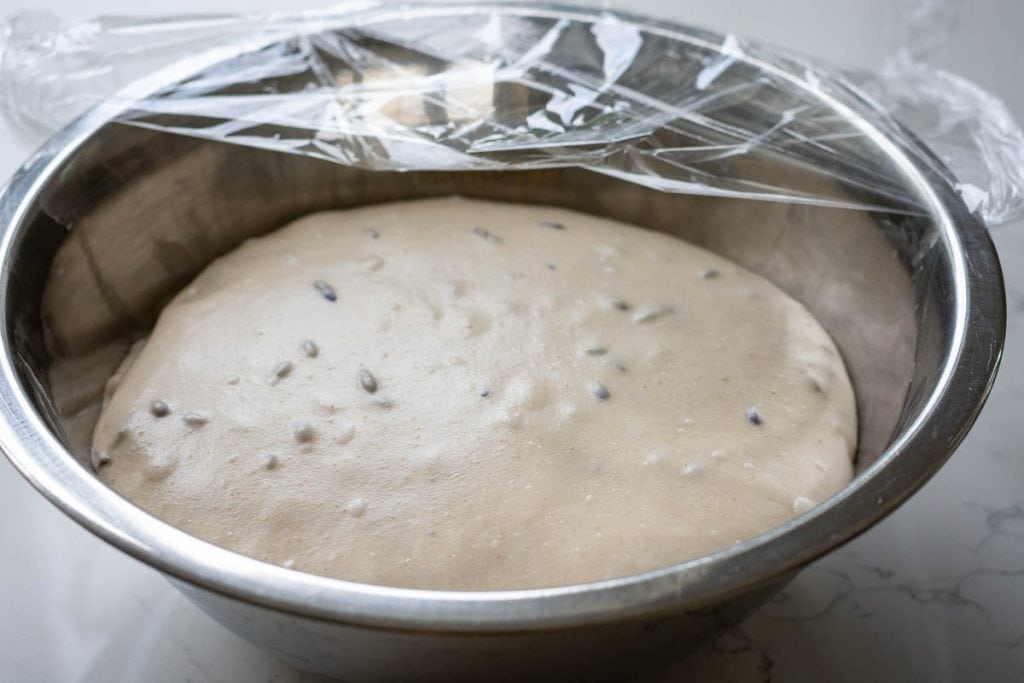
💧 Watch your bulk, not the clock. Honey feeds the yeast, so this dough can finish bulk fermentation faster than a plain sourdough, especially in a warm kitchen. Look for a 75-80% rise, a puffy, aerated look, and bubbles on the sides and base of the bowl. Don't wait for it to double, in warm conditions that can tip into over-fermentation quickly.
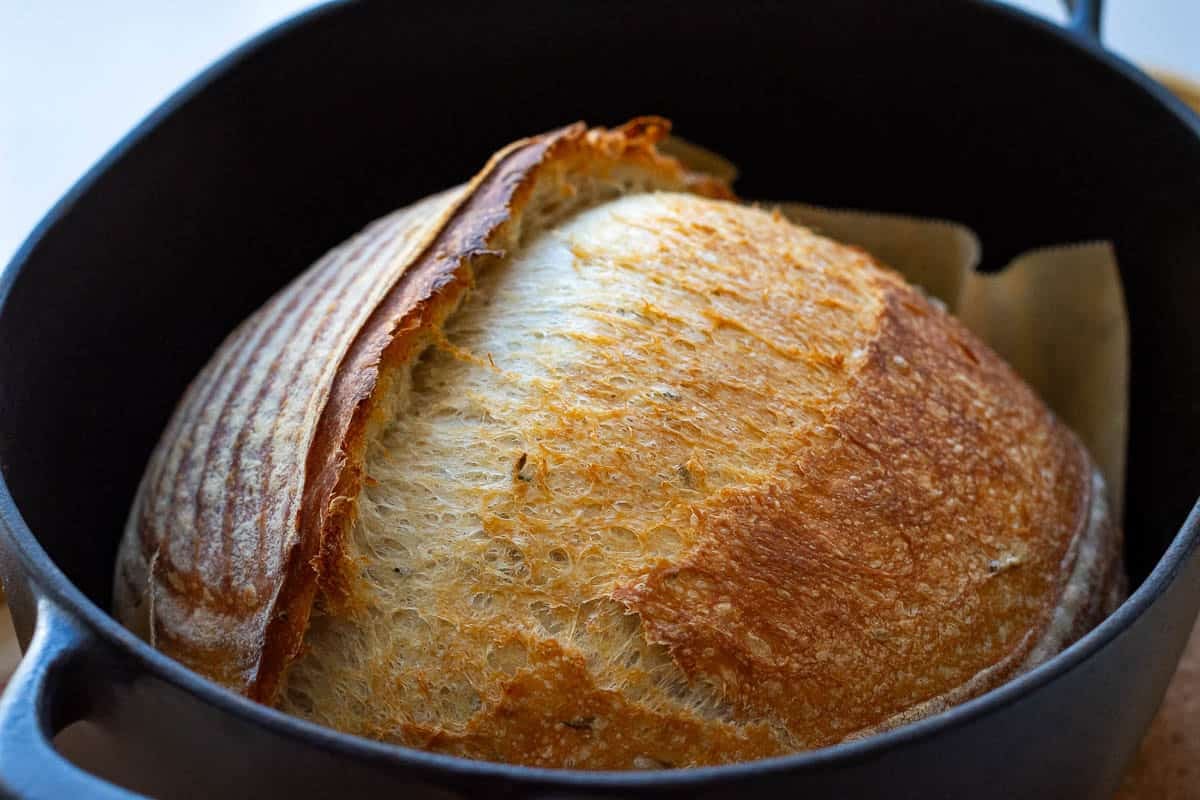
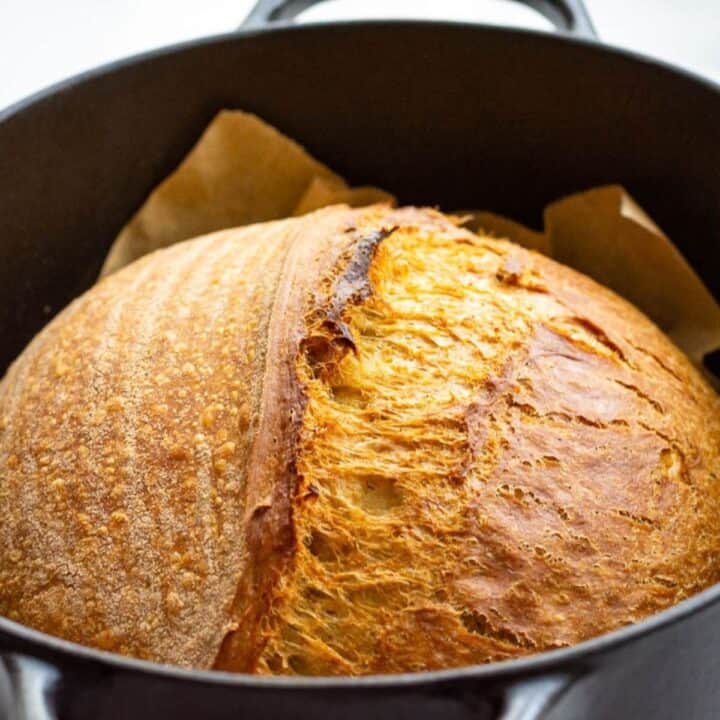
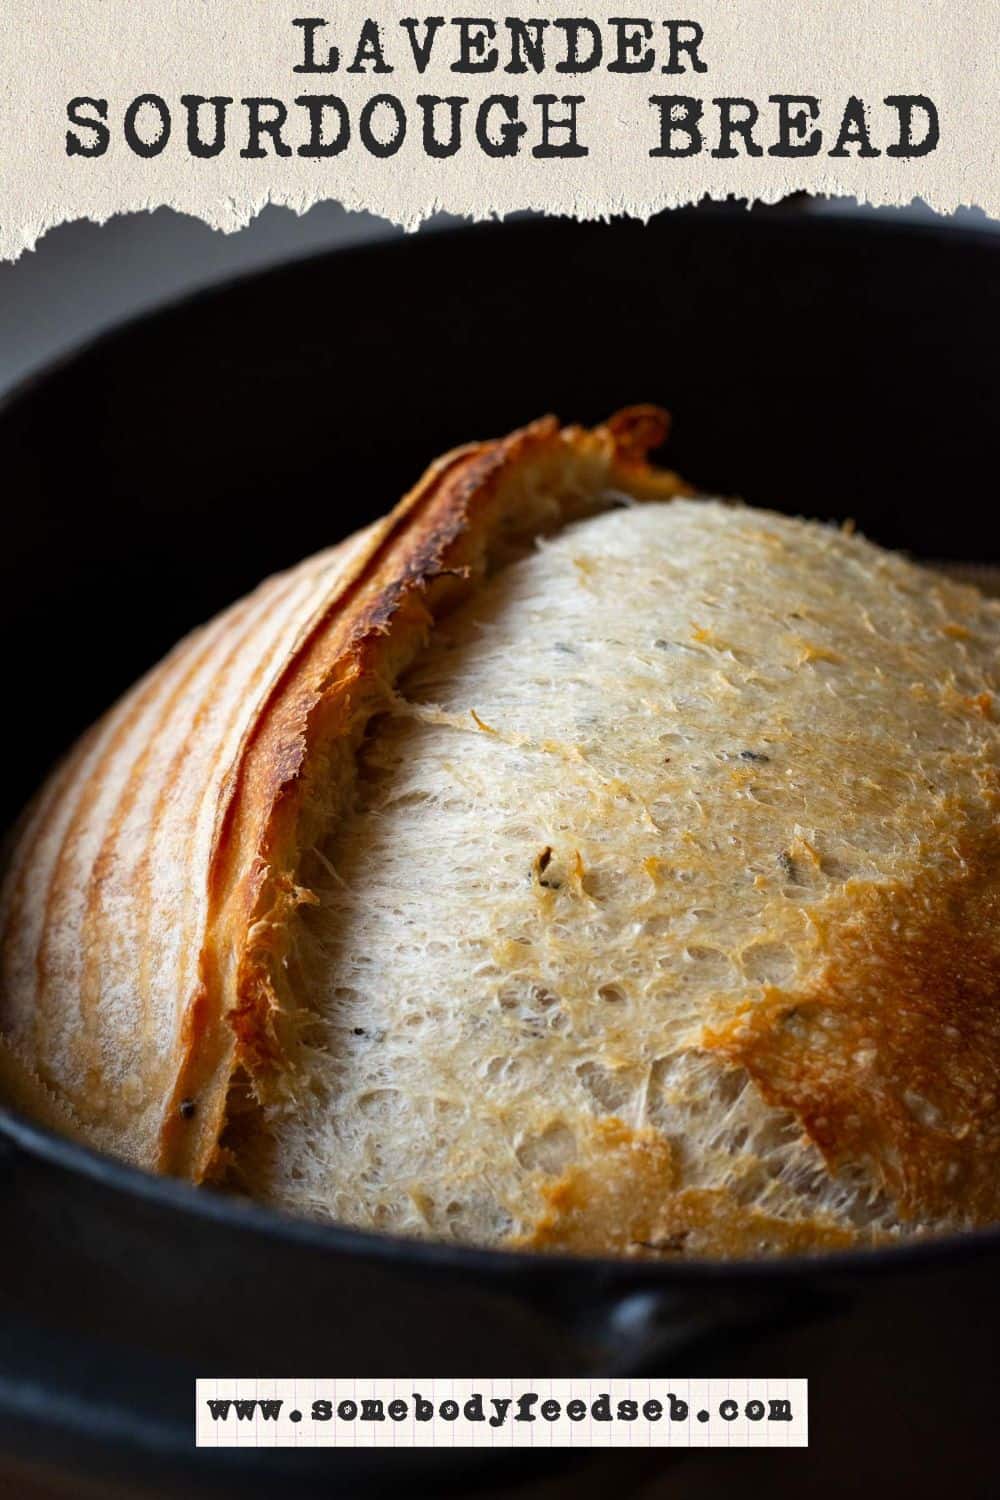
🔥 Expect a deeper crust colour. Honey caramelises, so this loaf browns faster and darker than a plain sourdough. That's not burning, it's the honey doing its job. If it's colouring too fast in the last 10 minutes, drop the oven to 200°C (400°F).
👀 Follow your nose. Lavender becomes properly fragrant in the oven. If your kitchen smells like a summer garden while this bakes, you're on track.
🌿 Press lavender sprigs onto the crust for a finishing touch. A few dried sprigs pressed onto the cold dough before scoring will toast in the oven and look stunning, without adding much extra flavour.
🔁 Start at 2g lavender on your first bake. Adjust up or down next time based on your own taste and how strong your particular batch of lavender is. Potency varies more than you'd expect.
Recipe FAQs
Yes, but fresh lavender is much less potent, so use roughly two to three times the amount. Fresh lavender also adds a little extra moisture, so cut the water back slightly to compensate. Dried is more consistent and easier to dose accurately.
I'd avoid it. Lavender extract is intense and tips into soapy or perfume territory quickly. Dried buds give a subtler, more even floral flavour that spreads naturally through the crumb rather than hitting all at once.
Vanilla is a classic pairing. Lemon zest brightens it and lifts the whole loaf. Rosemary takes it in a more savoury, herbaceous direction, and blueberries are a well-known lavender companion if you want to add fruit.
It's recommended but not essential. A 30-minute autolyse (resting the flour and water together before adding the starter) makes the dough easier to handle and improves structure. If you're short on time, you can skip it and mix everything together in the stand mixer, you'll still get a good loaf.
What to Serve With Honey and Lavender Sourdough Bread
This is where most lavender bread recipes give up. It shouldn't be a novelty loaf you make once and don't know what to do with.
- Cheese board: goat's cheese is the classic pairing, but brie, soft baked camembert and fresh ricotta all work. Add honeycomb, fresh figs or grapes for a proper summer spread.
- Afternoon tea: sliced thin with salted butter and a little extra honey drizzled over. Goes well with a pot of Earl Grey. Or you can take it a step further and make our Lavender and Earl Grey Sourdough Bread (a.k.a. London Fog Sourdough).
- Summer picnic: pack the loaf whole and slice on site with a sharp cheddar or creamy blue.
- Toast: lavender honey sourdough toast, buttered heavily while still warm or spread generously with cream cheese, is one of the better things you'll eat this summer.
- French toast: leftover slices make an excellent French toast, served with mascarpone and a drizzle of lavender honey.
Storage
Keep the unsliced loaf wrapped in a tea towel or in a bread bag at room temperature for 2-3 days. Once you start slicing, store it cut-side down to stop it drying out.
It freezes well: slice first, freeze in a freezer bag, then reheat straight from frozen in the toaster or a warm oven. For more tips, head to How To Store Sourdough Bread? Best Ways To Keep It Fresh.
This bread is best within the first two days though; the lavender fragrance is at its most noticeable when the loaf is young.
More Sourdough to Try
If this one goes down well, my Sourdough Bread Recipes With Inclusions rounds up more flavour combinations worth trying. Sourdough Focaccia Recipes is the next place to take your starter if you fancy something flatter and olive oil-heavy.


LOVE BAKING SOURDOUGH WITH ME?
You can now add Somebody Feed Seb as a preferred source on Google. It only takes a tick box, and tells Google you'd like to see more of my recipes when relevant.
Honey and Lavender Sourdough Bread
Equipment
- Bench Scraper
- Razor Blade or Bread Lame
Ingredients
- 500 g strong bread flour at least 12% protein content
- 10 g sea salt
- 300 g water
- 160 g active sourdough starter 100% hydration
- 20 g clear honey approximately 1 tablespoon
- 3 g dried culinary lavender approximately 1 tablespoon, loosely packed
Instructions
DAY 1:
Feeding Your Starter
- First thing in the morning, feed your sourdough starter. I typically feed 70g of my starter in a ratio of 1 part starter : 1 part water : 1 part flour - so 70g starter, 70g water, 70g flour. Scoop into a clean jar and leave in a warm spot (21-27°C), semi-covered, for 4-5 hours. Your starter should at least double in volume during this time. If it doesn't, give it a couple of good feeds before using it.
Autolyse
- About 30 minutes before your starter is ready, combine the flour and water in the bowl of your stand mixer. Mix briefly with the dough hook on low for 1-2 minutes until you have a shaggy, rough dough with no dry bits of flour remaining. Cover the bowl with a damp tea towel and leave to autolyse for 30 minutes. This short rest allows the flour to fully hydrate and starts gluten development without any kneading - it makes the dough noticeably easier to handle and gives you better structure.
Mixing The Dough
- Once your starter is active, bubbly, and at least doubled in volume, add it to the autolysed dough. Run the stand mixer on medium with the dough hook for 8-10 minutes, until the dough is smooth and elastic.
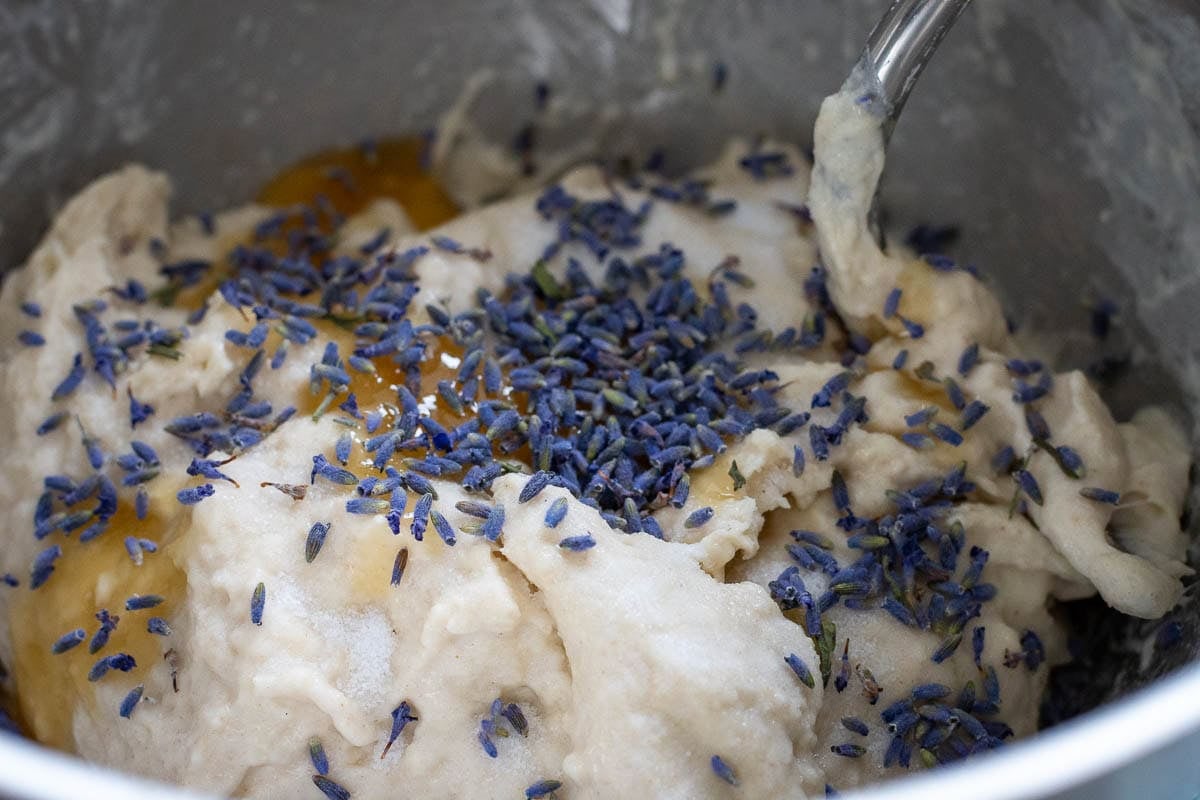
- Reduce the speed to low, add the salt, honey, and dried lavender all at once. Mix for a further 2-3 minutes until everything is fully incorporated and the lavender is evenly distributed throughout the dough. The dough should feel soft and slightly tacky but not sticky.
Coil Folds and Bulk Fermentation
- Scoop the dough into a large bowl, cover with a damp kitchen towel or plastic wrap, and leave in a warm place (21-27°C) for 30 minutes.
- After 30 minutes, with cold wet hands, perform the first set of coil folds. Lift the dough from the sides with both hands and tuck it under itself to form a coil. Rotate the bowl a quarter turn and repeat. Cover and rest for 30 minutes. Repeat every 30 minutes for a total of 4-6 sets of coil folds. By the final set, your dough should be noticeably less sticky, soft, and elastic, with visible blisters forming on the surface.
- Once coil folds are complete, cover and leave to finish bulk fermentation at warm room temperature for 1.5-2.5 hours (shorter in summer, longer in a cool kitchen).
- Important: The honey in this dough gives the yeast extra fuel, which can speed up bulk fermentation - particularly in a warm summer kitchen. Watch your dough rather than watching the clock. Bulk fermentation is complete when the dough has increased by around 75% in volume (just under doubling), looks puffy and aerated, and bubbles are visible on the sides and base of the bowl. Do not let it fully double - in warm conditions, that can happen quickly and you risk over-fermentation.
Shaping and Final Proof
- At the end of bulk fermentation, using a bowl scraper, turn the dough out onto a lightly floured surface, smooth side down. Fold the four corners into the centre, then flip the dough over.
- Using a bench scraper held at a shallow angle to the surface, push the dough while your free hand tucks it under itself, building tension. Work the dough into a tight round ball that holds its shape and doesn't spread.
- Place the shaped dough ball smooth-side down into a well-floured banneton (rice flour is best for lining). Pinch the seam at the top to keep the shape tight. Dust with flour and cover with a light tea towel or cloth napkin.
- Place the banneton inside a large plastic bag to prevent the dough from drying out. Refrigerate for 12-36 hours for the cold proof (final rise).
DAY 2:
Preheating The Oven
- Place the Dutch Oven in the oven and preheat to 240°C (460°F). The Dutch Oven should be piping hot all the way through.
Scoring The Dough
- Once the oven is fully hot, take the dough straight from the fridge (do not allow it to come to room temperature - cold dough scores more cleanly). Remove the banneton from the bag and invert the dough gently onto a large piece of parchment paper.
- Dust the surface with a little flour. Using a bread lame or razor blade, score the dough firmly at a 30-45° angle, approximately 1cm deep. One confident slash is all you need for an open ear.
Baking
- Carefully remove the hot Dutch Oven from the oven and take off the lid. Lift the dough into the pot using the edges of the parchment paper, keeping the scored slash open as you lower it in. Replace the lid.
- Bake with the lid on for 35 minutes.
- After 35 minutes, remove the lid and return the loaf to the oven for a further 15 minutes. The honey in the dough means the crust can darken a little faster than a plain sourdough - keep an eye on the colour. If it's browning too quickly, reduce the temperature to 200°C for the last 10 minutes. You're looking for a deep golden-brown crust.
Cooling
- Lift the loaf out of the Dutch Oven using the parchment paper and place on a wire rack. Slide the paper out from underneath.
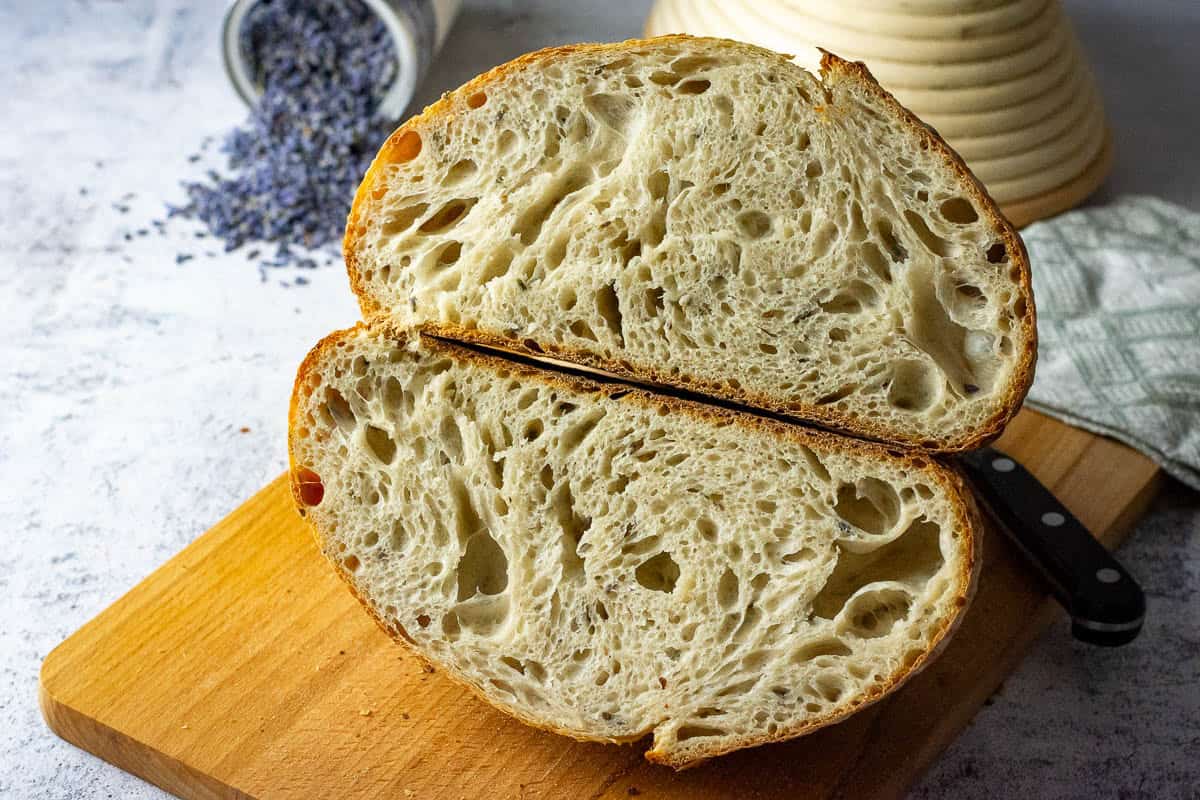
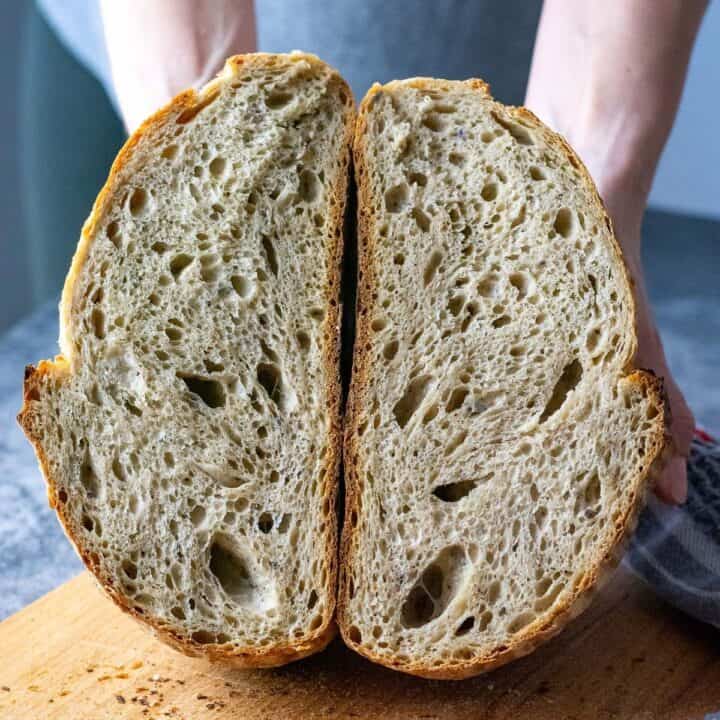
- Leave to cool completely before slicing - at least 1 hour, ideally 2. The lavender fragrance really comes through as the loaf cools, and the crumb needs time to set. Slicing too early will give you a gummy interior.
Notes
Nutrition



Amy Dong says
I made this Honey and Lavender Sourdough Bread, and it turned out so soft and fragrant. The subtle honey and lavender flavors were such a beautiful combination!
Ieva Greber says
Thanks, Amy — soft and fragrant is exactly what I hoped for with this one. Honey and lavender really is such a lovely, gentle combination!
Mindy says
This is my first time using a stand mixer. It worked beautifully, and will probably use the stand mixer more in the future. My loaf was amazing! The lavender taste was subtle, but you could tell it was there. I couldn’t taste the honey, so my remedy is to make honey butter! I may also try adding some whole wheat flour (fresh milled hard white) to add a little more nutrition. I’m so glad I tried your recipe! It’s a keeper. Thank you.
Ieva Greber says
Thanks, Mindy — sounds like the stand mixer made a proper convert of you! Glad the loaf turned out amazing, and honey butter is a genius workaround if the honey flavour was too subtle. Fresh milled whole wheat would be a lovely addition too if you don't mind a slightly denser loaf, let me know how that goes :)!
Rose says
I'm not usually a big lavender fan but you're a genius with the honey. It works so well!
Ieva Greber says
Thanks, Rose — that's exactly the kind of convert I like to hear about! The honey does a great job of keeping the lavender in check rather than letting it take over.
Swathi says
Honey lavender sourdough bread is good, I made my version too, perfect aromatic loaf.
Ieva Greber says
Thanks, Swathi — love that you made your own version! Aromatic and perfect is exactly how this one should turn out.