
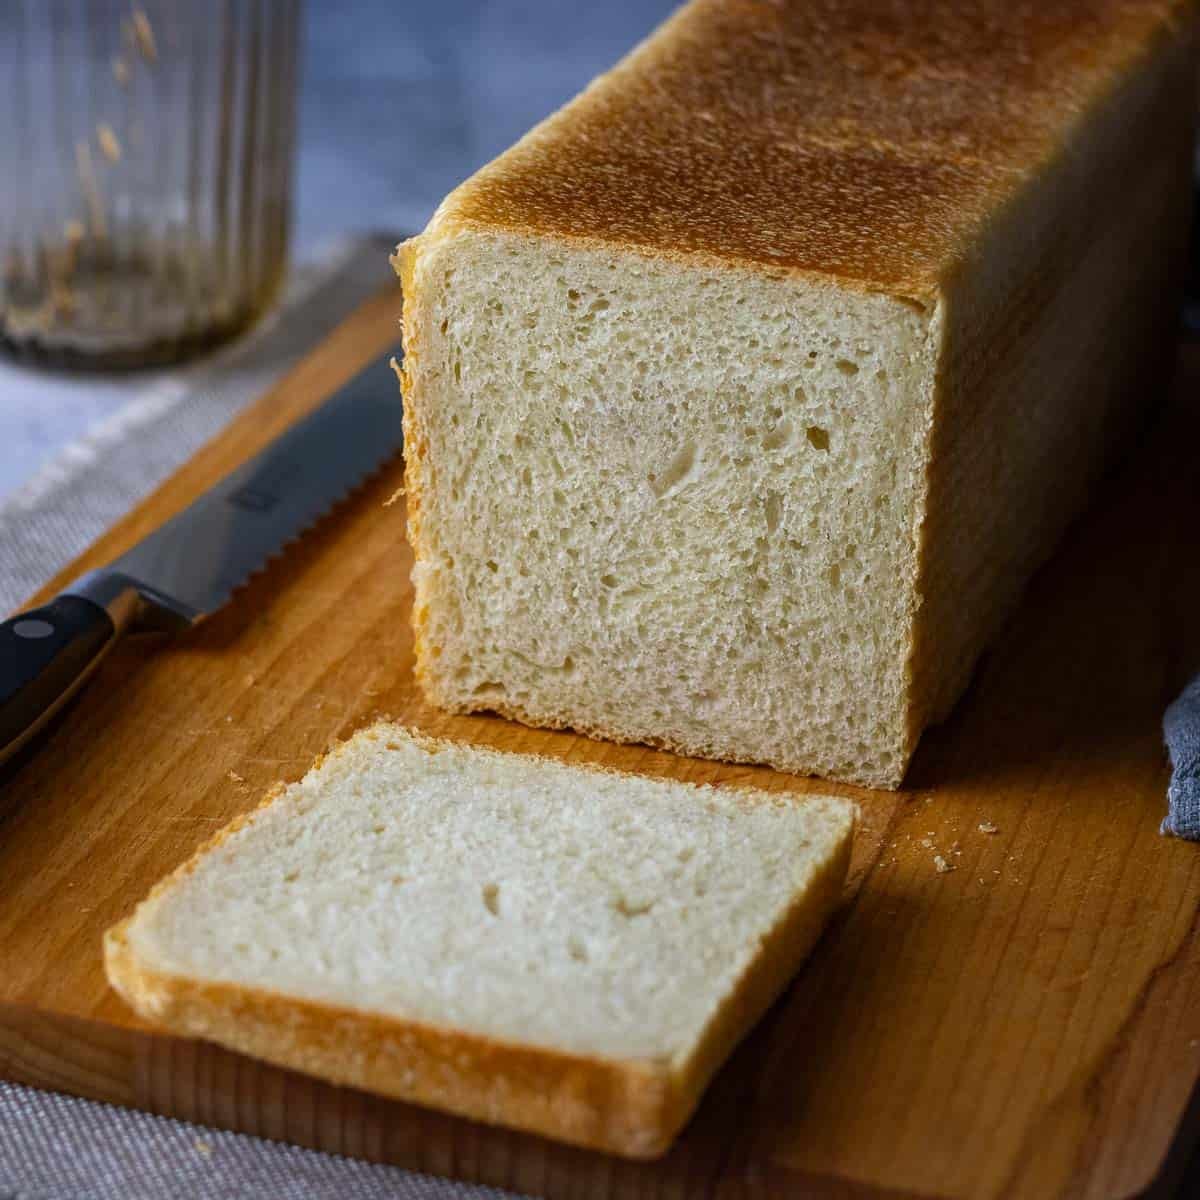
If you've been reaching for shop-bought sandwich bread because your usual sourdough is too crusty, too holey, or too much faff for a Tuesday lunch, this Sourdough Pullman Loaf is the fix. It's soft, perfectly square, and slices thin and even without the crumb collapsing or the crust tearing through your bread bag. The method below is properly detailed, including exactly what can go wrong at each stage and how to put it right, so even if this is your first enriched sourdough bake, you'll know what you're looking for.
Jump to:
- Recipe Highlights
- What Is a Sourdough Pullman Loaf (Pain de Mie)?
- Why Bake Sourdough Pain de Mie in a Lidded Pan?
- Ingredient Notes
- Sourdough Pullman Loaf Baking Schedule
- Step-By-Step Method
- Troubleshooting
- Tips for the Best Sourdough Pullman Loaf
- Recipe FAQs
- How to Serve Sourdough Pain de Mie
- Storage
- More Soft Crust Sourdough Bread
- Sourdough Pullman Loaf (Sourdough Pain de Mie)
As an Amazon Associate I earn from qualifying purchases, at no extra cost for you! Thank you!
I came to this recipe properly convinced it was needed. For years I made sourdough at home and still bought Seb sliced bread for his lunchbox sandwiches; it was just easier, soft and uniform, with nothing falling out the sides by the time he ate it at his desk.
Then he came home from work one evening and said, quite genuinely, "I don't think I like this bread anymore. It doesn't taste of anything. Can I have sourdough instead?" He wasn't being difficult; he sounded almost disappointed, like he'd only just noticed. That's when I decided to build a proper sourdough Pullman loaf: square, soft, light enough for a packed lunch, with none of the shop-bought blandness.
This is different from my usual open-tin sourdough sandwich loaf, too. A Pullman loaf bakes with the lid on, which is what gives it those perfectly square, even slices. I finally bought the pan and now use it for everything from Sourdough Brioche to Sourdough Shokupan.

Recipe Highlights
TASTE: Soft, faintly tangy, tender milk-bread crumb
PERFECT FOR: Sandwiches, toast, French toast, packed lunches
MOST IMPRESSIVE PART: Perfectly square, even slices every time
SEB'S RATING: Sends me a text message saying "Lovely sandwiches" every time without fail.

What Is a Sourdough Pullman Loaf (Pain de Mie)?
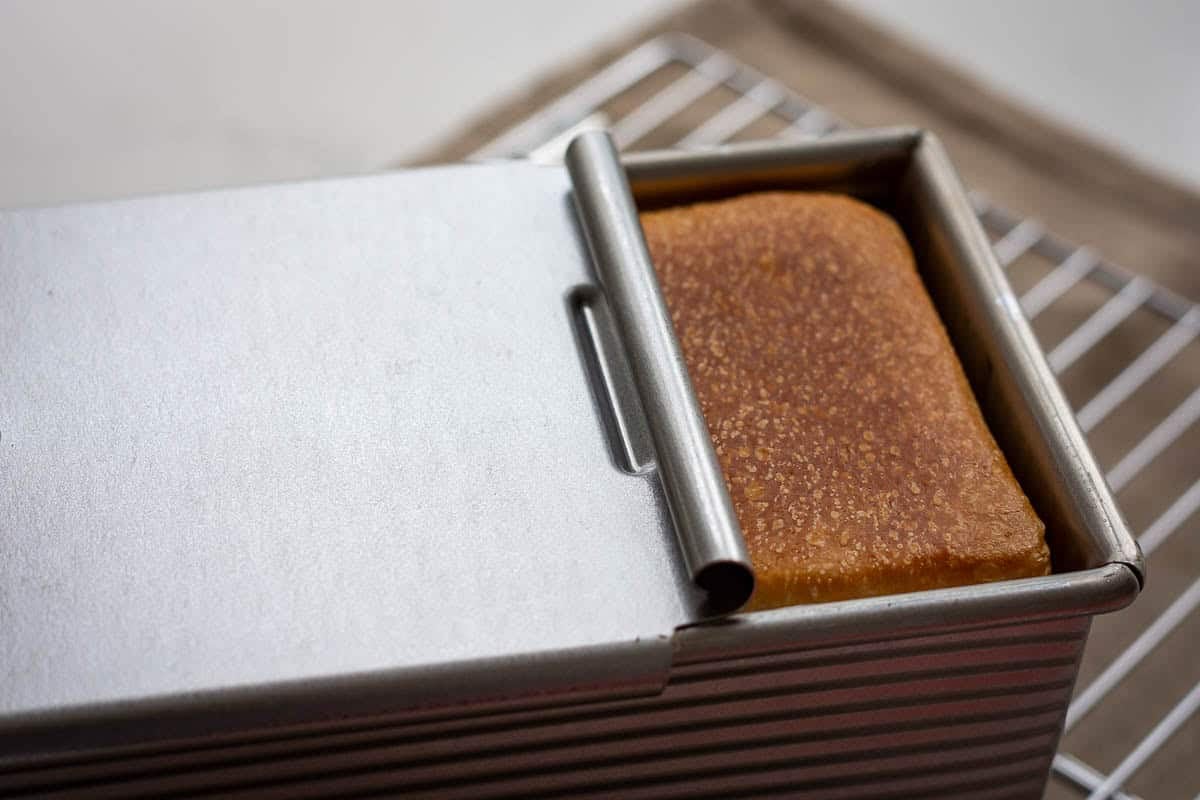
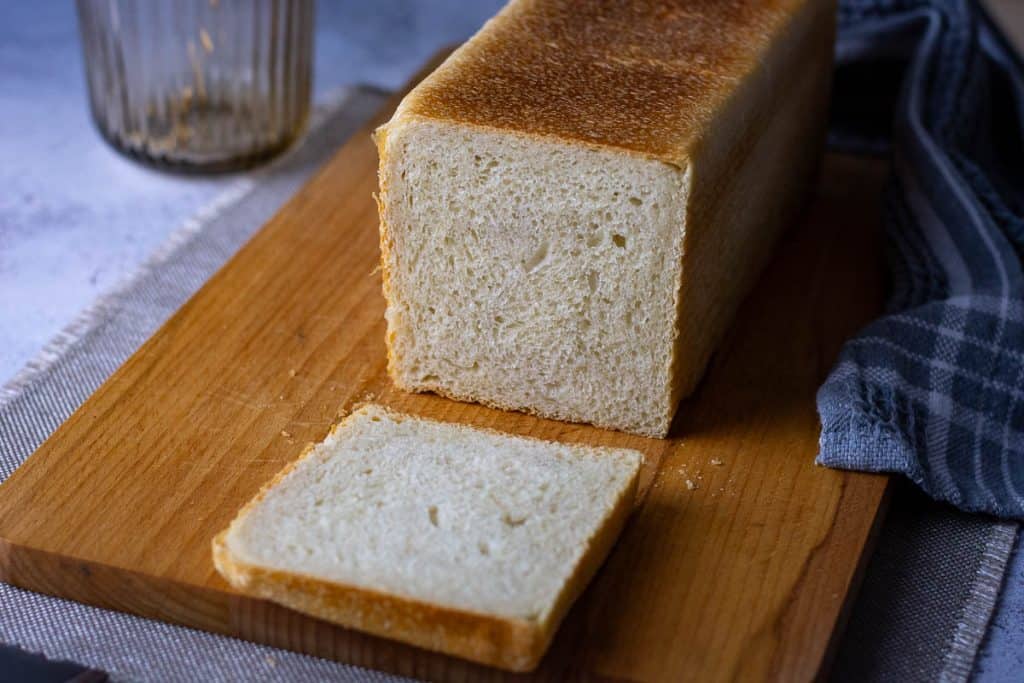
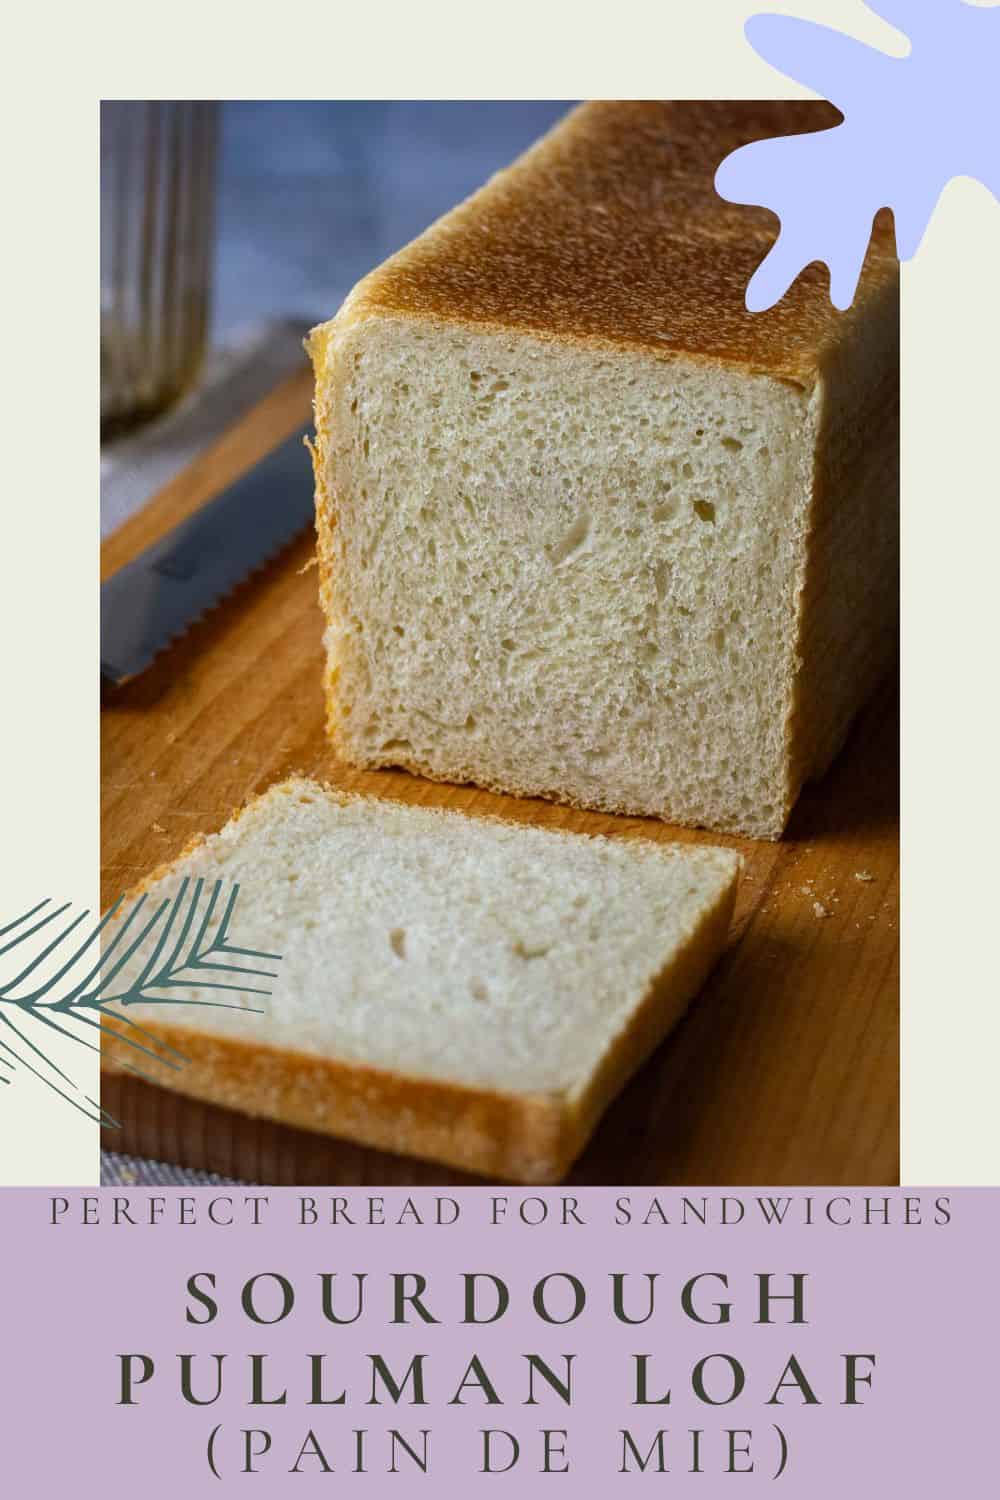
A sourdough pullman loaf is a sandwich bread baked with the lid on in a Pullman pan, which forces the dough to rise straight up into the corners rather than domed. The lid is what gives it that neat, square shape and tight, even crumb, perfect for slicing sandwich-thin without the bread falling apart.
Pain de mie is the French name for the same bread. It translates roughly as "bread of crumb," a nod to how little crust there is compared to the amount of soft interior. Pullman loaf and pain de mie describe the same thing: pullman refers to the pan (named after the shape of American Pullman train carriages), while pain de mie describes the bread itself. You'll see both terms used interchangeably, and this recipe answers to either name.
Why Bake Sourdough Pain de Mie in a Lidded Pan?
I already have a recipe for Soft-Crust Sourdough Sandwich Bread baked in an open loaf tin, and it's a good, soft everyday loaf. But it domes on top like any normal bread, so the end slices are smaller than the ones from the middle. Perfect for toast, less fine for uniform sandwiches.
The lid on a Pullman pan stops that. It traps the dough as it rises, pushing it sideways into the corners instead of up and over, so every slice from end to end matches. If you've read my post on Baking Sourdough In A Loaf Pan, you'll know I rate a loaf pan for beginners for being more forgiving than a Dutch oven. This is the next step up: the same forgiving structure, with a lid that guarantees a genuinely square loaf.
Ingredient Notes
- Strong white bread flour: A lower-protein flour does generally work, but in my experiments it sometimes domes inwards after cooling due to lack of structure.
- Active sourdough starter: it needs to be genuinely active, not just recently fed. If you're not sure yours is ready, How To Know When Sourdough Starter Is Ready And At Its Peak covers exactly what to look for.
- Whole milk: adds softness and richness. Semi-skimmed will work in a pinch, but the crumb will be a touch less tender.
- Unsalted butter, softened: not melted.
- Granulated sugar: feeds the yeast slightly and helps with browning, though the lid keeps this loaf pale anyway. Honey works as a swap, use the same weight.
- Fine sea salt: don't skip it. It slows fermentation just enough to keep things controlled, and it's doing real flavour work in a dough this enriched.
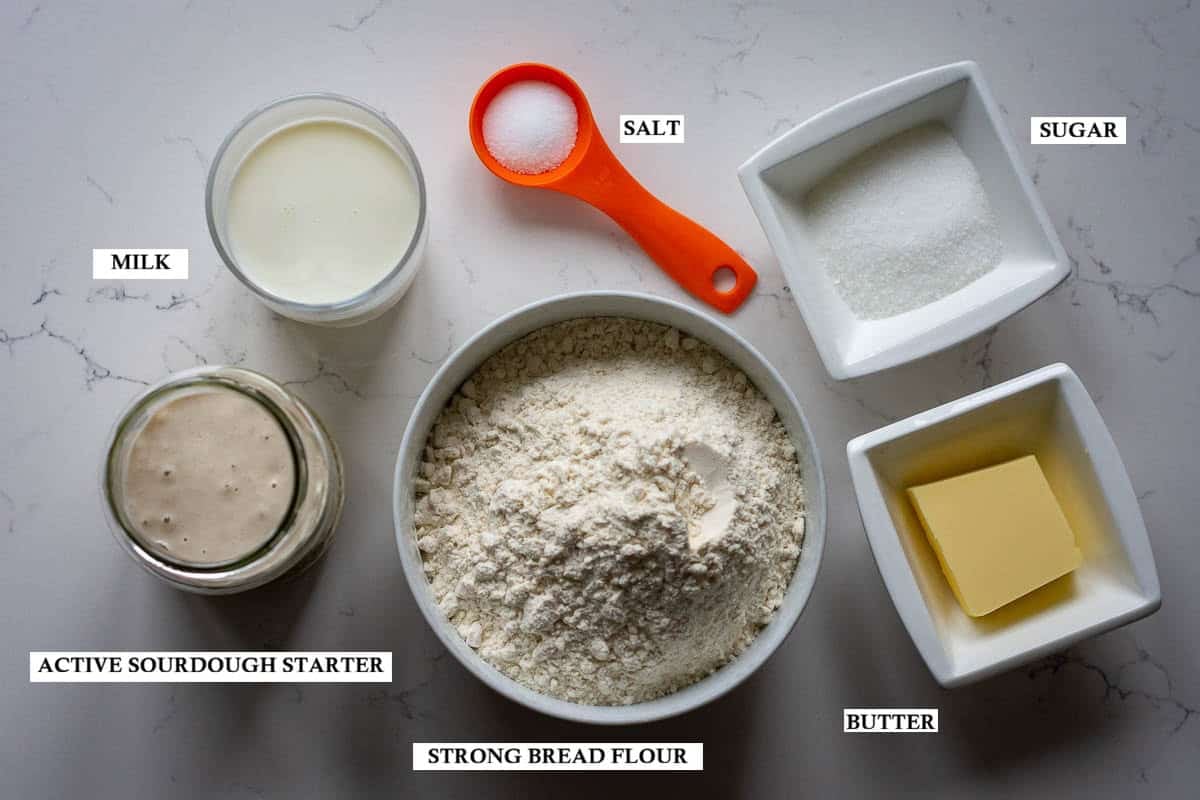
Find the full ingredient quantities and instructions in the recipe card below.
Sourdough Pullman Loaf Baking Schedule
This is a two-day bake, but most of that time is hands-off fermentation. Here's roughly how it breaks down in a kitchen around 21-23°C. My Sourdough Baking Schedule post has more on fitting sourdough around a normal working day.
- Morning, Day 1: feed your sourdough starter
- Late morning: fermentolyse and mix the dough
- Afternoon: bulk ferment, 6-8 hours
- Evening: shape, then refrigerate overnight, 12-15 hours
- Day 2: final proof, 2-5 hours, then bake
Total hands-on time is about half an hour (no stretch and folds or coil folds in this recipe). Everything else is the dough doing its own thing while you get on with your day.
Step-By-Step Method
Day 1
Feed the Starter, Mix and Bulk Ferment
1. First thing in the morning, feed your starter at a 1:1:1 ratio and leave it somewhere warm for 4-5 hours, until at least doubled. If it doesn't consistently double, head to our Sourdough Starter Not Doubling Within 4 Hours? How To Fix It? article or download a FREE Sourdough Starter Troubleshooting Guide below.
2. In the bowl of a stand mixer fitted with the dough hook, combine the flour, milk and active starter. Mix on low until no dry flour remains and the dough looks shaggy, then cover and rest for 30 minutes. This short fermentolyse hydrates the flour properly and cuts down your later mixing time.
3. Add the salt and sugar and mix on low-medium for about 5 minutes, until the dough starts coming together and smoothing out.
4. With the mixer still running, add the softened butter a tablespoon at a time, waiting for each bit to disappear into the dough before adding the next. The dough may look greasy and like it's splitting apart halfway through, that's normal, keep going.
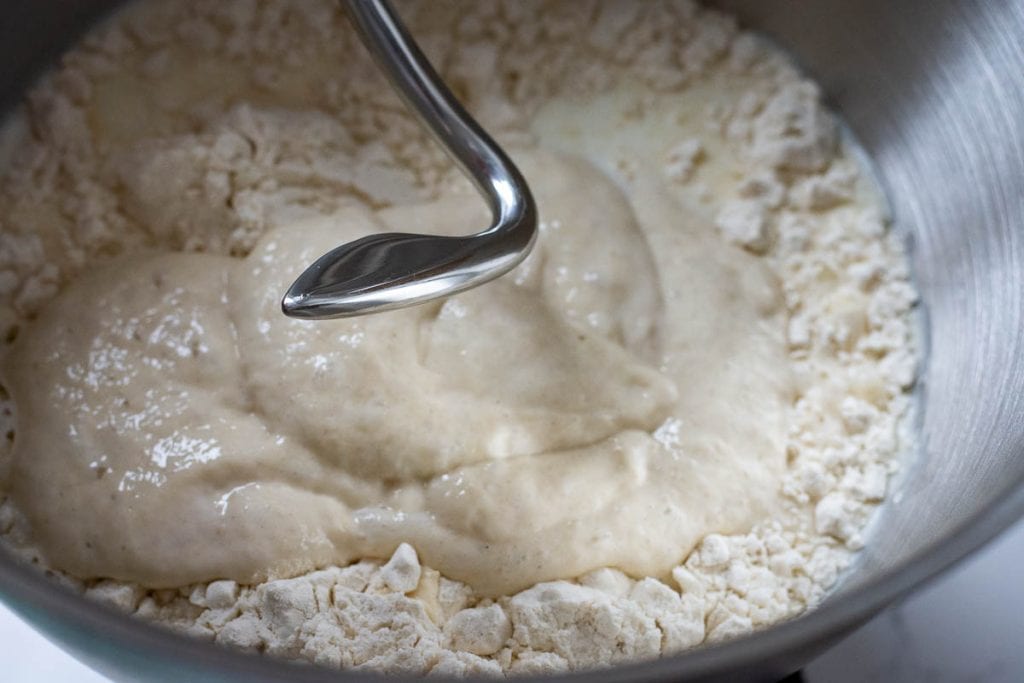
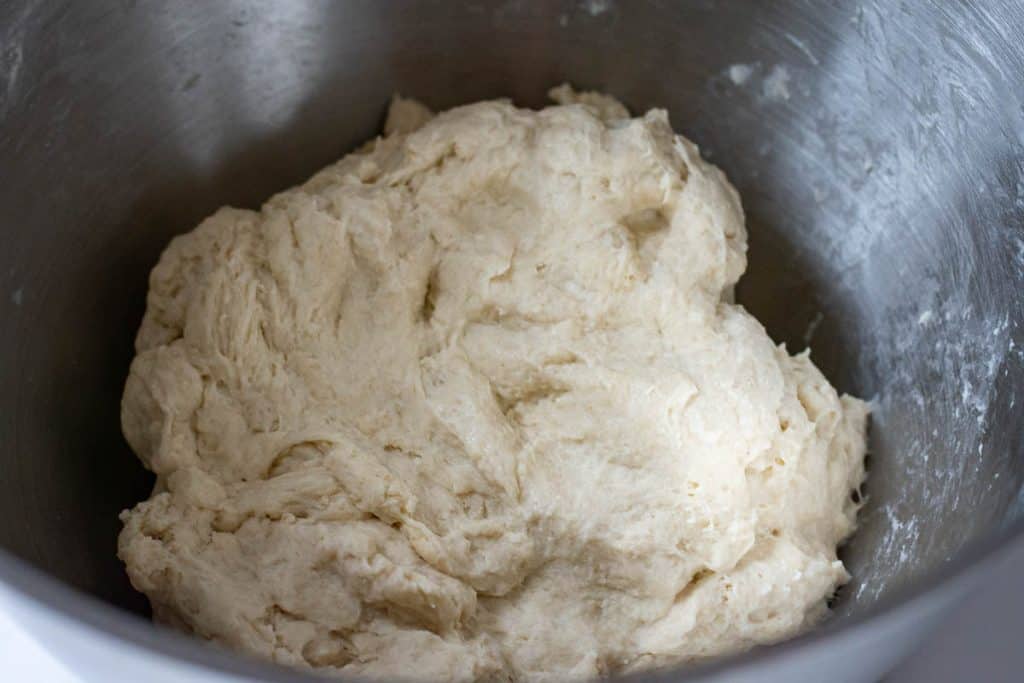
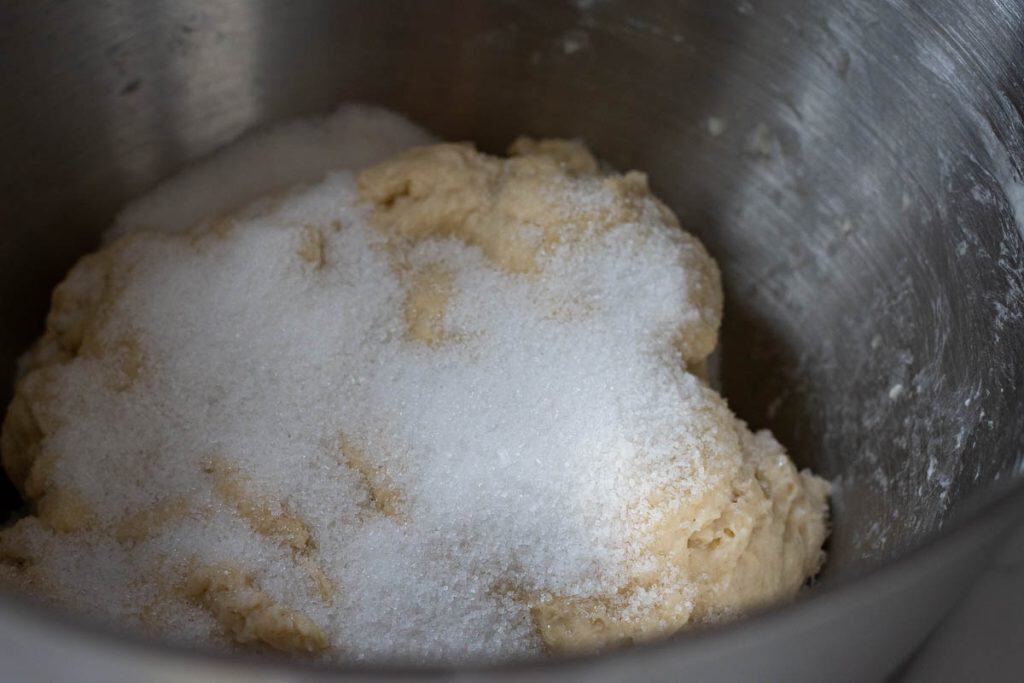
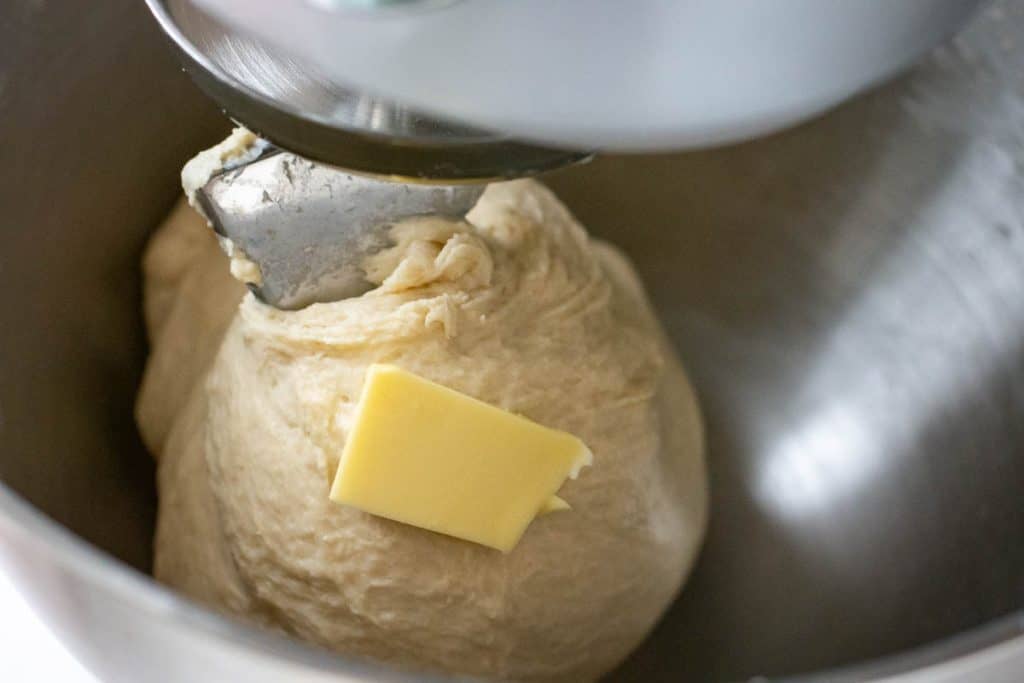
5. Keep mixing until the dough is smooth, elastic and passes the windowpane test, stretch a small piece thin enough to see light through without it tearing. That's roughly 10-15 minutes once all the butter is in. If you haven't done this before, my Windowpane Test For Sourdough Baking post walks through it properly. Keep an eye on the dough's temperature too, it should still feel cool, not warm, from the mixer.
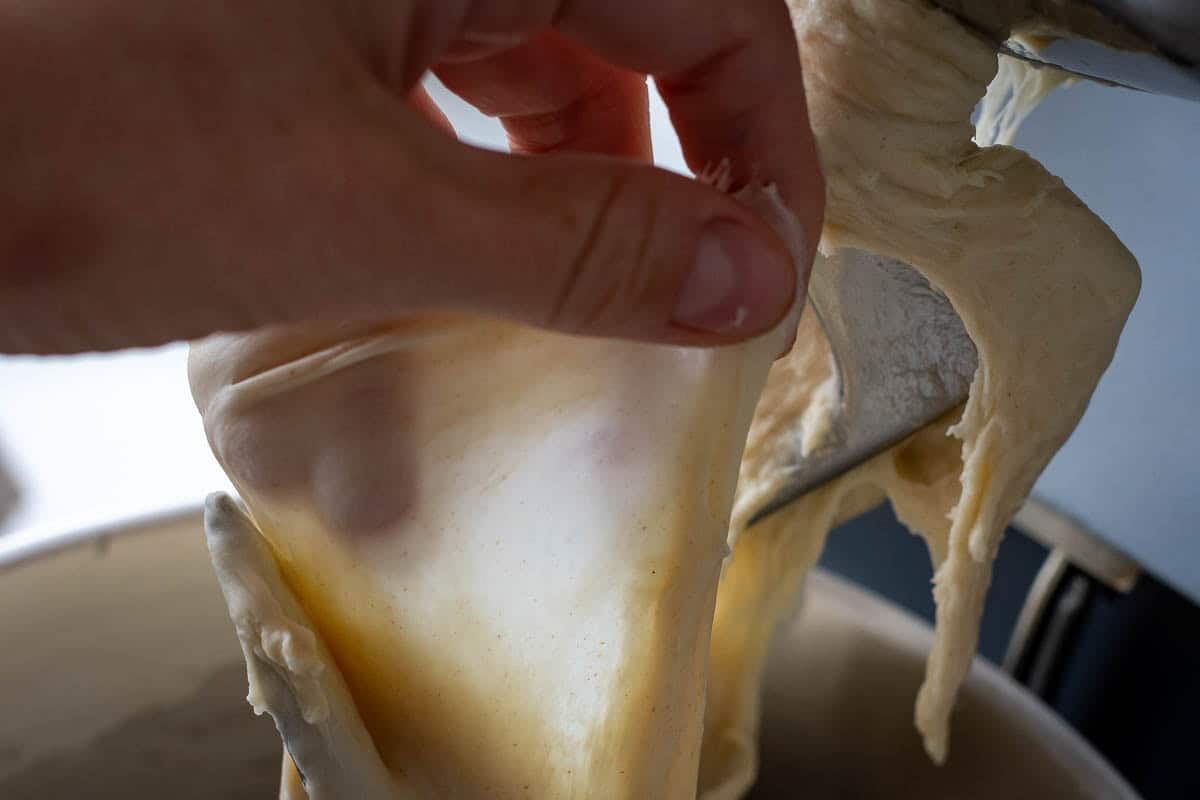
6. Scrape the dough into a lightly oiled container, cover, and bulk ferment somewhere around 21-23°C for 6-8 hours. There's no need for stretch and folds, the dough hook has already done the gluten development. You're looking for roughly a 50% increase in volume and a puffy, jiggly feel rather than a specific size.
Shape and Cold Retard
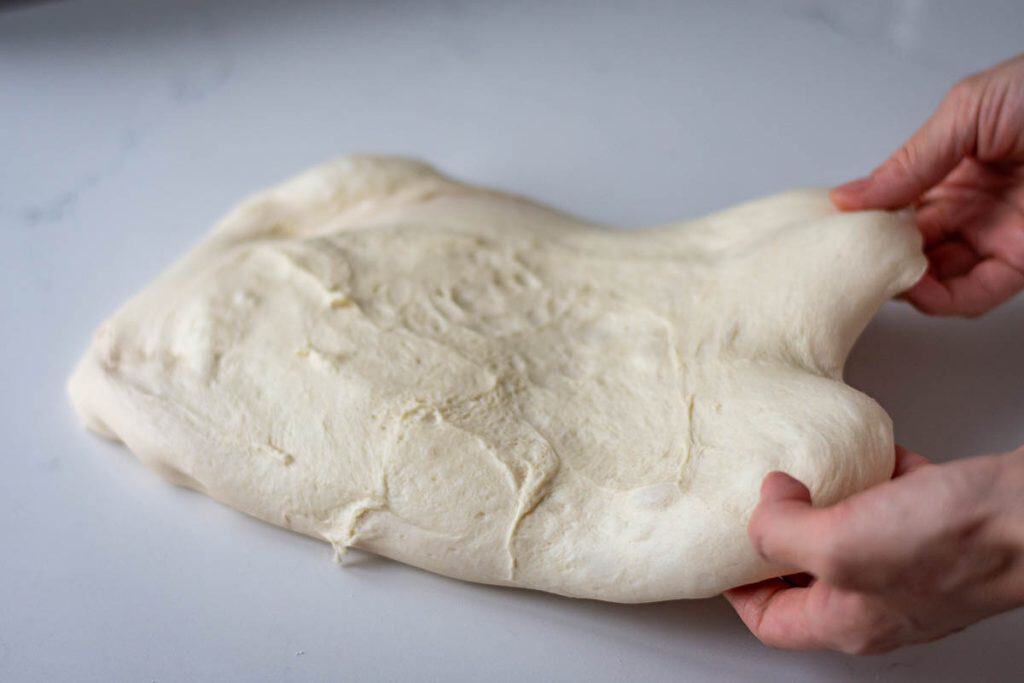
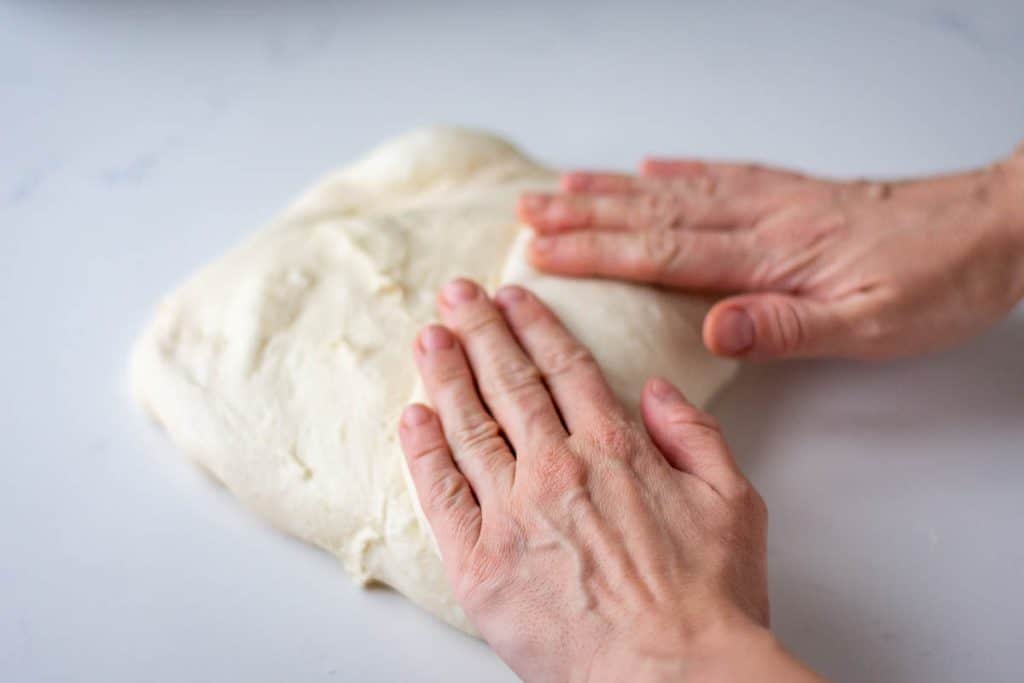
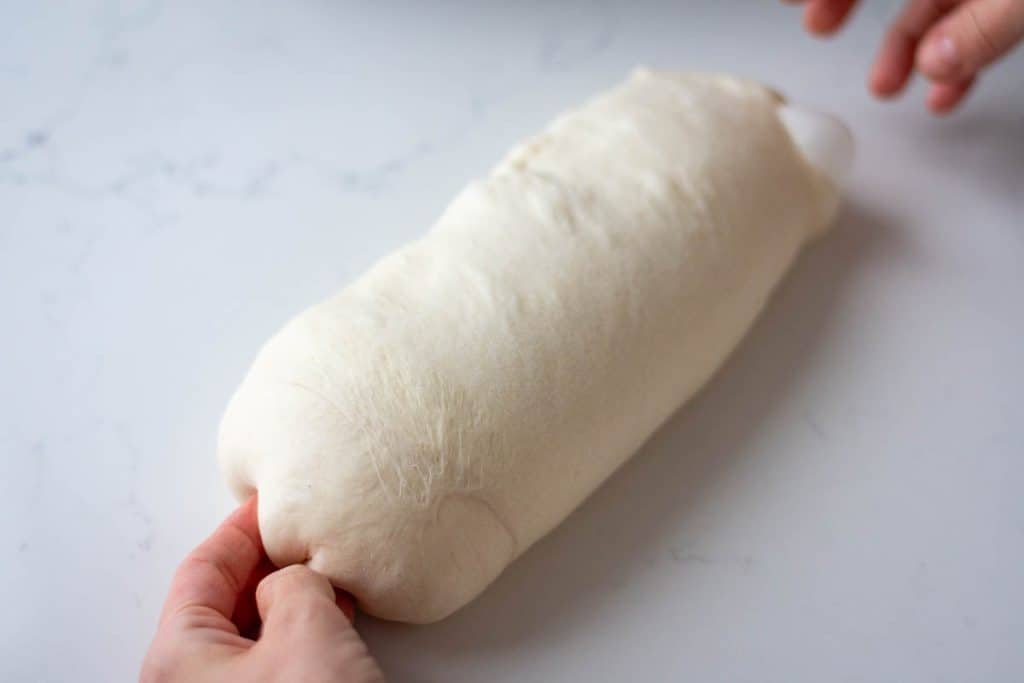
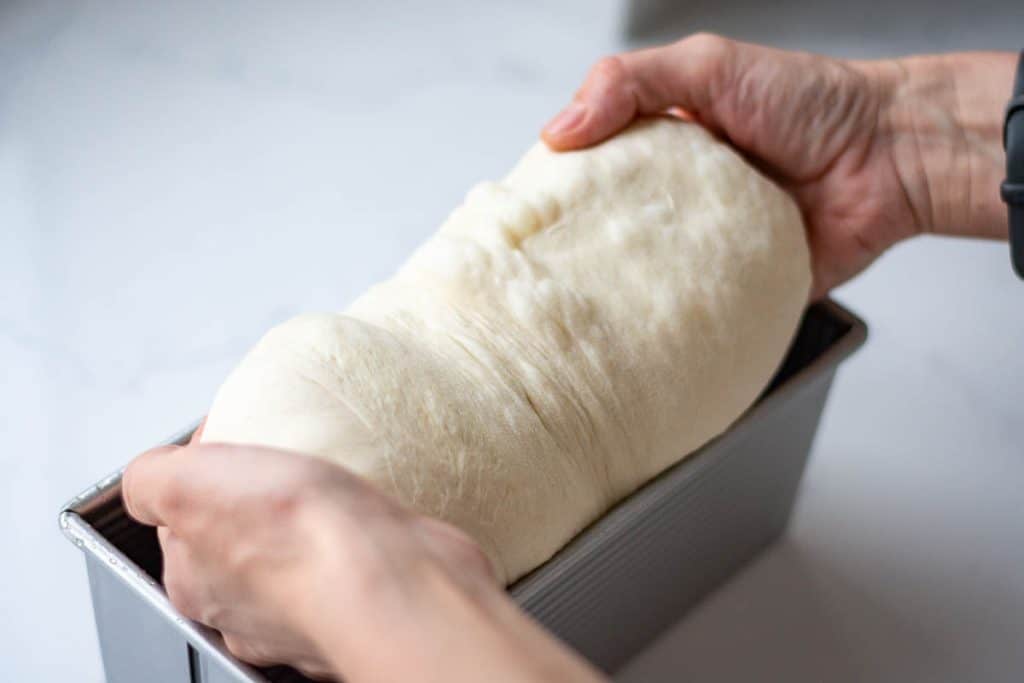
1. Grease your Pullman pan and lid generously. Turn the dough out, shape it into a tight log the length of the tin, and settle it in seam-side down. Slide the pan into a large plastic bag, lid off, to stop a skin forming, and refrigerate overnight, 12-15 hours.
Day 2
Final Proof, Bake and Cool
1. Take the pan straight from the fridge and let the dough proof at room temperature until it sits 1-2cm below the rim, or is just gently doming above it. Depending on your kitchen this takes 2-5 hours. Don't rush this stage, underproofed dough is the main reason a Pullman loaf won't fill the corners of the pan.
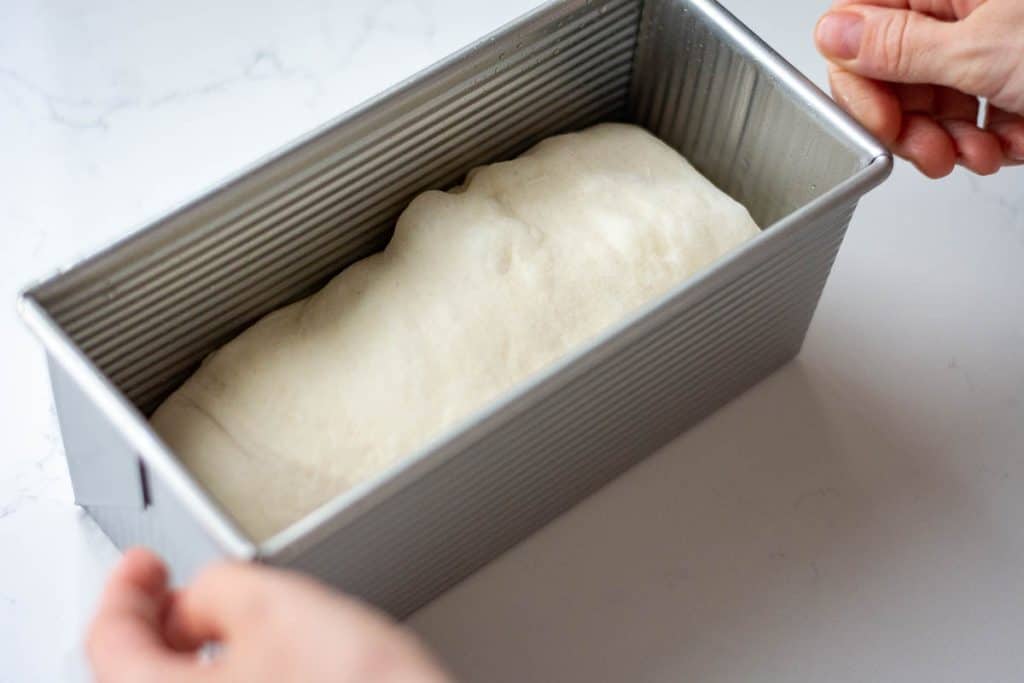
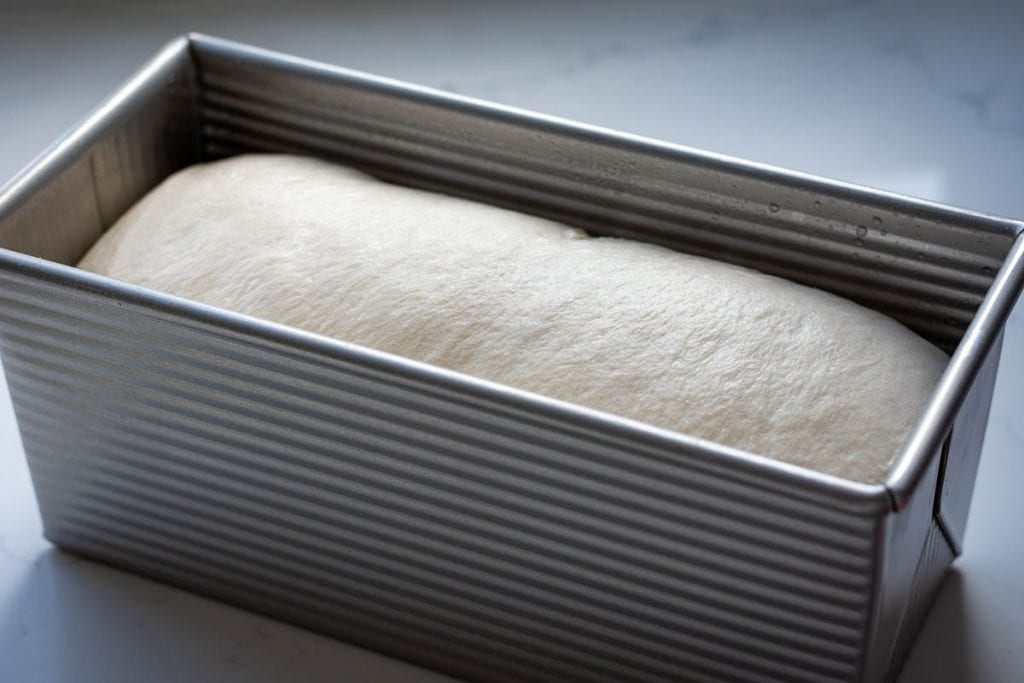
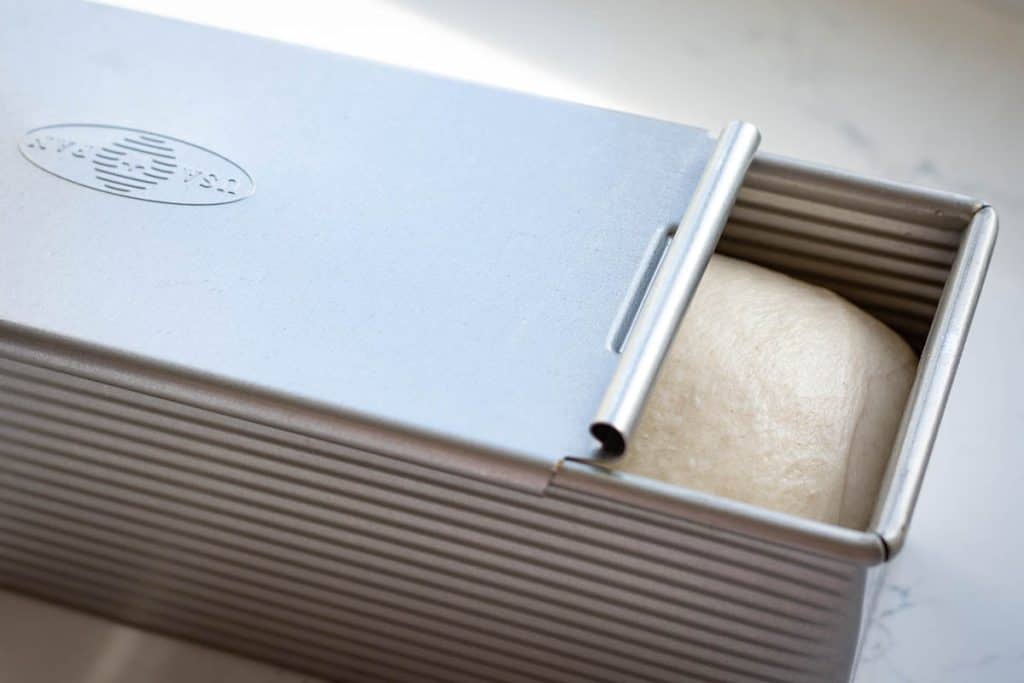
2. Slide the lid on and bake at 190°C/375°F for 35-40 minutes.
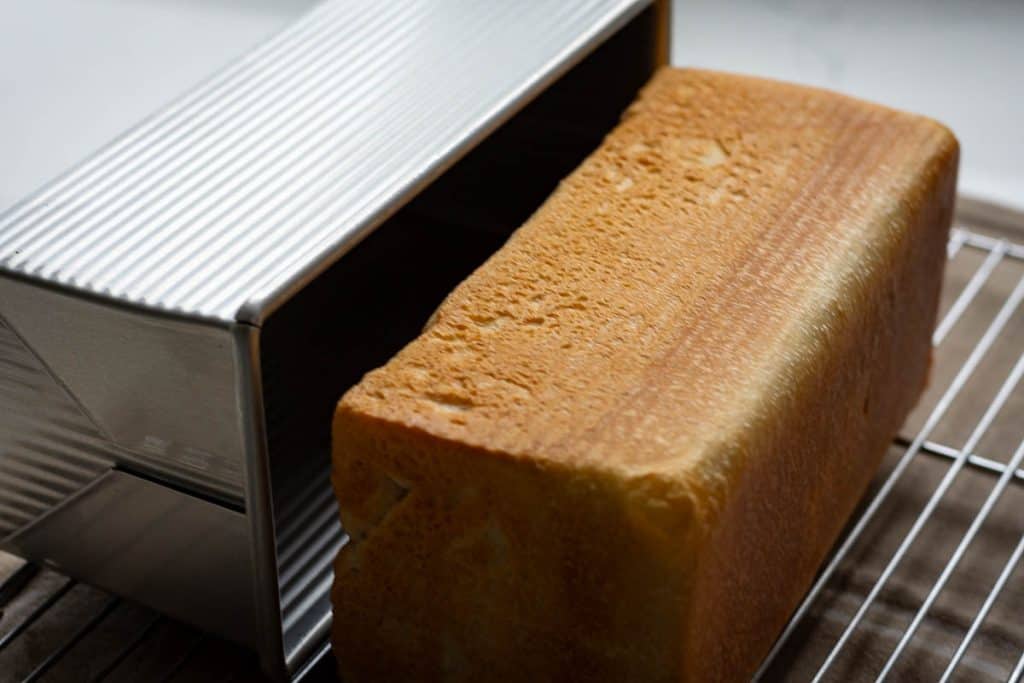
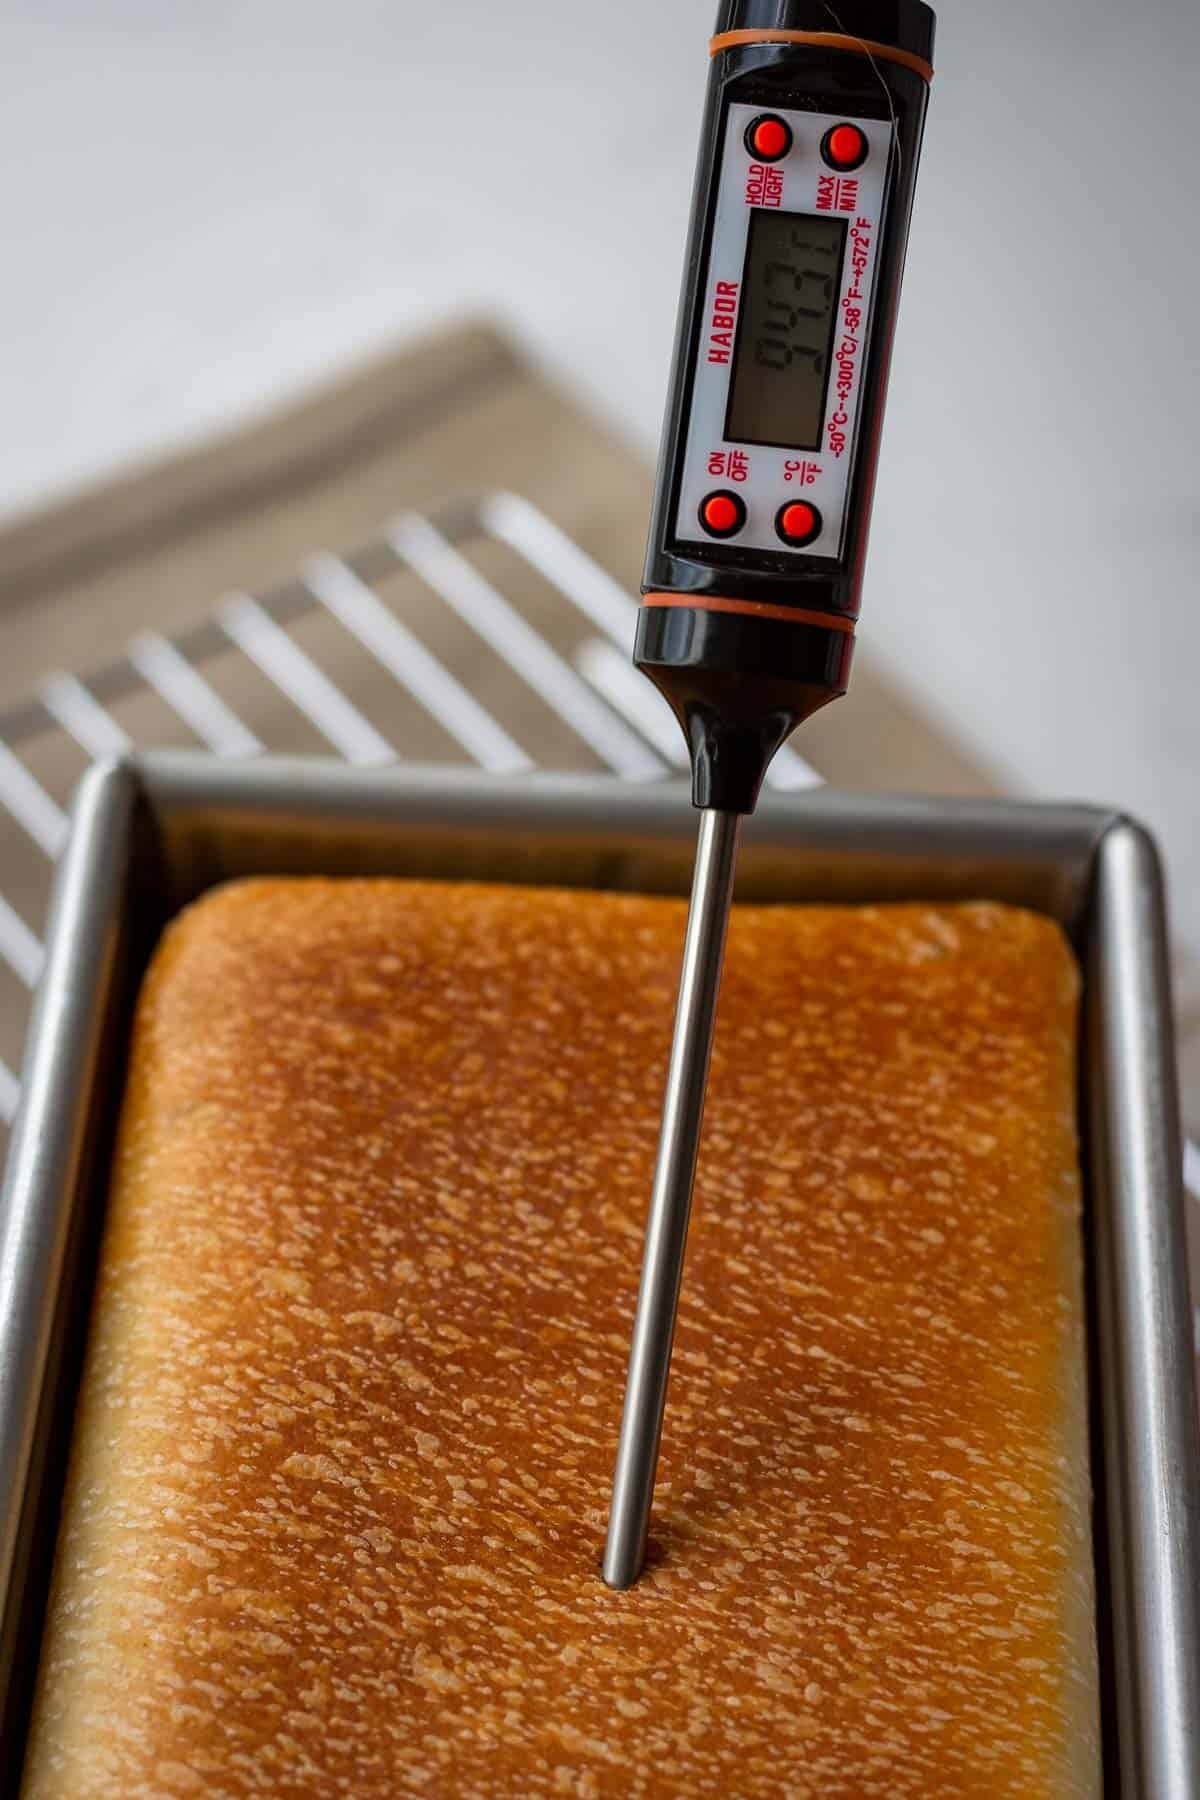
3. Check the internal temperature has reached 94-96°C/201-205°F, then remove the lid carefully (there'll be a rush of steam) and unmould the loaf onto a wire rack straight away.
4. Cool completely, at least 2 hours, before slicing. I know. Cut into it too early and you'll get a gummy line through the middle, it's still finishing setting once it's out of the oven.
Troubleshooting
- My loaf didn't fill the corners of the pan. Almost always underproofing. The dough needs to reach 1-2cm below the rim, or be gently doming, before it goes in the oven. Slide the lid on too early and there isn't enough dough pushing outward to reach the corners, so you get rounded edges instead of sharp ones.
- The dough split up the sides while baking. Oven spring with nowhere controlled to go, usually from slightly underproofed dough, or a pan that wasn't greased well enough for the dough to slide up evenly as it expands. Grease generously, right into the corners.
- The crumb came out dense or gummy. Slicing too early is the most common cause, give it the full 2 hours to cool and finish setting. If it's dense right through even once cooled properly, check your starter was genuinely active and that you didn't overproof during the cold retard.
- I can't tell if it's done because I can't see the crust colour. With the lid on, you're baking blind, so colour isn't a reliable guide. An instant-read thermometer is the only way to know for certain, look for 94-96°C/201-205°F in the centre of the loaf.
Tips for the Best Sourdough Pullman Loaf
🌡️ Watch your dough temperature, not just the clock. A stand mixer generates friction heat, and if the dough gets too warm during mixing, fermentation will run ahead of schedule and throw off your whole timeline.
📅 The cold retard is flexible, not fixed. Twelve hours is great to build flavour, but you can stretch it to 15 without any issue for more sourdough tang or reduce it for a milder-tasting loaf. Whatever makes this an easy recipe to fit around a normal day. Mix and shape one evening, bake whenever suits the next.
🔪 Use a serrated knife once it's properly cool. A sharp bread knife with a light sawing motion gives clean, even slices. A straight-edged knife just compresses the soft crumb.
🥛 Lukewarm milk, not hot. Milk that's too warm can start cooking the proteins and will also warm your dough more than you want at the mixing stage. Body temperature is about right.
Recipe FAQs
You can bake the dough in a regular loaf tin, but it will dome on top like normal bread rather than coming out square, and you'll lose the even, corner-to-corner slices this recipe is built around. If you don't own a lidded pan yet, my Sourdough Sandwich Bread recipe is designed for an open tin instead.
This is almost always underproofing. Give the dough the full final proof, until it sits 1-2cm below the rim or is gently doming, before baking. It could also be that your sourdough starter isn't strong enough. See the troubleshooting section above for more detail.
Yes, though it takes real effort. Enriched doughs this buttery are sticky and slow to come together by hand, expect closer to 20-25 minutes of kneading to reach a proper windowpane, with rest breaks if your arm gives out before the dough does.
You can, but I wouldn't recommend it if you can help it. The cold retard develops flavour. If you're short on time, shorten it rather than skipping it, the dough will still need a proper final proof afterwards regardless.
Use an instant-read thermometer. Check the centre of the loaf reaches 94-96°C/201-205°F before you unmould it.
Yes, swap it in at the same weight. The crumb will taste very slightly different but the loaf will rise and bake exactly the same way.
How to Serve Sourdough Pain de Mie
This loaf earns its keep at sandwich time: thin, even slices with proper structure that won't turn to mush under a wet filling. It also makes excellent toast, the tight crumb goes properly golden rather than just drying out.
It's one of the better breads I've used for French toast too, the soft crumb soaks up custard without falling apart. Torn into cubes, slightly stale slices make a good bread pudding or savoury stuffing base.



Storage
Keep the loaf in a bread bag or wrapped in a beeswax wrap at room temperature for up to 4 days, the enriched dough stays soft longer than a lean sourdough loaf would. I wouldn't store it in the fridge, that speeds up staling rather than slowing it down.
To freeze, slice the whole loaf first, then freeze with baking paper between slices so you can pull out only what you need. It keeps well for up to 3 months, and slices toast straight from frozen.
More Soft Crust Sourdough Bread
If this has got you thinking beyond a crusty sourdough, my Sourdough Sandwich Bread is the open-tin version of this soft, everyday bread, and my Sourdough Milk Bread (Sourdough Shokupan) takes the enriched approach further with a tangzhong starter. More delicious ideas below:



LOVE BAKING SOURDOUGH WITH ME?
You can now add Somebody Feed Seb as a preferred source on Google. It only takes a tick box, and tells Google you'd like to see more of my recipes when relevant.
Sourdough Pullman Loaf (Sourdough Pain de Mie)
Equipment
- Stand Mixer fitted with a dough hook attachment
- USA Pan Pullman loaf pan with lid, 23 x 10cm ( 9x 4 inches)
- Digital kitchen scale
- Instant-read thermometer (optional but recommended)
- Bench Scraper
Ingredients
- 390 g strong white bread flour with at least 12% protein content
- 240 g whole milk lukewarm
- 160 g active sourdough starter 100% hydration
- 40 g unsalted butter softened
- 35 g granulated sugar
- 9 g fine sea salt
- neutral oil or extra soft butter for greasing the pan
Instructions
Day 1
- First thing in the morning, feed your sourdough starter in the ratio of 1:1:1 and leave it in a warm spot for 4-5 hours to at least double in volume.
Fermentolyse and Mixing The Dough
- In the bowl of a stand mixer fitted with the dough hook, combine the bread flour, milk and active starter. Mix on low speed until no dry flour remains and the dough looks shaggy. Cover and rest for 30 minutes. This short autolyse hydrates the flour and cuts down mixing time later.
- Add the salt and sugar. Mix on low-medium speed for about 5 minutes, until the dough starts to come together and smooth out.
- With the mixer still running on low-medium, add the softened butter a tablespoon or so at a time, waiting until each addition is fully incorporated before adding the next. The dough will look greasy and like it's falling apart partway through, that's normal, keep the mixer going.
- Continue mixing until the dough is smooth, elastic and passes the windowpane test (stretch a small piece thin enough to see light through it without tearing), roughly 10-15 minutes once all the butter is in. Check the dough isn't overheating from the mixer, it should still feel cool to the touch, not warm.
Bulk Fermentation
- Scrape the dough into a lightly oiled bowl or container, cover, and leave to bulk ferment somewhere around 21-23°C for 6-8 hours. No stretch and folds needed, the dough hook has already done the gluten development. Look for about a 50% increase in volume and a puffy, jiggly feel rather than a specific size.
Shaping and Cold Proof
- Grease the Pullman pan and lid well. Turn the dough out, shape it into a tight log the length of the pan, and settle it into the tin seam-side down. Place the loaf in a plastic bag to prevent the skin from forming (lid off) and refrigerate overnight, 12-15 hours.
Day 2
Second Rise
- Remove the pan from the fridge and let the dough proof at room temperature until it sits 1-2cm below the rim of the pan, and is gently doming below the top edge of it. Depending on your kitchen, this can take 3-5 hours. Underproofed dough won't fill the corners of the pan, so don't rush this stage.
Baking
- Slide the lid on and bake at 190°C/375°F for 38-42 minutes.
- Slide the lid off partially and check the internal temperature reaches 94-96°C/201-205°F. Remove the lid carefully, there will be steam, and unmould the loaf onto a wire rack straight away.
- Cool completely, at least 2 hours, before slicing.
Notes
Nutrition

Andrea says
This is great sourdough sandwich bread. I followed the instructions exactly with no changes.
Ieva Greber says
Thanks, Andrea — glad it delivered exactly as written, that's exactly what a good sandwich loaf should do!
Chloe says
This bread turned out so soft and has a great sourdough flavor, It was so good.
Ieva Greber says
Thanks, Chloe! Soft crumb with proper sourdough flavour is exactly what a sandwich loaf should deliver, and I’m glad it earned an “it was so good.” Your next sandwich just got a serious upgrade.