
If you've ever wondered how to make rye sourdough starter from scratch, you're in the right place. Rye flour is one of the most reliable flours for building a strong, active starter thanks to its natural enzyme activity and nutrient content. This guide walks you through the process step by step, with clear expectations and no guesswork.

Jump to:
- Why Rye Starter Is A Great Choice?
- Ingredients & Tools Needed
- Best Rye Flour For Sourdough Starter
- Step-By-Step Method
- When is Rye Sourdough Starter Ready To Bake With?
- Tips & Common Problems With Rye Sourdough Starter
- Storage
- Frequently Asked Questions
- More Sourdough Starter Articles
- Rye Sourdough Starter From Scratch
As an Amazon Associate I earn from qualifying purchases, at no extra cost for you! Thank you!
Why Rye Starter Is A Great Choice?
Choosing a rye sourdough starter is like unlocking a whole new level of flavour for your bread. Rye grain contains a higher concentration of sugars and enzymes than wheat, which makes it easier for the wild yeast and bacteria in your sourdough culture to feed on.
As a result, rye starters tend to ferment faster and can create a complex flavour that you won't find with wheat starters.

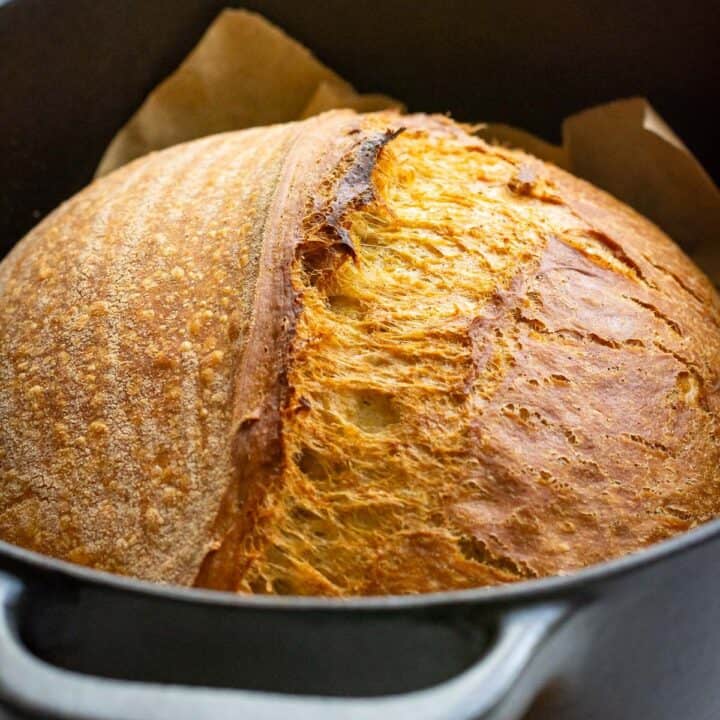
Because of this fermentation boost, rye starters often require less attention and are more resilient than wheat ones. Plus, if you're aiming for authentic rye sourdough bread, a natural yeast starter made from rye will deliver superior results without the need for commercial yeast.
Learn more about it in our article about how to replace yeast with sourdough starter!
It's simply the perfect choice for bakers who want depth of flavour and a hearty, rustic loaf.
Ingredients & Tools Needed
A rye sourdough starter is simply a combination of rye flour and water that goes through a fermentation process. You'll need just a few simple ingredients and basic kitchen tools. Here's what to gather:
Ingredients
- Whole-grain rye flour: The key ingredient to kick-start your sourdough culture. The section below discusses other types of rye flour you can use.
- Water: Use filtered, bottled or spring water if tap water is highly chlorinated where you live.

Tools & Equipment
- A glass jar or mason jar - For keeping your starter.
- Loose-fitting lid or cloth - To allow airflow while protecting your starter from debris.
- Elastic band - To mark the level of your starter and track its growth.
- A spoon or spatula - For mixing the starter.
- Digital scale - for precision when measuring your flour and water.
Best Rye Flour For Sourdough Starter
Choosing the right rye flour is crucial for getting the best results with your starter. Rye comes in various types, and each has its own characteristics that affect fermentation.
For a sourdough starter, whole-grain rye flour is generally considered the best option. This type of flour contains all parts of the whole grains, providing more nutrients for the yeast and bacteria in your sourdough culture. It ferments faster and produces a robust, tangy flavour.
Here's a breakdown of the different flours you might consider:
- Whole-grain rye flour (a.k.a. whole rye flour or dark rye flour). The top choice for creating an active, healthy starter. It offers maximum fermentation power due to its high nutritional content.
- Dark rye flour. This is made from the outer layer of the grain and brings a deeper flavour. It's another excellent choice for your starter.
- Light rye. A more refined version of rye flour, but it still provides more fermentation activity than white flour. You can use this for a milder starter.

If you're planning to use white bread flour or any white flour, save those for feeding an established starter or for baking, as they won't give you the same nutrient boost that rye does when building your starter.

Step-By-Step Method
Creating your rye sourdough starter from scratch is a rewarding journey. Follow these step-by-step instructions over the next 14 days to cultivate a vibrant starter!
Day 1: The First Step
- Mix Together: In a clean glass jar, combine 50g of whole grain rye flour and 60ml of water. Stir until there are no dry spots left.
- Cover the Jar: Use a loose-fitting lid or a cloth to cover the jar. This will allow air to circulate while keeping dust out.
- Mark the Level: Use a rubber band to mark the current level of the mixture. This will help you track its rise.


Day 2: Aerate the Mixture
- Good Stir: Without adding any more flour or water, give the starter a good stir to aerate it and introduce oxygen.
- Cover and Store: Re-cover the jar and place it in a warm spot away from direct sunlight. We have tips on how to keep sourdough starter warm, especially during colder months!

Day 3: First Feeding
- Remove and Feed: Take out 50g of the mixture and add 50g of whole grain rye flour and 50ml of water. Stir well to combine.
- Cover and Store: Re-cover the jar and return to the warm spot.

Day 4: Observe and Stir
- Check for Bubbles: You may start to see some bubbles forming. This is a good sign!
- Remove and Feed: Again, take out 50g of the mixture and add 50g of whole grain rye flour and 50ml of water. Stir well.
- Cover and Store: Re-cover and keep it in a warm spot.
Day 5: Continue Feeding
- Remove and Feed: Repeat the process by taking out 50g of the mixture and feeding it with 50g of whole grain rye flour and 50ml of water.
- Cover and Store: Make sure it's well mixed, then cover and keep warm.
Day 6: More Activity
- Check Activity: Look for more bubbles and a slight increase in volume.
- Remove and Feed: Take out 50g of the mixture, then add 50g of whole grain rye flour and 50ml of water.
- Cover and Store: Stir well, cover, and return to the warm spot.

Day 7: Consistency Check
- Remove and Feed: Feed the starter once more by taking out 50g of the mixture and adding 50g of whole grain rye flour and 50ml of water.
- Cover and Store: Ensure it's well mixed, then cover and keep warm.
Days 8-14: Building Strength
- Continue Feeding: For these days, continue to take out 50g of the mixture each day and feed it with 50g of whole grain rye flour and 50ml of water.
- Stir and Observe: Make sure to give it a good stir each day. Watch for signs of activity, such as bubbles and a pleasant, tangy smell.
- Maintain Warmth: Always keep your starter in a warm spot (but not in direct sunlight).
By the end of these 14 days, you should have a robust rye sourdough starter ready for your baking adventures!
When is Rye Sourdough Starter Ready To Bake With?
So, when can you finally bake with your active sourdough starter? Well, forget about the float test - it's unreliable, especially with a thick and sticky rye starter. Instead, let's look for some more practical signs.
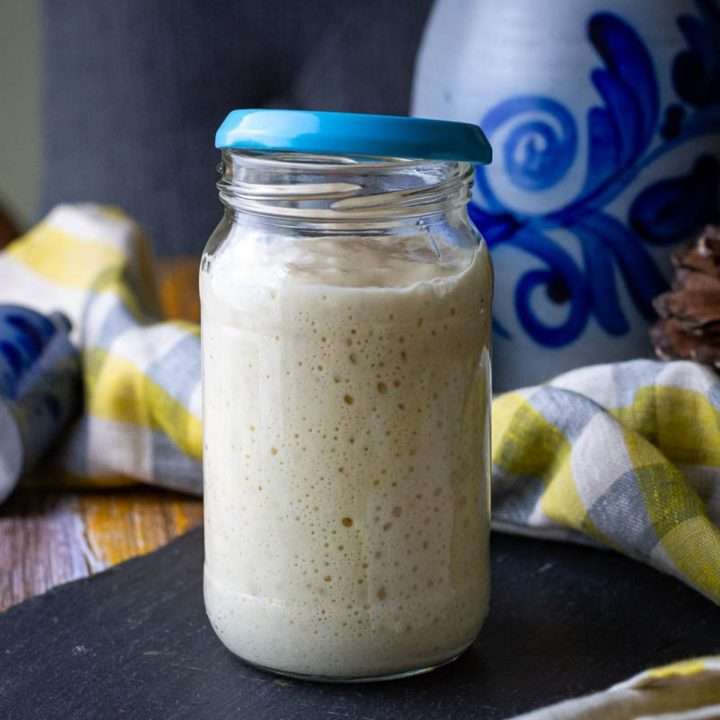
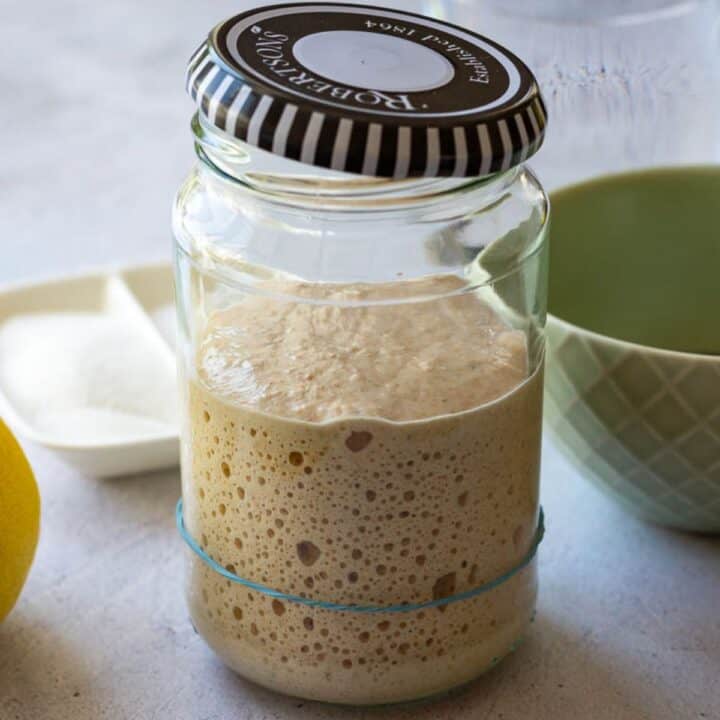
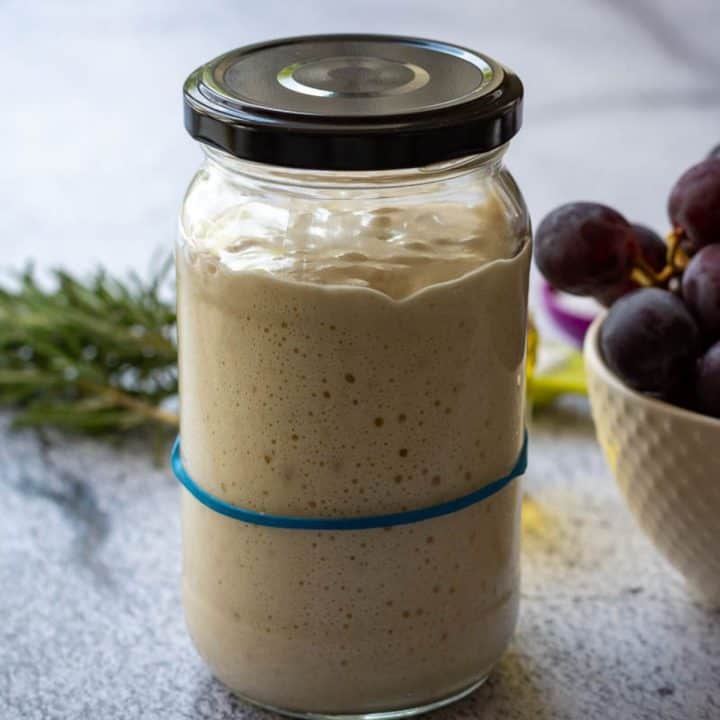
First off, you're aiming for a bubbly starter that doubles in size after each feeding. This means, that after feeding your rye starter in a ratio 1:1:1. it should at least double in volume within 4 hours at 21-27°C temperature. You should see plenty of activity, with lots of small and big bubbles forming throughout. The smell should be pleasantly tangy, but not overly sour.
Learn more about why your sourdough starter isn't doubling within 4 hours!
Though you might get excited and want to bake after just a couple of weeks, it's best to give your rye starter about two weeks of consistent feedings before attempting your first loaf. That said, if you want the best results, a truly mature starter - at least 3 months old - will give you a stronger rise and better flavour. So, patience is key!

Keep an eye on your starter, look for that rise, and remember: consistency and bubbles are your best cues for knowing when your rye starter is ready.
Tips & Common Problems With Rye Sourdough Starter
Building a rye sourdough starter from scratch is an exciting process, but it comes with its own set of challenges and common questions. Below, I'll answer some frequently asked questions and offer a few tips to help you troubleshoot any issues you may encounter.
Why doesn't the float test work with a rye starter?
The float test is often recommended to check if a starter is ready for baking. However, with a rye sourdough starter, this test can be unreliable because rye flour has less gluten than wheat flour, resulting in a thicker and denser texture. Even when your starter is active and bubbly, it may not float, but it can still be perfectly ready to use.
How long will it take for my new rye starter to show activity?
Patience is the most important thing when building a new starter. It's perfectly normal not to see much activity for the first couple of days. Depending on your environment and flour, signs of fermentation (small bubbles or a change in smell) usually start appearing around day 3 or 4. Just keep feeding it and don't panic if you don't see much action early on.

Does it matter what kind of water I use to feed my starter?
Yes, the type of water you use can impact the fermentation process. Tap water that contains high levels of chlorine can inhibit the growth of the wild yeast and bacteria in your starter. If you're having trouble, switch to filtered water or leave tap water out for 24 hours to allow the chlorine to evaporate.
Alternatively, you can use bottled water, but avoid distilled water as it lacks essential minerals.
What's the best temperature to keep my rye starter?
For the best fermentation activity, it's ideal to store your starter in a warm place where the temperature is between 21°C and 27°C (72°F to 80°F). If your kitchen is colder, consider using warm water (not hot) during feedings to give the starter a little boost. A cooler environment will slow down the process, while a warmer one will speed it up.
Why is my rye starter growing mould?
Mould is uncommon but can happen in very warm or unsanitary conditions. If your starter develops mould, discard it immediately and start over. To prevent this, always use a clean jar for each feeding - it's a good idea to avoid contamination and maintain a healthy starter.
Do I need to use a clean jar every time I feed my starter?
While it's not strictly necessary to use a brand-new jar every time, regularly transferring your starter to a clean jar is a good idea. It helps prevent the build-up of dried-out starter and bacteria that could eventually lead to spoilage or mould.
What should I do if my starter isn't showing signs of activity after 4-5 days?
If your starter seems sluggish and hasn't shown much activity after a few days, try giving it a good stir between feedings. This helps aerate the mixture and introduce oxygen, which can encourage the fermentation process.
Additional Tips for Rye Sourdough Starters
- Consistency is key: Feed your starter at regular intervals and don't skip feedings during the building phase.
- Warm it up: If your starter is slow to show signs of life, try increasing the temperature or using slightly warm water for feedings. Here's how to keep sourdough starter warm in winter!
- Don't worry about the bubbles early on: Some starters will be slow to show visible big bubbles, but the fermentation is still happening. Keep feeding it, and you'll see results soon.
- Time and patience are your best friends when it comes to creating a strong, healthy rye starter. Just keep feeding it and trust the process!

Storage
When building a new rye sourdough starter, keep it at room temperature and feed it daily to promote fermentation. Store it in a glass jar with a loose-fitting lid and continue daily feedings until it's strong enough to bake with.
Once your starter is active, for daily use, keep it at room temperature with daily feedings. If you bake less often, store it in the fridge and feed it once or twice a week, reactivating it before baking.
Frequently Asked Questions
Rye starter is not only for sourdough rye bread. You can use it in most sourdough recipes that call for a starter. Its unique flavour can add depth to anything from classic sourdough loaves to pancakes, waffles, or even pizza dough. We particularly like it in our Flaxseed Sourdough Bread and French Sourdough Pain De Campagne.
Yes, you can mix different flours like all-purpose flour or whole wheat flour into your rye sourdough starter. This flexibility allows you to experiment with flavour and texture while maintaining the health of your starter.
The main difference between wheat and rye starters is flavour and texture. Rye starter creates a more complex flavour due to the fermentation process of the rye grain, while wheat starters are typically milder and rise differently.
More Sourdough Starter Articles
For more guidance on perfecting your starter and exploring various sourdough bread recipes, check out these articles - because a strong starter is truly the foundation of every great loaf.



Rye Sourdough Starter From Scratch
Equipment
- A glass jar or mason jar, for keeping your starter
- Loose-fitting lid or cloth, to allow airflow while protecting your starter from debris
- Elastic band, to mark the level of your starter and track its growth
- A spoon or spatula, for mixing the starter for mixing the starter
- Digital scale, for precision when measuring your flour and water
Ingredients
- Whole-grain rye flour a.k.a. dark rye flour
- Water use filtered, bottled or spring water if tap water is highly chlorinated where you live
Instructions
Day 1: The First Step
- Mix Together: In a clean glass jar, combine 50g of whole grain rye flour and 60ml of water. Stir until there are no dry spots left.
- Cover the Jar: Use a loose-fitting lid or a cloth to cover the jar. This will allow air to circulate while keeping dust out.
- Mark the Level: Use a rubber band to mark the current level of the mixture. This will help you track its rise.
Day 2: Aerate the Mixture
- Good Stir: Without adding any more flour or water, give the starter a good stir to aerate it and introduce oxygen.
- Cover and Store: Re-cover the jar and place it in a warm spot away from direct sunlight. We have tips on how to keep sourdough starter warm, especially during colder months!
Day 3: First Feeding
- Remove and Feed: Take out 50g of the mixture and add 50g of whole grain rye flour and 50ml of water. Stir well to combine.
- Cover and Store: Re-cover the jar and return to the warm spot.
Day 4: Observe and Stir
- Check for Bubbles: You may start to see some bubbles forming. This is a good sign!
- Remove and Feed: Again, take out 50g of the mixture and add 50g of whole grain rye flour and 50ml of water. Stir well.
- Cover and Store: Re-cover and keep it in a warm spot.
Day 5: Continue Feeding
- Remove and Feed: Repeat the process by taking out 50g of the mixture and feeding it with 50g of whole grain rye flour and 50ml of water.
- Cover and Store: Make sure it's well mixed, then cover and keep warm.
Day 6: More Activity
- Check Activity: Look for more bubbles and a slight increase in volume.
- Remove and Feed: Take out 50g of the mixture, then add 50g of whole grain rye flour and 50ml of water.
- Cover and Store: Stir well, cover, and return to the warm spot.
Day 7: Consistency Check
- Remove and Feed: Feed the starter once more by taking out 50g of the mixture and adding 50g of whole grain rye flour and 50ml of water.
- Cover and Store: Ensure it's well mixed, then cover and keep warm.
Days 8-14: Building Strength
- Continue Feeding: For these days, continue to take out 50g of the mixture each day and feed it with 50g of whole grain rye flour and 50ml of water.
- Stir and Observe: Make sure to give it a good stir each day. Watch for signs of activity, such as bubbles and a pleasant, tangy smell.
- Maintain Warmth: Always keep your starter in a warm spot (but not in direct sunlight).
- By the end of these 14 days, you should have a robust rye sourdough starter ready for your baking adventures! But it typically takes 3-4 months of consistent feeding for it to reach its full potential.


Leave a Reply