
Thinking of replacing commercial yeast with your own sourdough starter? Welcome to the world of sourdough alchemy, where your trusty yeast recipe transforms into a tangy, flavorful sourdough version! Just be prepared for some extra time-and perhaps a little patience-as you set out on this delicious journey of fermentation! This article will tell you everything you need to know about how to replace yeast with sourdough starter!

Jump to:
As an Amazon Associate I earn from qualifying purchases, at no extra cost for you! Thank you!
Difference Between Commercial Yeast And Active Sourdough Starter
- Commercial Yeast: Available as instant yeast, active dry yeast, and fresh yeast, these store-bought yeasts provide a direct and predictable rise in dough. Known for their convenience, commercial yeasts are used in many quick breads and recipes where time is of the essence. They come in dried granules or as compressed fresh yeast, and are ready to work as soon as they're mixed with warm water. Commercial yeast consists of a single strain of cultured yeast specifically designed to act fast, making it ideal for breads that need a reliable, quick rise.
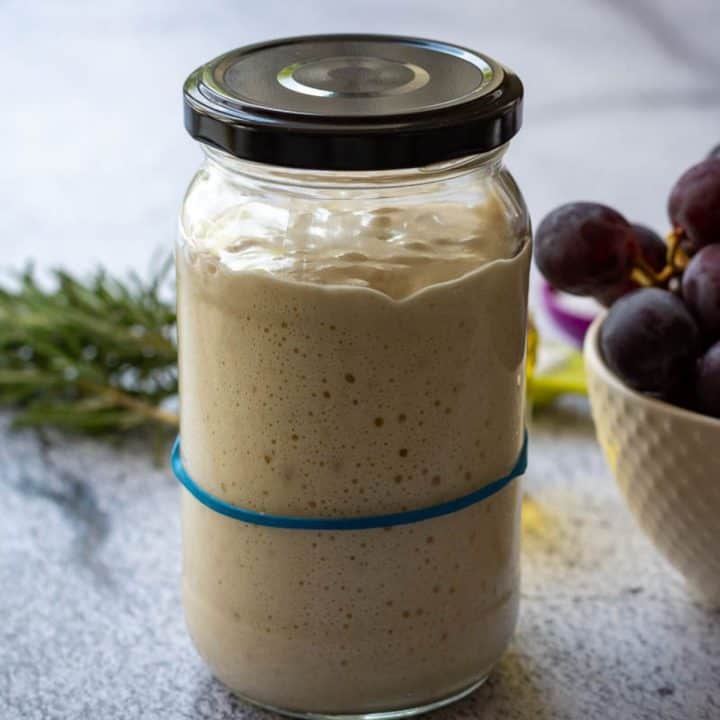
- Sourdough Starter and Wild Yeast: Unlike commercial yeasts, sourdough starter contains wild yeast and lactic acid bacteria, which together form what's known as a sourdough culture. Unlike store-bought yeast, sourdough starters require maintenance and come with added water and flour that contribute to the recipe's hydration and texture. Because sourdough is a blend of natural yeasts and bacteria, it often takes longer to ferment but brings out rich, complex flavours that add depth to the final product.


Ultimately, swapping store-bought yeast for wild yeast in a sourdough culture isn't a simple one-to-one trade. The wild yeasts in sourdough not only need more time but can create a much more complex flavour profile in your bread-a key reason many home bakers choose to make this shift.
However, you can still make sourdough bread in a single day without commercial yeast - follow our same day sourdough bread recipe!
Conversion Rule of Thumb
When replacing commercial yeast with sourdough starter in a recipe, a general rule of thumb is to use 100g of sourdough starter for every 7g (or one full packet) of yeast.
However, in my personal experience, I find that using 150g of active starter per 7g gives even better results - producing pleasant tangy flavour and great texture of sourdough bread and shortening the bulk fermentation process.

Step-By-Step Conversion Process
Converting a recipe from commercial yeast to sourdough is a simple process that requires a few adjustments in ingredient quantities and timing.
Here, we'll walk you through the steps for converting a yeasted recipe using a 100% hydration sourdough starter, which means your starter is made up of equal grams of water and flour.
- Investigate the Original Recipe
First, look closely at your specific recipe. Note the total amount of yeast it calls for (measured in grams). - Determine the Amount of Starter
Replace the yeast with active sourdough starter by using between 100g and 150 grams of sourdough starter per 7g of commercial yeast in the recipe, depending on your preference. - Adjust the Flour
Since sourdough starter contains both water and flour, you'll need to reduce these in the recipe. Divide the weight of sourdough starter by 2 to work our the weight of the flour in the starter. Remove this weight of flour from the total grams of flour originally in the recipe. - Adjust the Water
Next, reduce the liquid (usually water) in the recipe by half the weight of the sourdough starter, which accounts for the water portion. This step is essential to balance the dough's hydration level. - Allow Time for Bulk Fermentation and Proofing
When baking with sourdough, you'll need to consider the time you will need for the dough to ferment naturally. Sourdough's bulk fermentation, or first rise, will take anywhere from 4 to 12 hours depending on your specific recipe and room temperature. Additionally, sourdough recipes generally improve when you refrigerate the dough overnight, which slows the fermentation and develops flavour. - Account for a Longer Second Rise
Once shaped, the dough's second rise (final proof) will also take longer than in the original recipe. This slower rise gives a better structure to the dough, as well as improved flavour and texture.
Following these steps lets you convert most yeasted recipes to sourdough, allowing for that signature tang and texture with just a few ingredient and time adjustments.
Example
Here's a quick example on how to convert Paul Hollywood's Easy White Bread Recipe to sourdough.

- Since the recipe requires 7g of dried yeast, I will use 150g of active sourdough starter instead.
- 150g of sourdough starter consists of 75g of water and 75 g of flour.
- Therefore, I will reduce the amount of flour in the recipe to 425g and amount of water to 225g (since sourdough dough can handle higher hydration due to long fermentation process, you may use a little more water - this is discussed below).

Things To Note And Adjust
When converting recipes to sourdough, there's more than just yeast to think about.
Sourdough baking has its own basic rules to ensure a smooth process, including considerations for sourdough hydration, acidity, and the extended longer rise time that naturally comes with sourdough fermentation.
Hydration of Sourdough Starter
Hydration is an important factor to keep in mind when replacing yeast with sourdough starter. The conversion examples above assume a 100% hydration starter, meaning it's made with equal parts flour and water by weight.
However, if you're working with a stiff sourdough starter (like 80% or 60% hydration), it's simple to adjust: just calculate the exact amount of flour and water in your starter and reduce those amounts in the original recipe. This ensures that the dough's overall hydration level stays consistent, giving you the texture and rise you're looking for in your final loaf.
Hydration of The Dough
As discussed above, when using sourdough starter instead of commercial yeast, it's essential to adjust the amount of flour and water in the recipe to maintain the correct hydration.
However, because sourdough dough undergoes a longer fermentation process, the flour has more time to hydrate thoroughly. Techniques like stretch and fold or coil folding further aid gluten development, meaning higher-hydration doughs can still achieve a strong, workable structure.
As you become more familiar with converting yeasted recipes, you can experiment with adding a bit more liquid or reducing the water in the original recipe slightly less to suit your personal preference.

Sourdough Hydration 101
In this article, we'll delve into the ins and outs of sourdough hydration, why it matters, and how it can transform your bread baking adventures.
Acidity & Sour Flavour
Always start with a low-acidity starter that's refreshed regularly. Starters that are overly acidic can interfere with gluten development and lead to bread dough with an intense sourness that might overwhelm the flavour.
The fermentation process is where you can control sourness to achieve best results. Here's how it works:
- Play with Starter Amount and Bulk Fermentation: If you prefer a stronger sour tang, try using less sourdough starter and extending the bulk fermentation process-a longer fermentation time allows for more acetic acid production, which delivers that punchy sour taste.
- Shorten Bulk Time for Mildness: For a more subtle flavour, use a bit more starter. This allows you to shorten the bulk fermentation, favouring lactic acid bacteria over acetic acid and resulting in a less tangy loaf.

Timings
Timings are crucial in sourdough baking. Unlike baking with commercial yeast, sourdough involves a slower, more hands-on process that allows flavours to develop and strengthens the dough's structure.
Sourdough takes a long time due to the extra steps-feeding the starter, waiting for it to rise, and going through a lengthy bulk fermentation.
Here's a breakdown of approximate timings:
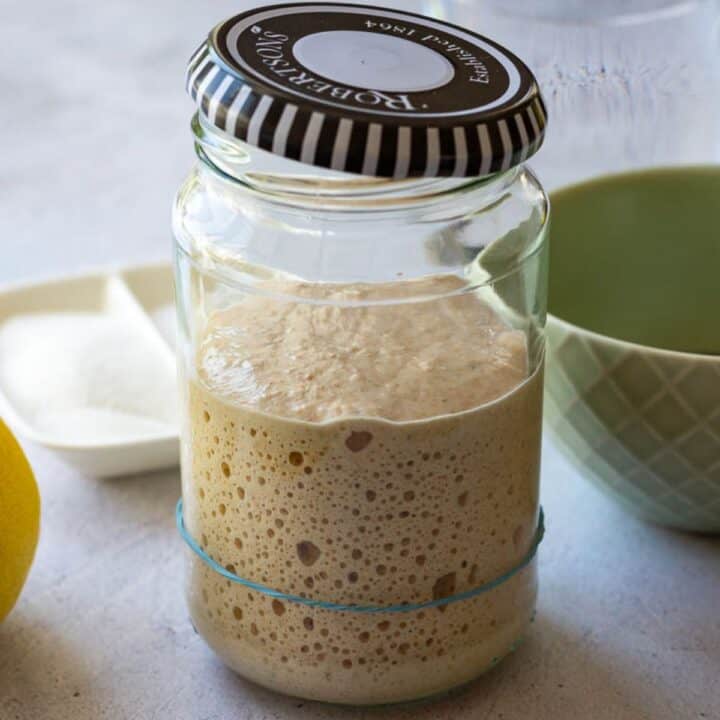
- Starter Prep: Feeding the starter takes about 3-5 hours at room temperature, depending on the temperature of your kitchen. An important thing to remember is that you need to wait until it at least doubles in volume and is active before using it.
- Bulk Fermentation: After mixing the dough, expect the bulk fermentation to last 4-12 hours at room temperature. Sourdough's rising time here depends on your kitchen's warmth, sourdough hydration, flour used and strength of yours sourdough starter.

- Cold Retardation: Sourdough works better when cold retarded in the fridge overnight (8-12 hours or more). The longer chill gives a richer flavour and better oven spring.
- Second Proof: After shaping, the dough requires another 3-8 hours to proof at room temperature.
Allowing sufficient time for these steps ensures your sourdough has developed flavour and structure, delivering optimal texture and flavour.
Recipes With No Water
It doesn't matter if the original recipe calls for water; you simply need to find a liquid to replace the moisture from the starter. This could be milk, tea, or coffee instead of water, and that's perfectly fine! Just ensure you make the substitution for any liquid, except for eggs.
(Low-Hydration) Stiff Dough Recipes
Very low-hydration recipes (or recipes that use lots of eggs and little other liquids) may benefit from adding a low-hydration sourdough starter. You can read all about stiff sourdough starter here. A good example would be sourdough brioche or sourdough stollen.

Frequently Asked Questions
No, sourdough discard cannot be used alone to replace yeast. While sourdough discard adds a delightful sourdough flavor, it lacks the necessary strength to leaven your bread on its own.
However, you can pair it with other leavening agents like commercial yeast or baking soda/powder to create a hybrid dough that captures the essence of sourdough while still achieving a good rise.
Baking with sourdough starter instead of commercial yeast offers several advantages that enhance both the flavor and quality of your baked bread. First and foremost, sourdough fermentation results in complex flavors that elevate the taste of your loaves, providing a depth that commercial yeast simply cannot match.
Additionally, sourdough bread often has a longer shelf life due to the natural acids produced during fermentation, which help inhibit mold growth.
There are also many claimed health benefits of sourdough; the fermentation process can make the bread easier to digest and may be more suitable for those with gluten intolerances.

Mix It Up: Turn Your Sourdough into a Flavour Adventure.
Recipes To Get You Started
Grab your favorite yeast bread recipe, and let's make it sourdough! Or have a look at our favourite recipes that will help you get started with making sourdough versions of the classics!




Leave a Reply