
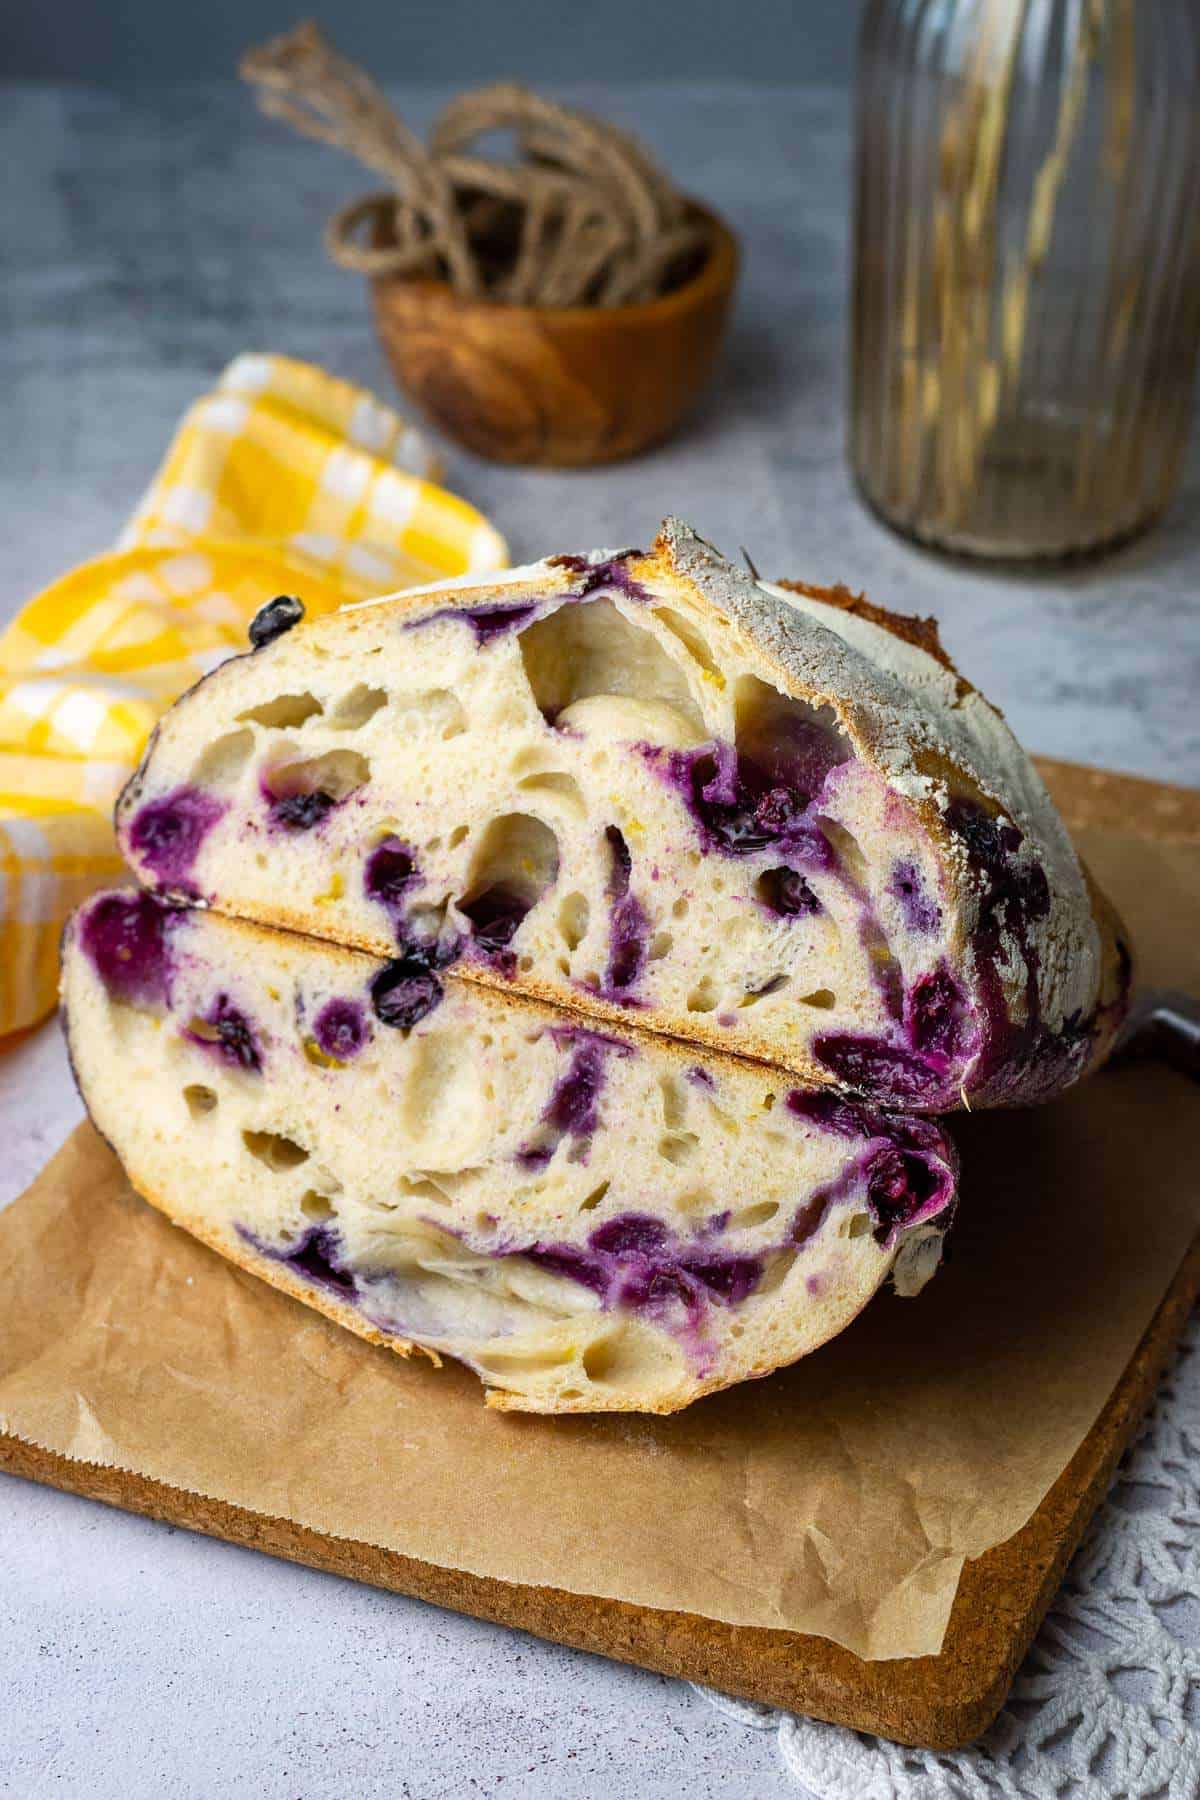
Lemon Blueberry Sourdough Bread combines the tang of a classic sourdough loaf with bursts of juicy blueberries and the zesty brightness of lemon. It's the kind of loaf that feels like summer in every slice-go on, give your starter a reason to shine!

Jump to:
As an Amazon Associate I earn from qualifying purchases, at no extra cost for you! Thank you!
Lemon & Blueberries: Perfect Sourdough Bread For Spring
Come spring, I'm always craving fresh, zingy flavours-and this Lemon Blueberry Sourdough Bread is just the thing.
While sourdough often feels like a cosy winter project (think sourdough cinnamon rolls or cinnamon swirl sourdough and chocolate star bread), Easter calls for something lighter and brighter. You can find even Easter Sourdough recipes here. And we love Lemon Poppy Seed Sourdough Bread and Sourdough Lemon Rolls in summer.
Packed with the tang of lemons and bursts of blueberries, it's the perfect bread for this time of year. It's also a fantastic choice for the summer months, especially during the blueberry season when the fruit is at its best.

If you're a fan of citrus bakes, don't stop here - try exploring more lemony creations featuring sourdough discard below:
- Easy Sourdough Lemon Cake
- Lemon Poppy Seed Sourdough Scones
- Sourdough Lemon Muffins (Sourdough Discard Recipe)
- Lemon & Blueberry Sourdough Scones
- Sourdough Lemon Poppy Seed Muffins (Discard Recipe)
But the first thing you must try is our Lemon Blueberry Sourdough Cake!
How Do Mix-Ins Affect Sourdough?
Adding mix-ins like blueberries and lemon zest can be a fun and delicious twist in your sourdough journey, but they do come with a few tweaks to the process.
1. First, hydration-using whole fresh blueberries won't affect the dough's hydration as long as the berries don't burst. This means you won't need to make any adjustments to the water-to-flour ratio in the recipe.
2. Second, bulk fermentation-the added sugar from the blueberries and zest will speed up the fermentation process, so you'll need to keep a close eye on your dough. It may rise quicker than usual, and over-fermentation can impact the final texture of your bread.
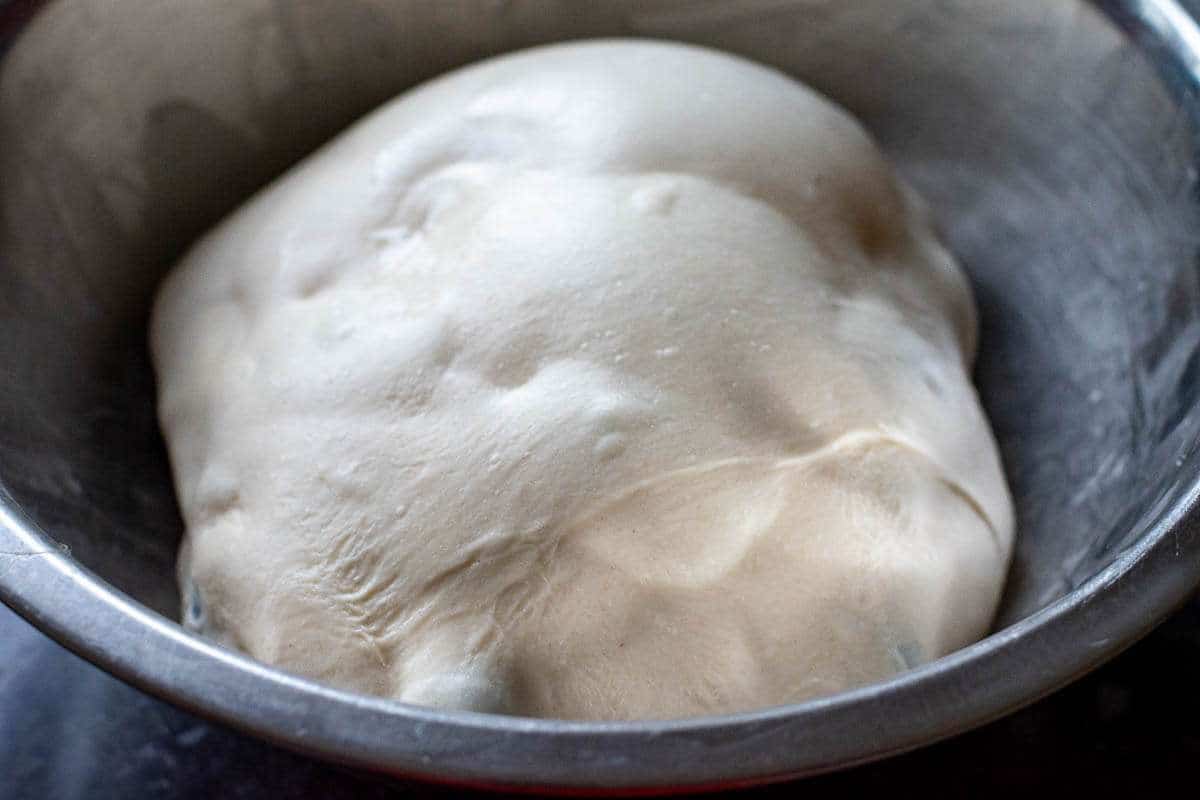
3. Third, handling! You don't want the blueberries to burst during the lamination or shaping process, so try to be extra gentle.
4. Finally, baking-the natural sugars in the mix-ins will cause the loaf to brown faster in the oven. To avoid over-browning, you can bake your loaf with the lid on for a little longer and give it just a quick blast with the lid off at the end for colour.
If you'd like to dive deeper into how mix-ins impact sourdough baking, you can purchase our in-depth eBook dedicated to sourdough mix-ins. It's packed with tips and tricks to elevate your bakes!

Mix It Up: Turn Your Sourdough into a Flavour Adventure.
Ingredient Notes
Here's everything you will need to make this blueberry lemon sourdough bread:
- strong white bread flour: with at least 12.5% protein content. You may replace up to 100g with whole wheat flour, but we find that the colour of the loaf doesn't quite go with the freshness of the blueberry and lemon zest inclusions.
- water: if you live in an area with highly chlorinated water, use filtered water for your sourdough.
- salt.
- caster sugar: or granulated white sugar. Maple syrup or honey can also be used. You can also skip the sweetened altogether if you wish.
- active sourdough starter: 100% hydration.
- fresh blueberries.
- lemon zest. You can use lemon juice to make our zingy Sourdough Lemon Bars and icing for Lemon Sourdough Focaccia!
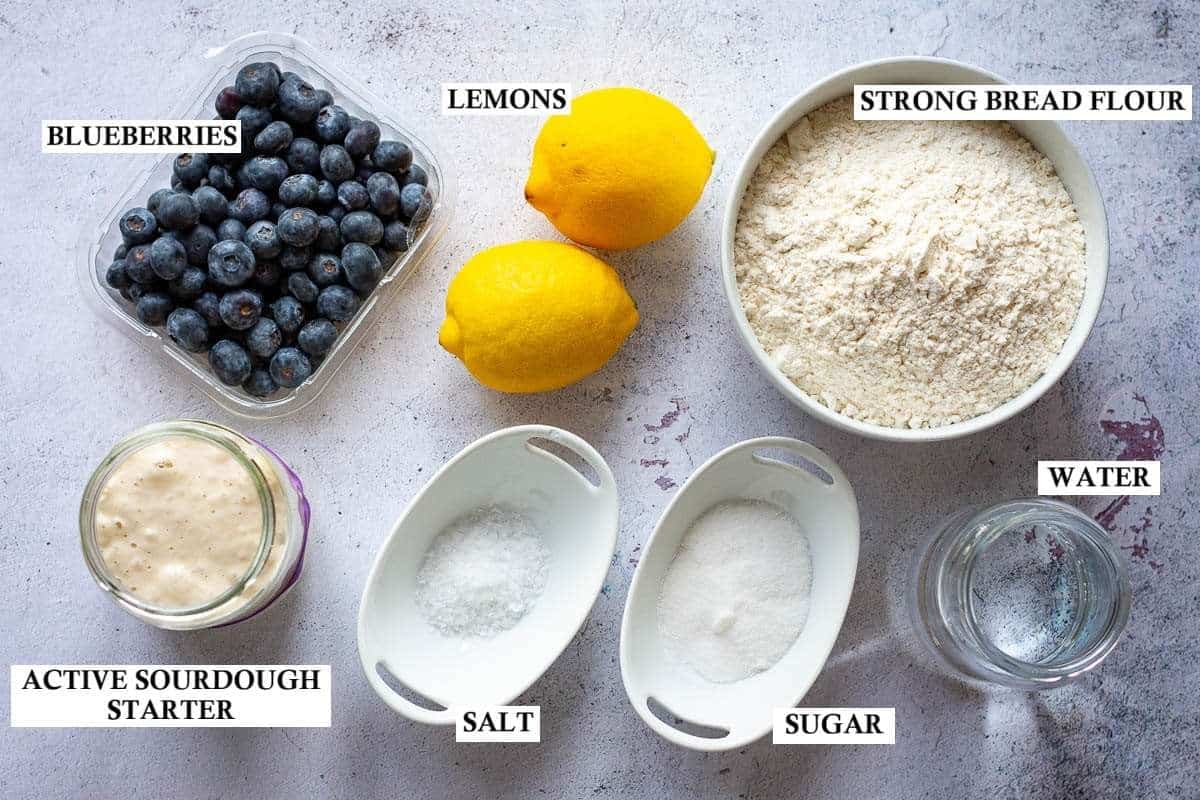
Find the full ingredients list, detailed instructions and nutritional information in the recipe card at the bottom of the post.
Step-By-Step Method
This Lemon and Blueberry Sourdough Bread is made over two days. On day 1, we mix the dough, fold, bulk ferment and laminate the mix-ins into sourdough, then shape and leave the dough in the fridge overnight. The next day, we score, bake and EAT!
DAY 1
- First thing in the morning, feed the sourdough starter and leave it in a warm spot (ideally between 21-27°C), loosely covered, for 4 hours. The starter should double in size by then. If it doesn't, it might need a few more good feedings to be ready.
Autolyse
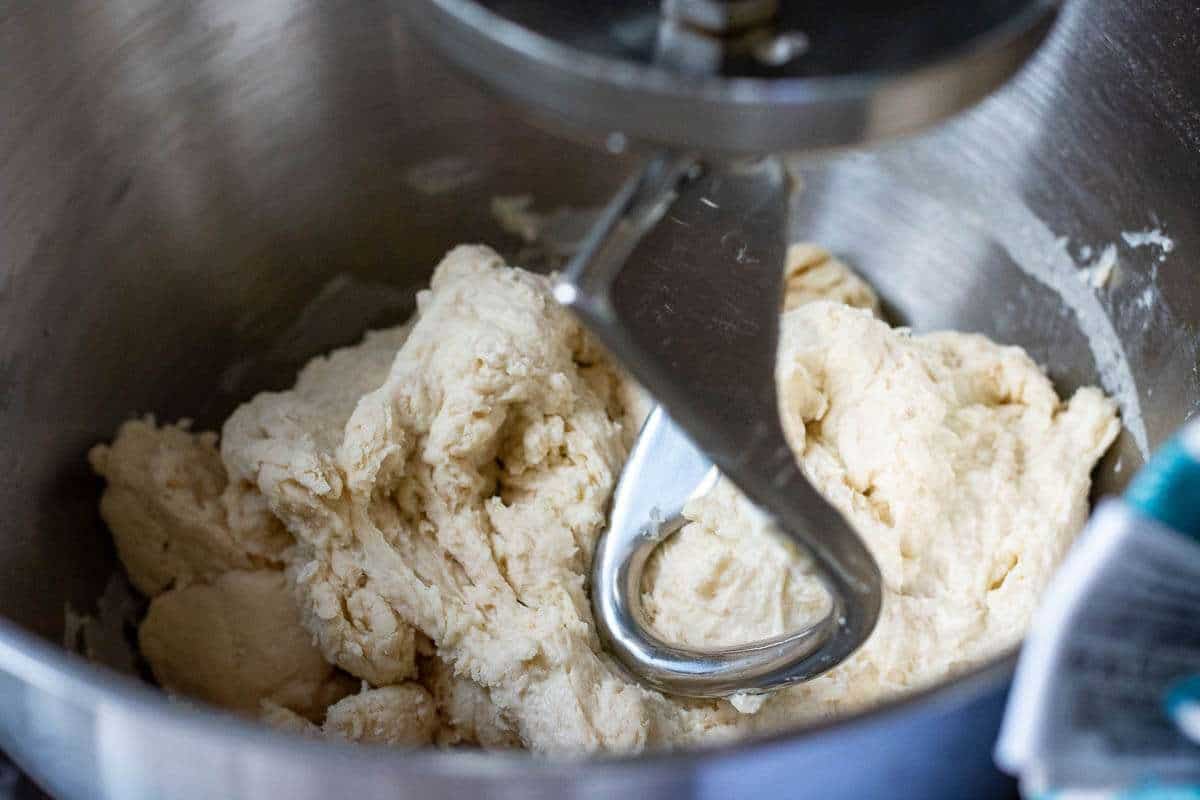
- Before your starter reaches its peak, start the sourdough autolyse. In a bowl of your stand mixer, combine the flour and water into a dry-ish shaggy dough. Simply run the mixer for 1-2 minutes, then cover the bowl with a damp towel and leave the flour to hydrate for 30-60 minutes.
Mixing The Dough
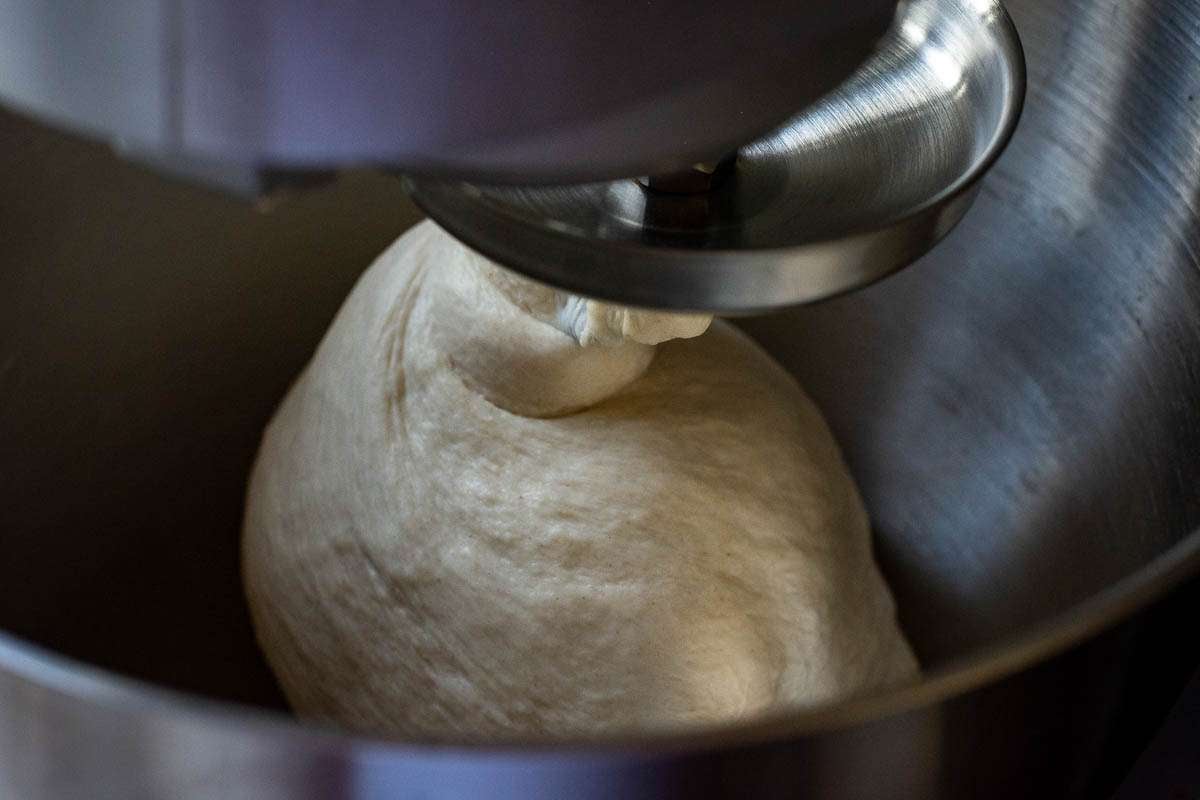
- Sprinkle salt and sugar over the hydrated flour and add the active starter to the shaggy dough mixture. Run the stand mixer for 10-15 minutes until your dough is smooth and elastic. It does not need to pass the windowpane test just yet (the gluten will continue developing when we fold the dough during the bulk fermentation period).
Bulk Fermentation and Coil Folds
- Scoop the dough into a large bowl, cover with a damp kitchen towel or plastic wrap (a.k.a. cling film) and leave it in a warm place (21-27°C) for 30 minutes.
- After 30 minutes, with cold wet hands, perform the first set of coil folds (or a set of stretch and folds, if that's what you're used to). Simply lift the bread dough with both hands from the sides and tuck it under to form a coil. Rotate the bowl a quarter turn and coil again. Cover the bowl again, and let the dough rest for 30 minutes again.
- Repeat the coil folds three more times. After the third coil fold, your dough should feel a lot less sticky and feel strengthened and elastic. This is important for the next step - sourdough lamination!
Laminating The Mix-Ins & Finish Bulk Fermentation
- Wet the surface of a large area of the kitchen surface (you can spray it or simply use your hands to make the surfaces wet). Scoop the dough out onto a wet surface and stretch it out as much as you can without tearing it.
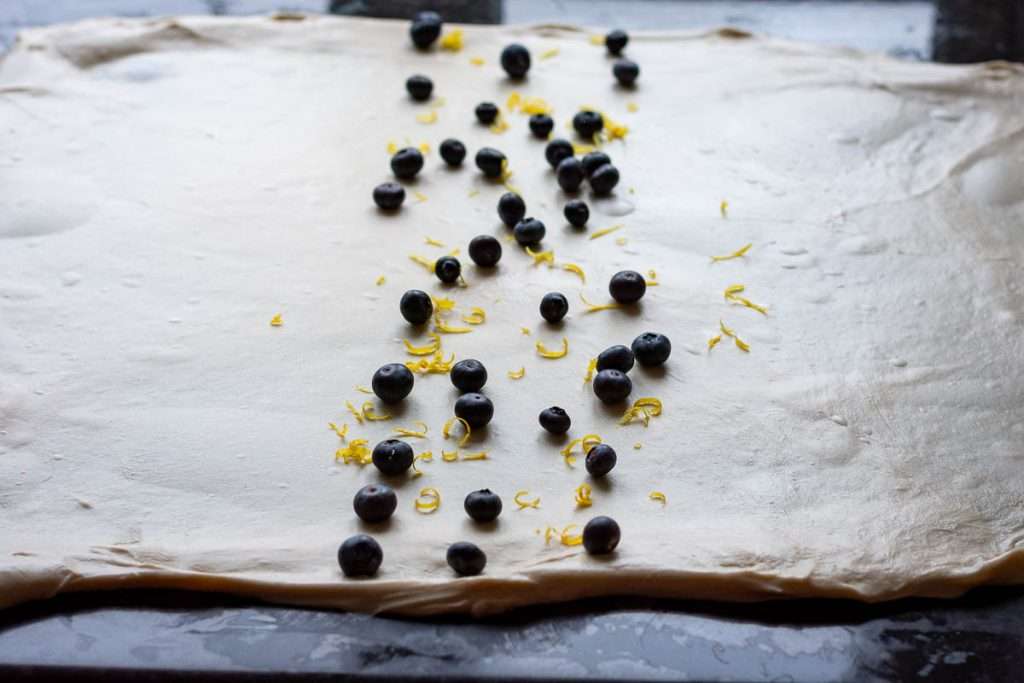
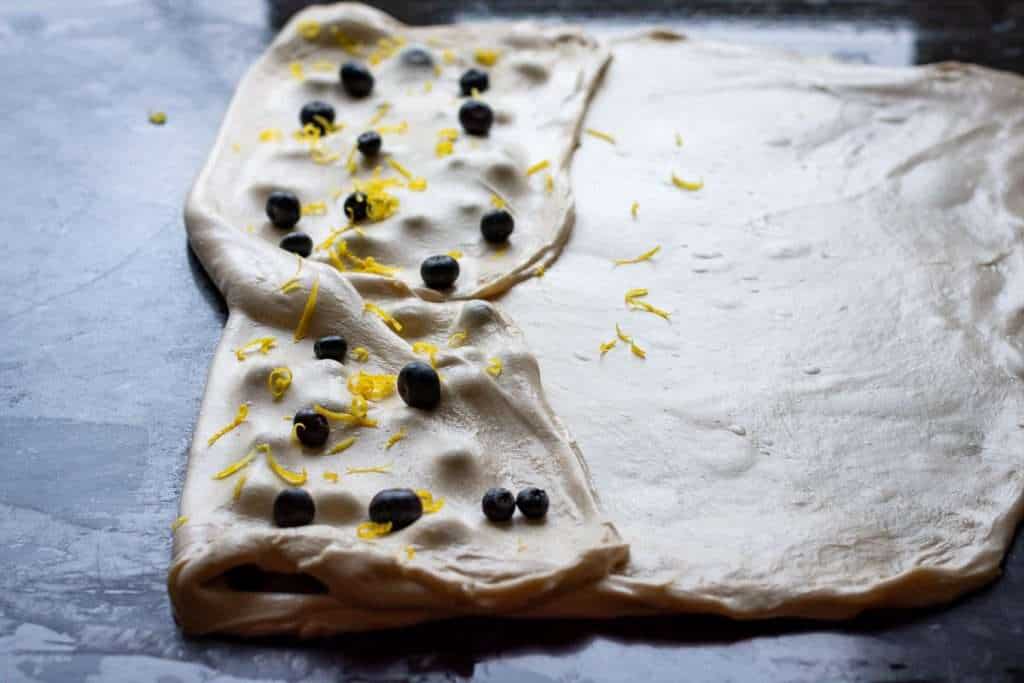
- Scatter ⅓ of blueberries and ⅓ of fresh lemon zest all over the middle section of the dough. Then fold one side over the mix-ins. Scatter another ⅓ on top of the folded-over area and fold the other side over. This should look like a large dough pamphlet at this stage.
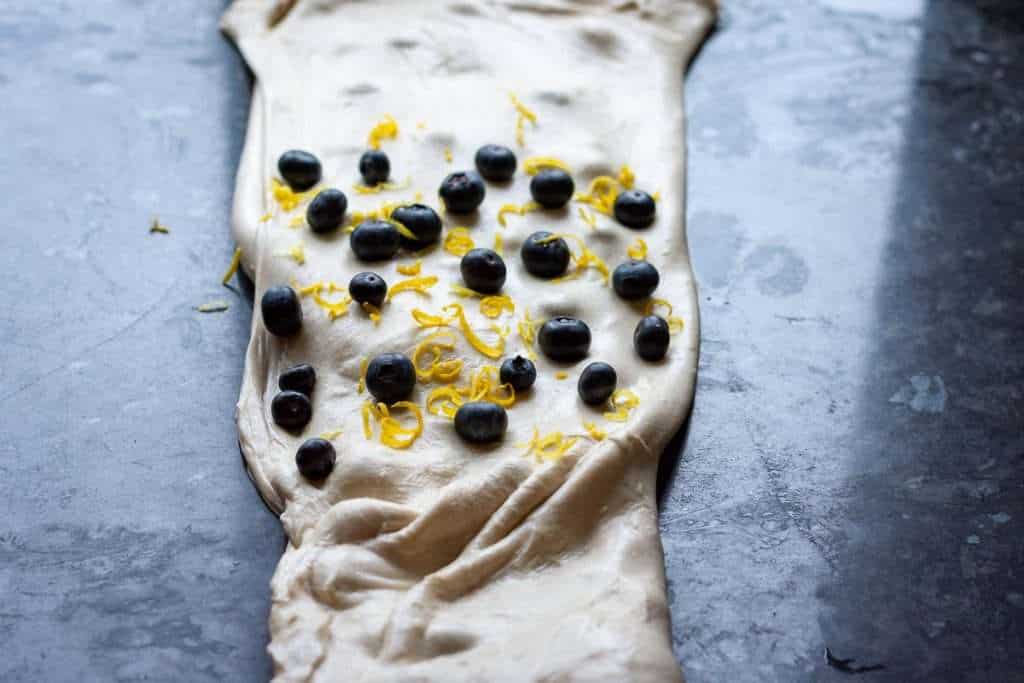
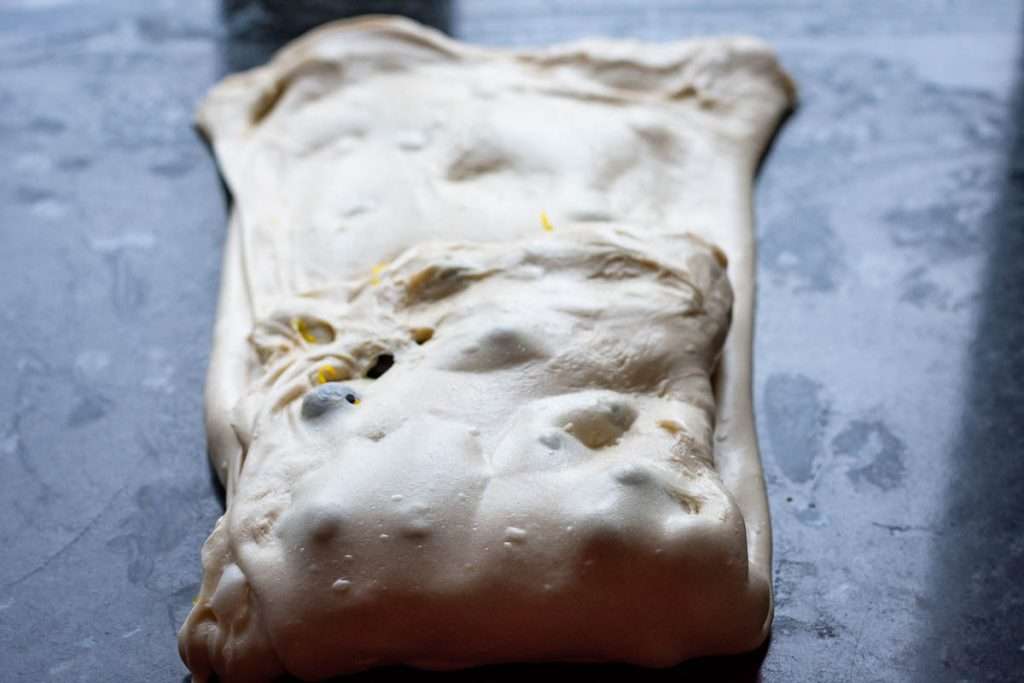
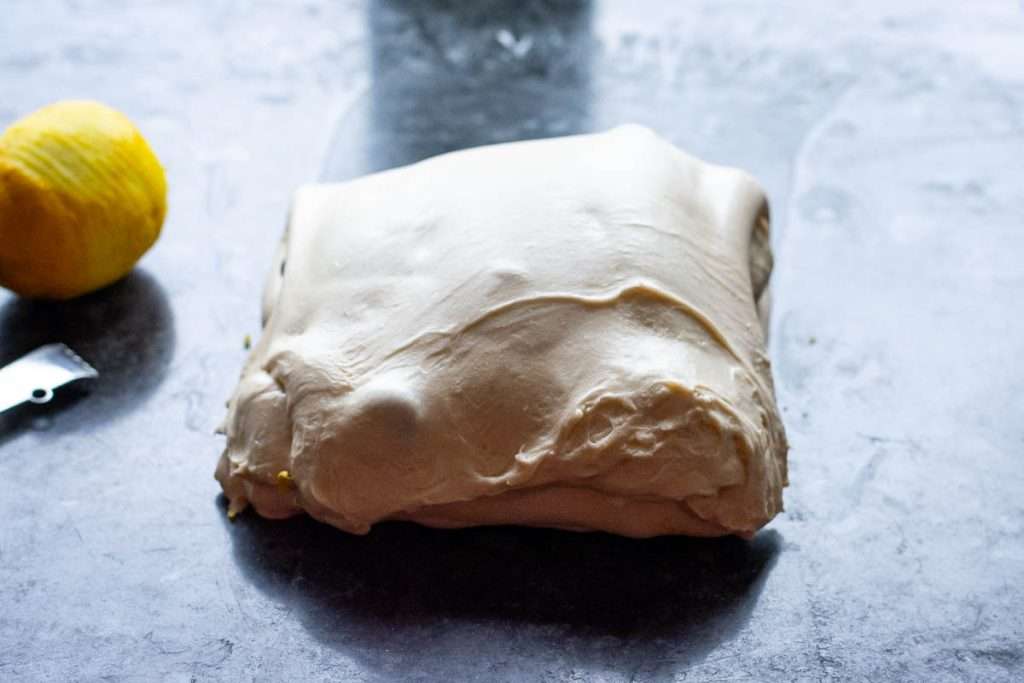
- Scatter half of the remaining mix-ins in the centre of the pamphlet, then fold the top over. Finally, scatter the remaining mix-ins over the folded-over bit, and fold the bottom over. Please refer to the photos below for a better explanation. You should now be left with a parcel of laminated sourdough.
- Place the dough into the mixing bowl you used before, cover and let the dough rise for 1-3 hours. Watch the dough, as bulk fermentation will be quicker due to added sugar. Note that the time required will depend on your kitchen temperature and activity levels in your sourdough starter.

Shaping and Cold Retardation
- At the end of bulk fermentation, using a bowl scraper scoop the dough onto a lightly floured surface. Try and make sure that the smooth top of the dough (the side that is not intact with the bowl) is placed on the floured work surface. Then swiftly fold the four corners of the dough into the centre and flip the dough over.
- With your bench scraper held at a shallow angle to the work surface, push the dough while using your hand to tuck it under itself, creating tension. This fluid circular motion involves pushing and gently rounding with the bench knife, while your free hand continues the rounding motion, tucking the dough slightly under itself. It takes some practice, but you should aim for a tight round ball of dough that holds its shape and doesn't spread much.
- Place the dough ball into a well-floured banneton basket (or any proofing basket alternatives). We recommend using rice flour for dusting your proofing baskets. The smooth side of the sourdough ball should be at the bottom, with the seam side up.
- Pinch the seam together with your fingers, if the dough starts spreading in the bowl to make sure the dough is tight. Sprinkle with some flour, and cover the dough with a clean fabric napkin or small lightweight tea towel.
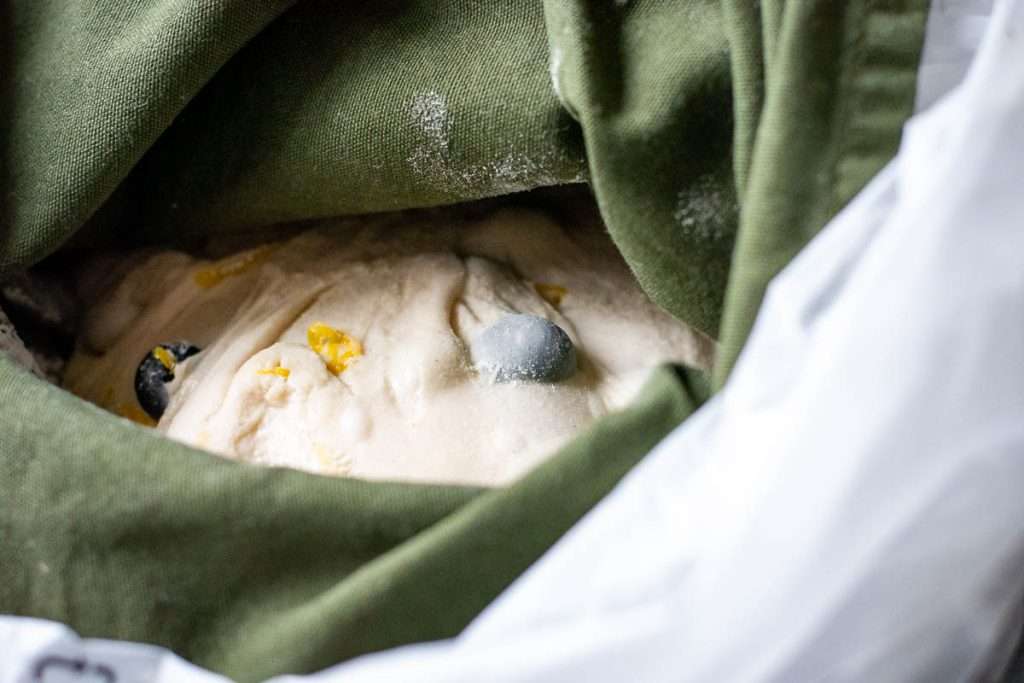
- Place the proofing basket in a large plastic bag - it will protect the dough from drying out. Then place the whole thing in the fridge for its final rise (a.k.a. second rise or cold proof) in the fridge for 12-36 hours.
DAY 2
Scoring The Sourdough
- The next day, place the Dutch Oven in the oven, and preheat it to 240°C (typically, it is the highest temperature home ovens will go to) with the Dutch oven in it. It needs to be piping hot!
- Once the oven is hot, take the dough out of the fridge and out of the bag.
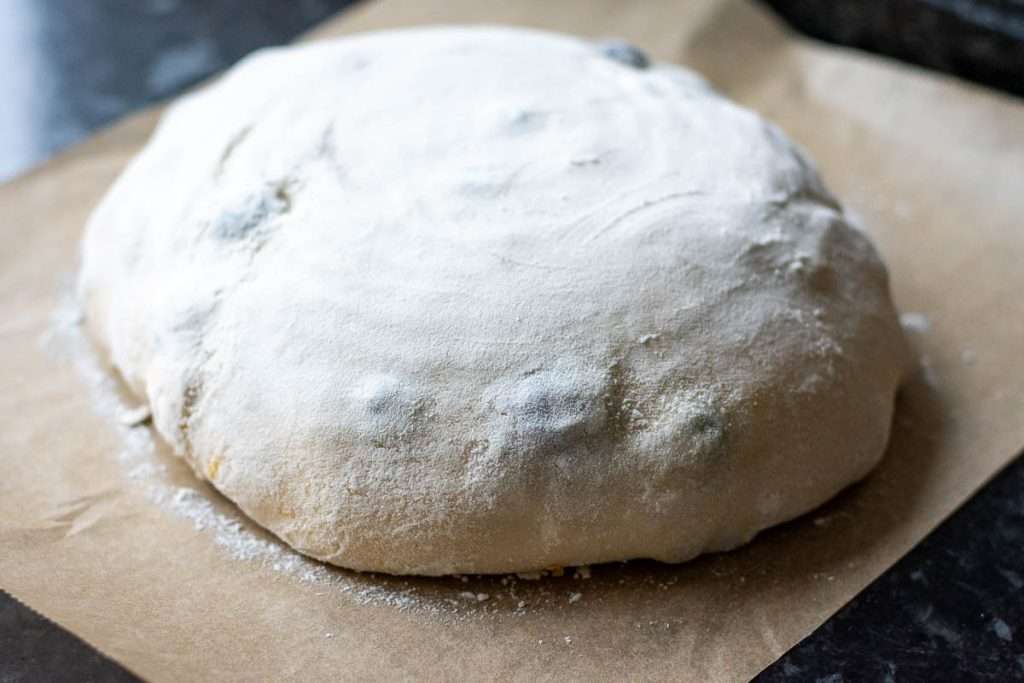
- Invert the dough gently onto a large piece of parchment paper. If your dough was properly bulk fermented and shaped correctly, it should not spread once inverted.
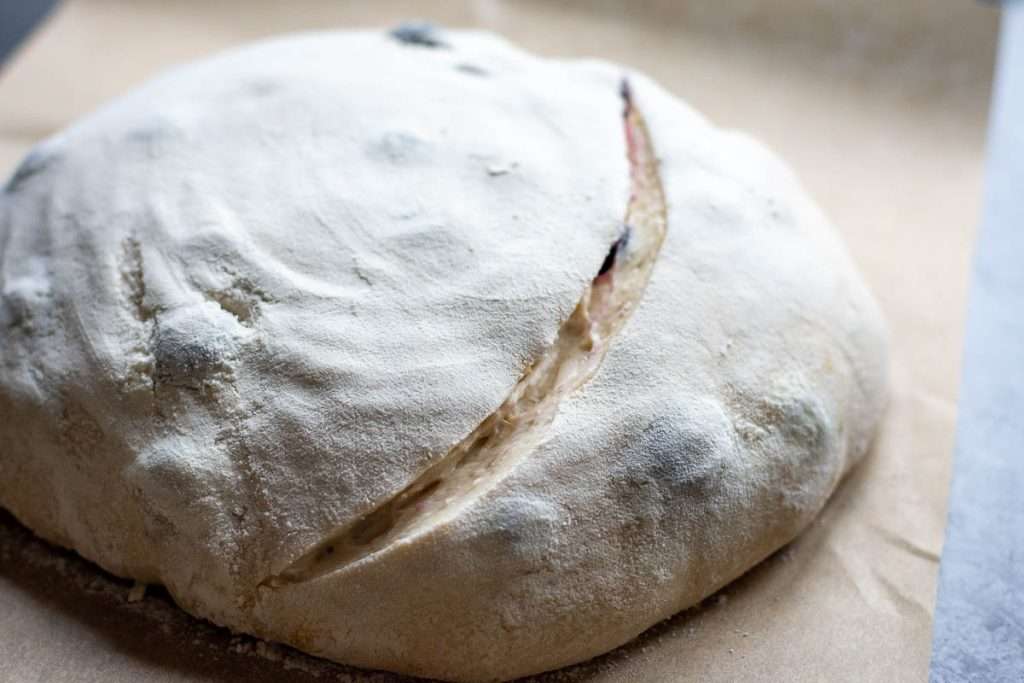
- Dust the surface of the dough with flour. Using a bread lame or a razor blade, score the dough deeply (approximately 1cm deep) at a 30- 45º angle. One single deep slash is all that's needed for that sought-after sourdough "ear".
Baking and Cooling
- Take the hot Dutch Oven out of the oven, take the lid off, and lift the sourdough into it, holding the edges of the parchment paper. Be mindful of how you lift the paper. Sometimes, the scored slash can begin to close up during this process. To prevent this, lift the parchment from the sides that won't push the two edges of the scored dough back together.
- Place the lid back on the Dutch Oven and place the bread into the hot oven for 30 minutes.
- After 30 minutes, take the lid off, reduce the oven temperature to 200 C and return the sourdough to the oven for another 20 minutes to turn golden brown.
- Once baked, take the Dutch Oven out of the oven. Lift the bread out by holding the corners of the parchment paper. Place the bread onto the wire rack, and slide the parchment paper from underneath the loaf.
- Leave the sourdough to cool down to room temperature before slicing.


How To Serve Lemon Blueberry Sourdough Bread?
This bread is bursting with sweet blueberries and zesty lemon, so you will often catch me just munching on a slice of bread with butter on it.
However, a perfect way to turn it into a dessert is to spread it with a thick layer of cream cheese or ricotta for a creamy contrast and drizzle a little honey over the top. Or serve it with lemon curd for an afternoon snack!
Storage
To keep your sourdough blueberry bread fresh, store it in an airtight container or bread bin at room temperature for up to 3 days. For longer storage, freezing is a great way to preserve it-either as a whole loaf or pre-sliced for convenience. Simply warp the loaf (or slices) in plastic wrap and place it in a ziplock bag to prevent freezer burn.
If the bread starts to go a little stale, don't toss it! Cut off the crusts and use the soft interior to whip up the most delicious French toast. For the best results, serve it warm with a drizzle of maple syrup or a dollop of lemon curd.
Recipe FAQs
Acidic ingredients like lemon juice or citric acid can affect your dough in subtle ways. Small amounts (e.g., 1 tbsp) can add a nice tang to your bread without significantly impacting fermentation. But too much acidity can deflate the dough and inhibit yeast activity, resulting in a slower rise and potentially dense bread.
Yes! But you will have to add more water, as dried blueberries will absorb a lot of moisture from the dough. Alternatively, soak the blueberries overnight, then drain, and add the to the dough.
Whilst your blueberry sourdough will taste just as delicious, lack of gluten will make it harder to shape and it may not hold its shape as well resulting in less oven spring.
More Sourdough Recipes With Inclusions
In love with homemade sourdough bread? Us too! If you've had enough of your classic sourdough bread, try some of our favourite sourdough recipes with inclusions, like our new Pistachio & Chocolate Chip Sourdough Bread.





Lemon Blueberry Sourdough Bread
Equipment
- Dough Scraper
- Proofing Basket
- Razor Blade or Bread Lame
Ingredients
- 400 g strong white bread flour with at least 12.5% protein content
- 1 teaspoon salt
- 1 tablespoon caster sugar
- 240 ml water
- 160 g active sourdough starter 100% hydration
- 150 g fresh blueberries
- zest of 2 lemons
Instructions
DAY 1
- First thing in the morning, feed the sourdough starter and leave it in a warm place (ideally between 21-27°C), loosely covered, for 4 hours. The starter should double in size by then. If it doesn't, it might need a few more good feedings to be ready.
Autolyse
- Before your starter reaches its peak, start the autolyse. In a bowl of your stand mixer, combine the flour and water into a dry-ish shaggy dough. Simply run the mixer for 1-2 minutes, then cover the bowl with a damp towel and leave the flour to hydrate for 30-60 minutes.
Mixing The Dough
- Sprinkle salt and sugar over the hydrated flour and add the active sourdough starter to the shaggy dough mixture. Run the stand mixer for 10-15 minutes until your dough is smooth and elastic. It does not need to pass the windowpane test just yet (the gluten will continue developing when we fold the dough during the bulk fermentation period).
Bulk Fermentation and Coil Folds
- Scoop the dough into a large bowl, cover with a damp kitchen towel or plastic wrap (a.k.a. cling film) and leave it in a warm place (21-27°C) for 30 minutes.
- After 30 minutes, with cold wet hands, perform the first set of coil folds. Simply lift the bread dough with both hands from the sides and tuck it under to form a coil. Rotate the bowl a quarter turn and coil again. Cover the bowl again, and let the dough rest for 30 minutes again.
- Repeat the coil folds three more times. After the third coil fold, your dough should feel a lot less sticky and feel strengthened and elastic. This is important for the next step - lamination!
Laminating The Mix-Ins & Finish Bulk Fermentation
- Wet the surface of a large area of the kitchen surface (you can spray it or simply use your hands to make the surfaces wet). Scoop the dough out onto a wet surface and stretch it out as much as you can without tearing it.
- Scatter ⅓ of blueberries and ⅓ of lemon zest all over the middle section of the dough. Then fold one side over the mix-ins. Scatter another ⅓ on top of the folded-over area and fold the other side over. This should look like a large dough pamphlet at this stage.
- Scatter half of the remaining mix-ins in the centre of the pamphlet, then fold the top over. Finally, scatter the remaining mix-ins over the folded-over bit, and fold the bottom over. Please refer to the photos below for a better explanation. You should now be left with a parcel of laminated sourdough.
- Place the dough into the mixing bowl you used before, cover and let the dough rise for 1-3 hours. Watch the dough, as bulk fermentation will be quicker due to added sugar.
Shaping and Cold Retardation
- At the end of bulk fermentation, using a bowl scraper scoop the dough onto a lightly floured surface. Try and make sure that the smooth top of the dough (the side that is not intact with the bowl) is placed on the floured work surface. Then swiftly fold the four corners of the dough into the centre and flip the dough over.
- With your bench scraper held at a shallow angle to the work surface, push the dough while using your hand to tuck it under itself, creating tension. This fluid circular motion involves pushing and gently rounding with the bench knife, while your free hand continues the rounding motion, tucking the dough slightly under itself. It takes some practice, but you should aim for a tight round ball of dough that holds its shape and doesn't spread much.
- Place the dough ball into a well-floured banneton basket (or any proofing basket alternatives). We recommend using rice flour for dusting your proofing baskets. The smooth side of the sourdough ball should be at the bottom, with the seam side up.
- Pinch the seam together with your fingers, if the dough starts spreading in the bowl to make sure the dough is tight. Sprinkle with some flour, and cover the dough with a clean fabric napkin or small lightweight tea towel.
- Place the proofing basket in a large plastic bag - it will protect the dough from drying out. Then place the whole thing in the fridge for its final rise (a.k.a. second rise) in the fridge for 12-36 hours.
DAY 2
Scoring The Sourdough
- The next day, place the Dutch Oven in the oven, and preheat it to 240°C (typically, it is the highest temperature home ovens will go to) with the Dutch oven in it. It needs to be piping hot!
- Once the oven is hot, take the dough out of the fridge and out of the bag.
- Invert the dough gently onto a large sheet of parchment paper. If your dough was properly bulk fermented and shaped correctly, it should not spread once inverted.
- Dust the surface of the dough with flour. Using a bread lame or a razor blade, score the dough deeply (approximately 1cm deep) at a 30- 45º angle. One single deep slash is all that's needed for that sought-after sourdough "ear".
Baking and Cooling
- Take the hot Dutch Oven out of the oven, take the lid off, and lift the sourdough into it, holding the edges of the parchment paper. Be mindful of how you lift the paper. Sometimes, the scored slash can begin to close up during this process. To prevent this, lift the parchment from the sides that won't push the two edges of the scored dough back together.
- Place the lid back on the Dutch Oven and place the bread into the hot oven for 30 minutes.
- After 30 minutes, take the lid off, reduce the oven temperature to 200 C and return the sourdough to the oven for another 20 minutes to turn golden brown.
- Once baked, take the Dutch Oven out of the oven. Lift the bread out by holding the corners of the parchment paper. Place the bread onto the wire rack, and slide the parchment paper from underneath the loaf.
- Leave the sourdough to cool down to room temperature before slicing.
Nutrition




Paula says
I can't get over how gorgeous this lemon blueberry sourdough is! The colors are so vibrant and of course, it was extra tasty!
Ieva Greber says
Thank you so much for giving this recipe a go! We cannot get enough of it now that the weather is getting warm! 🙂
Andrea Russell says
Did you use room temp blueberries or straight from fridge?
Rani says
Lemon blueberry sourdough bread is delicious I have already made once, going to make it again.
Criss says
Tried this lemon blueberry sourdough bread and it turned out so good—zesty, slightly sweet, and perfect for breakfast or a snack with a bit of butter. Definitely baking it again soon!
Ieva Greber says
Thank you so much, Criss! It's such a good loaf for spring and summer! 🙂
Matt says
This loaf turned out beautifully! The balance of tangy lemon and sweet blueberries makes each slice a delightful treat.
Swathi says
This one of the favorite combo. I have tried it too. your recipe is perfect and make delicious loaf.
Lathiya says
I love the lemon and blueberry combination. This bread is so light and airy with the freshness of citrus.
Cindy Seither says
New to making sourdough. How many grams of starter do you feed and how much do you feed it to get 160 grams of starter for the recipe??
Ieva Greber says
If you are feeding in the ratio of 1 part starter : 1 part flour : 1 part water, then you will need at least 55g of each (5 grams will be left over (or stuck to spoons and bowls :)) This should double within 4-5 hours at room temperature.
Andrea Russell says
Do you think instead of sugar or regular sugary syrup… one could use swerve and sugar free syrup????
Ieva Greber says
Hi Andrea, whilst I haven't used it myself, having done a little research online, I see no issue with using an alternative sweetener. It may not speed up the fermentation in the same way sugar does, but it should work 🙂
Andrea Russell says
Thank you so much for your reply! How about the berries, should they be straight from the fridge or room temp?
Ieva Greber says
It won't make much of a difference! Blueberries straight from the fridge will cool the dough slightly as you laminate so it may take 10-15 minutes longer for bulk fermentation to finish, but I personally never worry about it too much. The important thing with blueberries is to keep them whole and not mush them into the dough as you laminate. Hope this helps 🙂
Carolyn Jovetic says
Can you use frozen blueberries in this recipe? if so, how does it effect the process. Can't wait to try this! Thanks,
Ieva Greber says
Thank you — I’m so glad you’re excited to try it 😊
I wouldn’t really recommend using frozen blueberries in this recipe. If added frozen, they’ll cool the dough down, which can significantly slow bulk fermentation. As they thaw, they also release a lot of juice, making the dough very sticky and the hydration uneven. Thawing them first doesn’t help much either — once added, the dough tends to turn wet and messy and becomes tricky to handle.
If frozen blueberries are your only option, the best workaround is to thaw them fully, pat them dry, and laminate them into the dough right at shaping, after bulk fermentation has finished. That keeps the structure intact and avoids most of the chaos.
Fresh blueberries really do give the cleanest, most predictable result here 🍋🫐
Devon says
I’m in the process of mixing this up right now! Can I bake it right after the first rise or do you recommend doing the second rise in the refrigerator? I’m hoping to give this as gifts tomorrow!
Ieva Greber says
I'd recommend to shape and place it in the fridge for at least 4-6 hours for better flavour. Cold dough will also be so much easier to score. Hope this helps 🙂
Jonique Blount says
Overall it came out wonderful but the final rise in the fridge completely stopped my dough from fermenting. It was in the fridge for 36 hours and did not move. I took it out and put it on the counter and within a couple of hours it rose properly. This was the first time I’ve seen a sourdough recipe require the final rise to be in the refrigerator.
Ieva Greber says
Thank you so much for your feedback, and I’m really glad the bread came out well in the end!
A fridge proof, or cold retard, is actually very common in sourdough baking, but the dough doesn’t usually rise much in the fridge — especially if your fridge runs quite cold. The main purpose of that final fridge rest is to slow fermentation right down, develop flavour, and make the dough easier to score and bake. It’s not meant to rise in the same way it would at room temperature.
That said, if the dough hadn’t quite finished its bulk fermentation before going into the fridge, it can seem like everything has completely stopped. In that case, letting it sit at room temperature afterwards, like you did, was exactly the right move. The dough simply needed a little more time somewhere warmer to finish proofing.
For this recipe, the most important thing is to make sure the dough has risen enough and feels airy before shaping and refrigerating. Fridge temperatures, starter strength, flour, and room temperature can all make a big difference — sourdough likes to keep us humble!
I’m so pleased you trusted your dough and adjusted as needed. That’s honestly one of the best sourdough skills to have.
Kael says
How can I make this without a dutch oven?
Ieva Greber says
Yes, you can! Transfer scored sourdough on a preheated cast-iron skillet or baking stone. Place an ovenproof dish with water at the bottom of the oven to create steam (to mimic the steam created inside the Dutch oven) and bake for approx 35 minutes at 220 C (425 F). It will brown quickly due to added sugar, so keep an eye on it and cover with foil if needed towards the end of baking. Hope this helps!
Stacy says
This blueberry lemon loaf was my first loaf of sourdough bread that turned out perfect, and tastes amazing. Thank you for A+ easy to follow directions.
Ieva Greber says
This absolutely made my day — thank you so much for taking the time to share! 🥹 I’m especially honoured it was your first successful sourdough loaf… and what a flavour combo to start with! Lemon and blueberry never disappoint.
So glad the instructions worked well for you — that’s always the goal. Happy baking, and welcome to the sourdough obsession (it only gets worse from here in the best way 😄)
Elaine says
I so love this lemon and blueberry bread. It's perfect for warm weather breakfasts or at tea time. I love to toast it and eat with butter. Yum!
Ieva Greber says
The best breakfast! We love it with honey-sweetened cream cheese 🙂
Mia says
This lemon blueberry sourdough bread turned out really soft with a nice balance of tangy lemon and sweet blueberries. I like it sliced up for breakfast or as a snack with a cup of tea.
Ieva Greber says
Thanks so much, Mia! I’m really glad you enjoyed it. I love that balance of lemon and blueberries too, and it makes such a lovely breakfast slice with a cup of tea. Have you tried with with cream cheese? Sooo good!
Kade says
This lemon blueberry sourdough bread is the perfect mix of bright citrus and juicy sweetness. Such a creative way to elevate a classic loaf. I love how it feels both bakery-style and comforting at the same time!
Ieva Greber says
Thank you so much, Kade, for taking the time to leave such a lovely comment! So glad you enjoyed it!
Sandy says
This sounds so fresh and bright with the lemon, blueberries, and tangy sourdough. Such a pretty summer loaf to slice up for breakfast or an afternoon treat!
Ieva Greber says
Oh, this is the perfect summer sourdough! Hope you love it if you give it a try! 🙂
Noura says
I followed the recipe to a T, and the dough is nowhere near resembling dough. It's more like cake batter. I used artisan bread flour that is 13.8% protein. I've never done sourdough where I mixed the flour and water prior to adding the active starter. (the autolyse step?) My starter trippled in 3hrs, so I know my starter is active. I've made 8 other loaves this week. In 3+ years of making sourdough, I've never had this happen. What could the issue be?
Ieva Greber says
Hi Noura, I’m sorry to hear that — and no, that definitely doesn’t sound right for this recipe. The dough should feel fairly low-hydration (it's 67% hydration) and quite manageable, not like cake batter.
The autolyse step itself shouldn’t cause this — at that stage it should be more of a dry-ish, shaggy dough. If it was batter-like right from the start, I’d suspect a mismeasurement somewhere, or possibly a starter that was much thinner than 100% hydration. If the dough started off normal but became loose later, then over-fermentation is more likely, especially with such an active starter and the added sugar from the fruit.
Can I ask at what stage it turned runny — straight after mixing, after bulk fermentation, or after adding the blueberries? That should help narrow it down.
Stacey Rothfarb says
Oh my this bread is amazing!! My husband has NOT stopped talking about it. I do have a few questions. My fresh blueberries rose to the top or dropped to bottom of loaf. I did add everything the way you said during lamination. Would it be better to laminate and spread ingredients out all over and then fold and bulk ferment?
One more question I had to zest 4 lemons to get enough and the flavor was very mild. I would like the flavor of the lemons to come through a little more without adding juice. Do you have a suggestion?
Have you ever done a lemon drizzle on top?
Thanks!!
Ieva Greber says
Hi Stacey, I’m so pleased you both loved it — that has absolutely made my day!
For the blueberries, I’d first try tossing them in a little flour before adding them to the dough. It can help them “grip” slightly better and stay more evenly suspended. Also, when laminating, try to stretch the dough to a fairly even thickness all over — easier said than done, I know! I find my mix-ins tend to gather in one place when the centre is left thicker and the edges get stretched very thin.
You could try adding them earlier, but dough that hasn’t bulk fermented much can be difficult to stretch without tearing unless it’s been mixed very well at the start, ideally to the point where it passes the windowpane test. My only worry would be the blueberries bursting during folds, which could make the dough sticky, wet and a bit of a nightmare to shape.
For more lemon flavour, I’d definitely use a microplane for the zest if you aren’t already — it makes such a difference. You can also rub the lemon zest with a tablespoon of sugar using your fingertips before adding it to the dough. This helps release the citrus oils and gives a stronger lemon flavour. I’d add the zest sugar straight into the dough, then just laminate the blueberries in.
Another thought: a little candied lemon peel or mixed peel folded in with the blueberries could be lovely. I use citrus peel in my lemon sourdough rolls and it adds loads of flavour.
I’ve only done lemon drizzle on my lemon sourdough focaccia, not a crusty loaf, but I’d be very interested to hear how it works if you try it. My only slight concern would be whether it softens the crust too much.
Hope this helps, and I hope your next loaf is even better!