
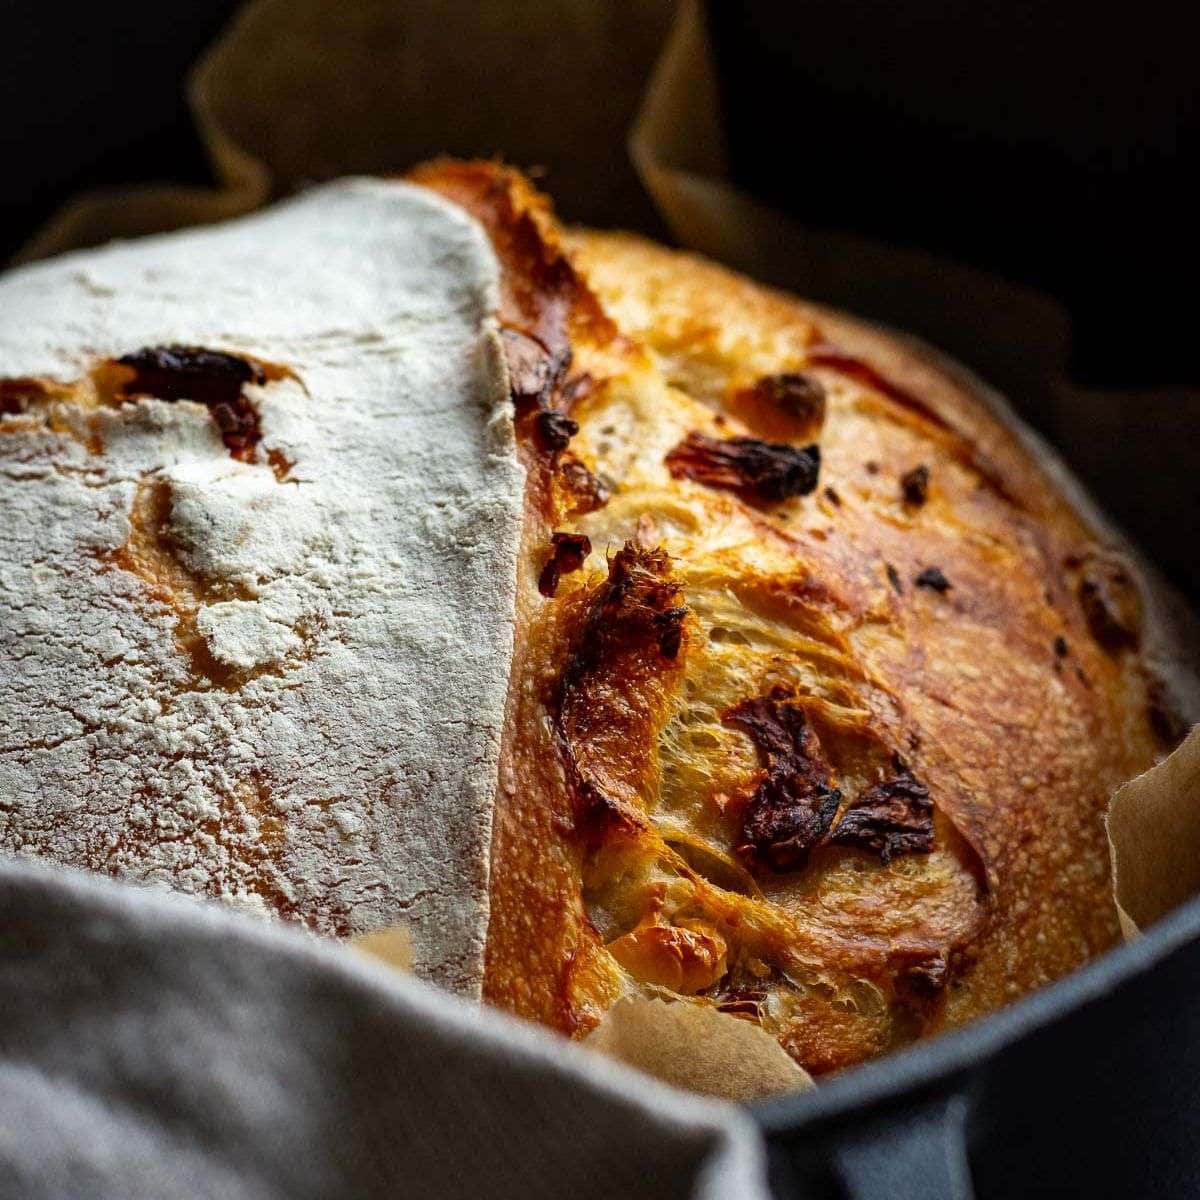
Meet our new favourite bread! This Feta and Sundried Tomato Sourdough is packed with little pops of sweet-tart flavour from the tomatoes, and the creamy feta makes it savoury and so irresistible, that it's hard not to eat an entire loaf in one day. Let's put the wild yeast to work again and make this delicious loaf of bread with sweet tomatoes and salty feta - the flavours that will take you on holiday in Greece!
Jump to:
As an Amazon Associate I earn from qualifying purchases, at no extra cost for you! Thank you!

Recipe Highlights
FLAVOUR: Salty, creamy feta and sweet-tart sun-dried tomatoes against a tangy sourdough crumb. A Greek holiday in loaf form.
TECHNIQUE: The feta and tomatoes are laminated into the dough partway through bulk fermentation, so the mix-ins spread through the whole loaf rather than clumping in one corner.
TIMING: It's a two-day bake with a 12-36 hour cold proof in the fridge, so you can bake it when it suits you.
SEB'S RATING: Would happily eat a quarter of the loaf standing at the worktop, and has.

Ingredient Notes
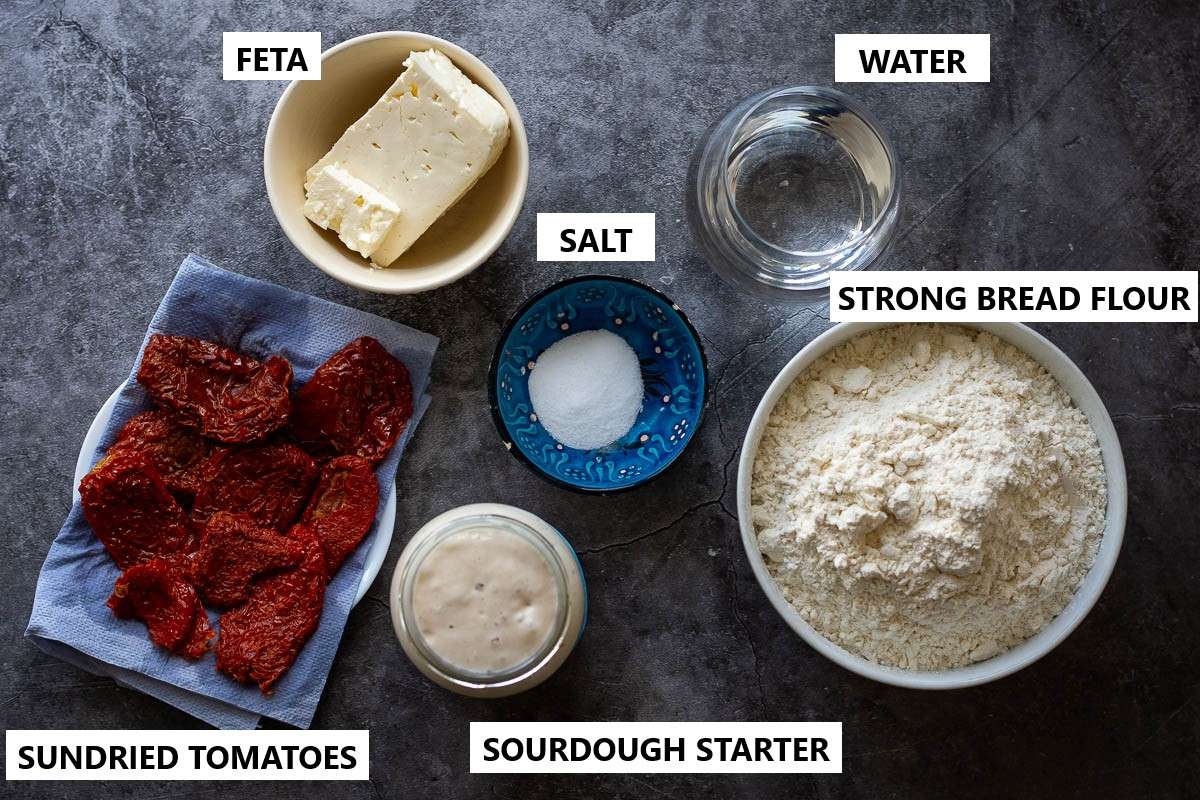
- strong bread flour: ideally, with at least 12% gluten content. We used all strong white bread flour, but you may replace up to 20% of the flour with whole wheat flour. Note though, that it will absorb more water, so increase the amount of water in the dough slightly.
- water: we use tap water, but if you live in an area with highly chlorinated water, use filtered (not distilled) water. Using slightly warm water may speed up the fermentation process.
- salt: we tend to use sea salt, but rock salt will work too.
- active sourdough starter:100% hydration.
- feta cheese: feta can be replaced with many other cheeses, like cubed gruyere, parmesan cheese, cheddar or red Leicester. We love feta in our Greek-themed focaccia too - a must-try Lemon & Feta Sourdough Focaccia!
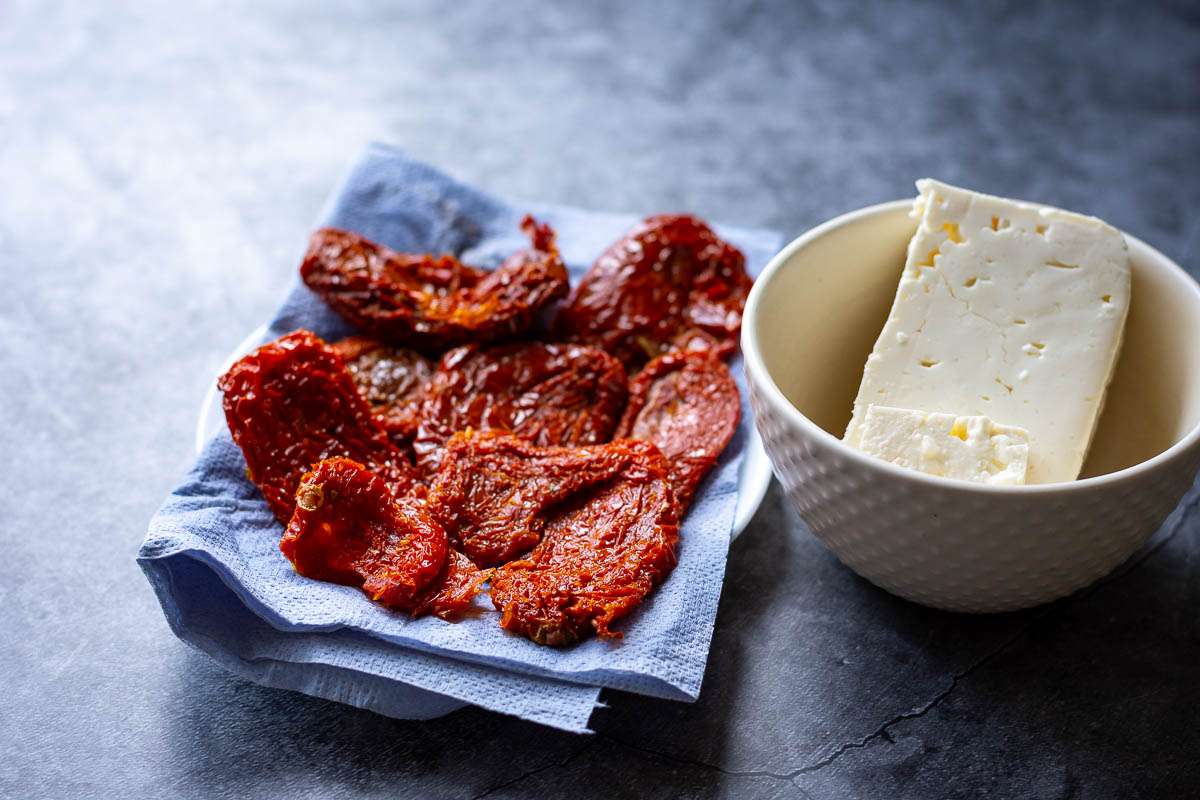
- sun-dried tomatoes: we used sundried tomatoes in olive oil in this recipe. The key is to drain the tomatoes well and dab them with a sheet of paper towel to remove any extra oil before chopping them into small pieces. You may also use rehydrated sundried tomatoes, but ensure to squeeze our extra moisture. If you choose to use sundried tomatoes without rehydrating them first, increase the hydration of the dough by adding an extra 20ml of water, as tomatoes will absorb a lot of moisture, leaving your dough rather dry.
Want a sundried tomato sourdough bread but have not time for a full ferment? Try our Mediterranean Sourdough Courgette Loaf - it's a quick discard-based bread with olives, sundried tomatoes and parmesan!
How Do Feta and Sun-dried Tomatoes Affect The Dough?
Various mix-ins can affect the sourdough in different ways. Specifically, you need to consider how your inclusions affect the hydration and the fermentation of the dough. Feta and sundried tomatoes will not add too much moisture to the dough, so you do not need to adjust the hydration level of the sourdough.
However, you should drain the tomatoes very well, whether you're using tomatoes in oil, or rehydrated sundried tomatoes (you don't want to add too much oil or water). Same, applies to feta, make sure you dab it with kitchen towels to remove excess moisture.
Bulk fermentation may happen slightly quicker due to the sugars in the tomato, but due to the amount added and the fact that they're added midway through the bulk fermentation should not affect the speed of fermentation too much.
One other thing to note is that due to chunky mix-ins, your dough should be handled with more gentle care in order not to pierce and tear the dough when coil folding after the sourdough lamination.
Learn more about sourdough mix ins, in our ebook - Flavoured Sourdough: What, When and How to Add Mix-Ins To Sourdough?

Mix It Up: Turn Your Sourdough into a Flavour Adventure.
Equipment Used
You will need:
- A stand mixer with a dough hook attachment (we use a Kenwood stand mixer)
- Dough Scraper/ Bench Scraper
- Sturdy Parchment Paper (we love Bacofoil Baking Paper)
- Razor blade or bread lame/ dough scorer
- Dutch Oven
- Cooling Rack
Step-By-Step Method
Just like most sourdough bread recipes, this Feta and Sundried Tomato Sourdough Bread is made over two days.
Day 1
Sourdough Starter
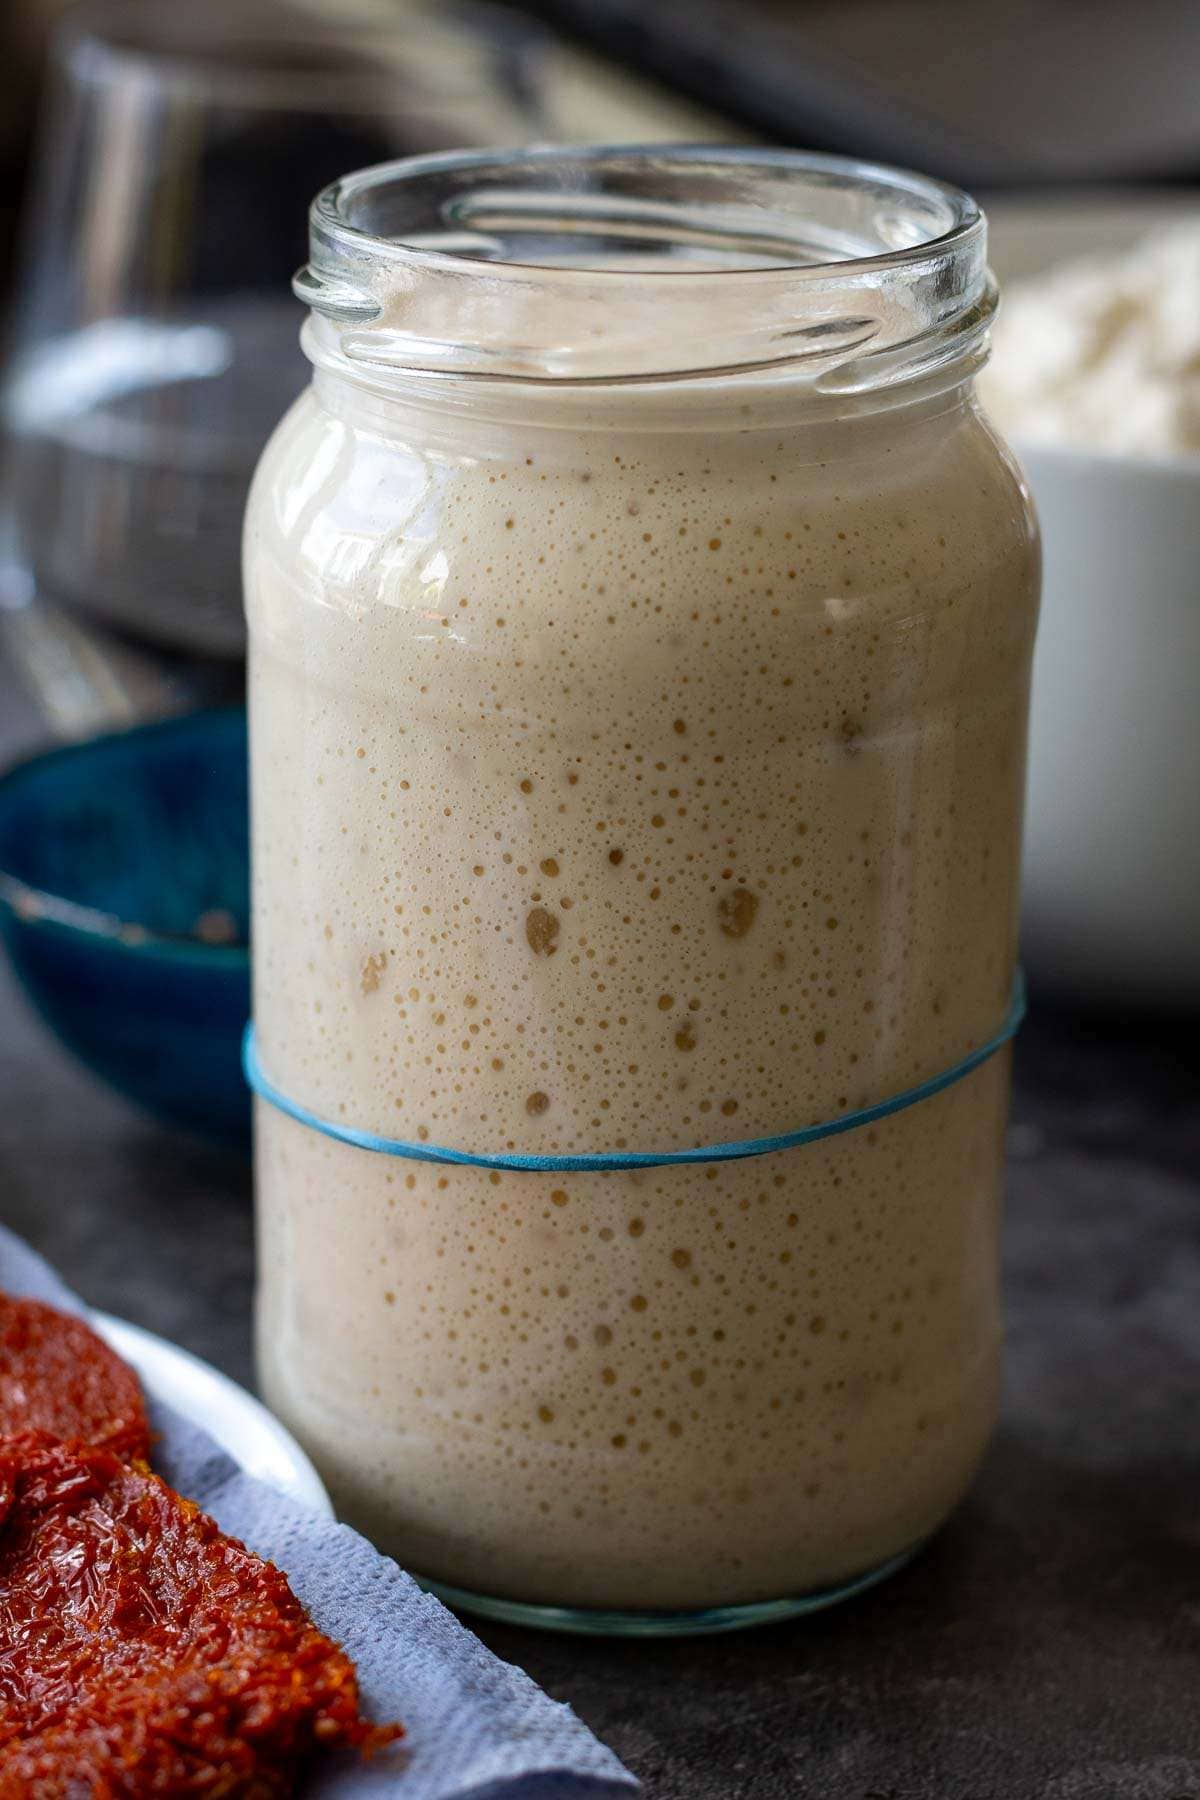
First thing in the morning, feed the sourdough starter and leave it in a warm place (ideally between 21-27°C), loosely covered, for 4 hours. The starter should double in size by then. If it doesn't, it might need a few more good feedings to be ready.
Autolyse
Before your starter reaches its peak, start the autolyse. In a bowl of your stand mixer, you combine the flour and water into a dry-ish shaggy dough. Simply run the mixer for 1-2 minutes, then cover the bowl with a damp towel and leave the flour to hydrate (autolyse) for 30-60 minutes.
Mixing The Dough
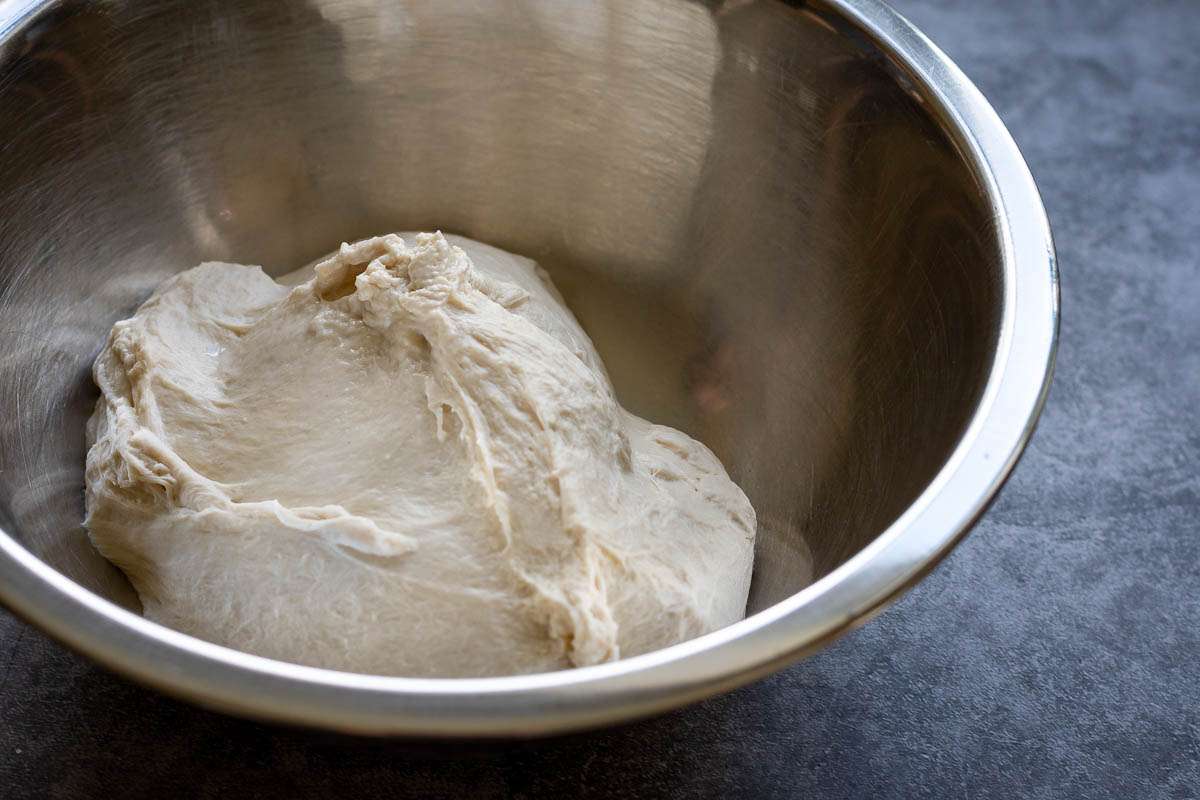
Sprinkle salt over the hydrated flour and add the active sourdough starter to the shaggy dough mixture. Run the stand mixer for 10-15 minutes until your dough is smooth and elastic. It does not need to pass the windowpane test just yet (the gluten will continue developing when we fold the dough during the bulk fermentation period).
Bulk Fermentation and Coil Folds
Scoop the dough into a large bowl, cover with a damp kitchen towel or plastic wrap (a.k.a. cling film) and leave it in a warm place (21-27°C) for 30 minutes.
After 30 minutes, with cold wet hands, perform the first set of coil folds. Simply lift the bread dough with both hands from the sides and tuck it under to form a coil. Rotate the bowl a quarter turn and coil again. Cover the bowl again, and let the dough rest for 30 minutes again.
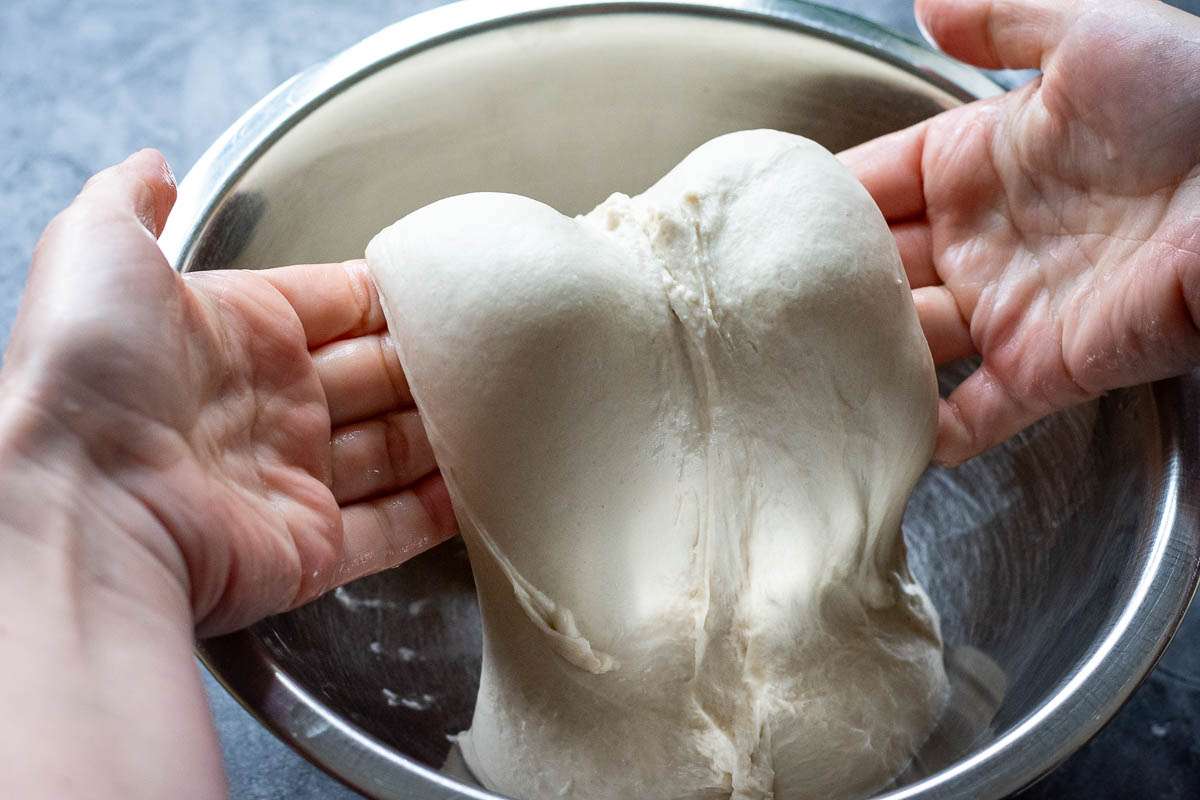
Repeat the coil folds twice more. After the third coil fold, your dough should feel a lot less sticky and feel strengthened and elastic. This is important for the next step - lamination!
Laminating The Mix-Ins and Extra Coil Folds
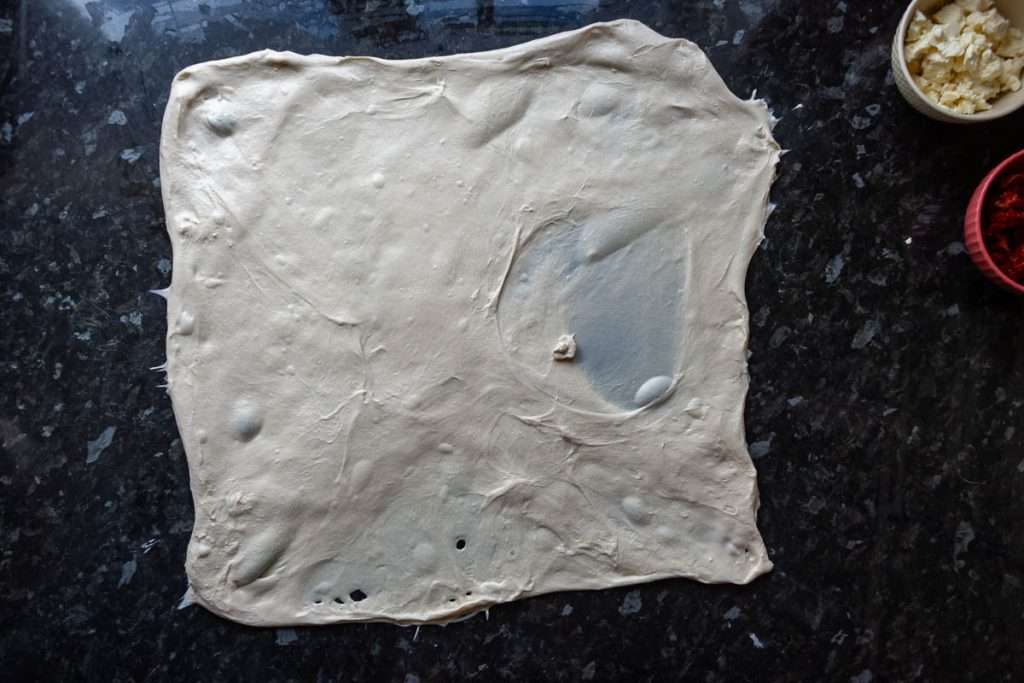
Wet the surface of a large area of the kitchen surface (you can spray it or simply use your hands to make the surfaces wet). Scoop the dough out onto a wet surface and stretch it out as much as you can without tearing it.
Which Sun-Dried Tomatoes Should You Use?
Oil-packed sun-dried tomatoes are what I use for this loaf, but drain them well and pat them dry with kitchen paper before chopping, as you don't want that extra oil ending up in the dough. Dry-packed tomatoes work too: either rehydrate them and squeeze out the excess water, or use them as they are and add an extra 20ml of water to the dough, because they'll soak up moisture and leave it rather dry. Either way, you'll need 90g, chopped into small pieces.
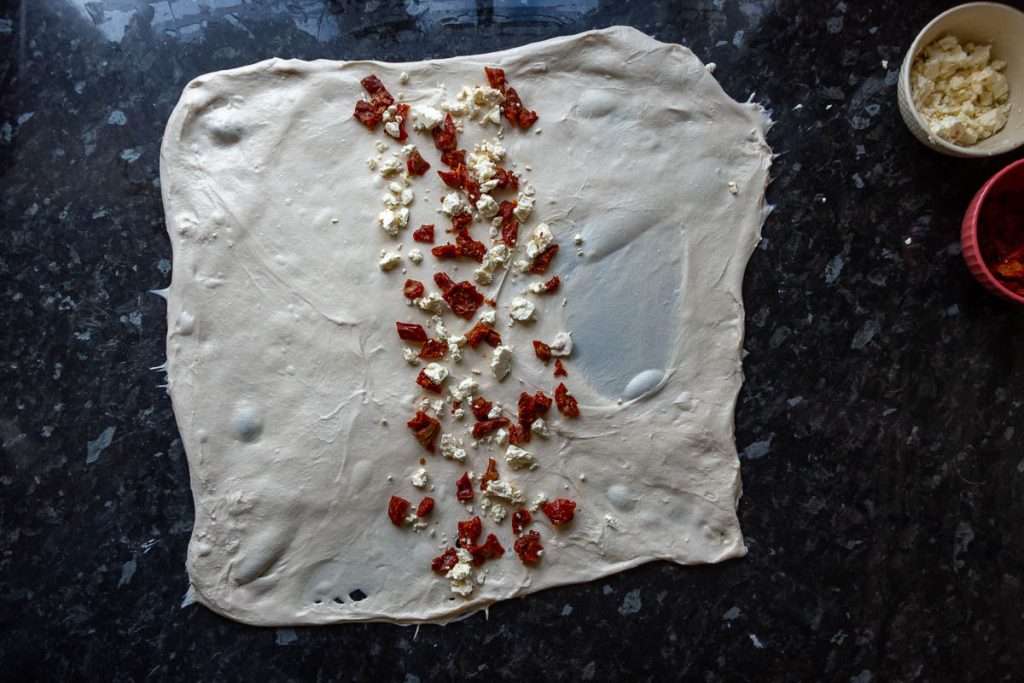
Scatter ⅓ of crumbled feta and ⅓ of sundried tomatoes all over the middle section of the dough. Then fold one side over the mix-ins. Scatter another ⅓ on top of the folded-over area and fold the other side over. This should look like a large dough pamphlet at this stage.
Scatter half of the remaining sourdough inclusions in the centre of the pamphlet, then fold the top over. Finally, scatter the remaining mix-ins over the folded-over bit, and fold the bottom over. Please refer to the photos below for a better explanation. You should now be left with a parcel of laminated sourdough.
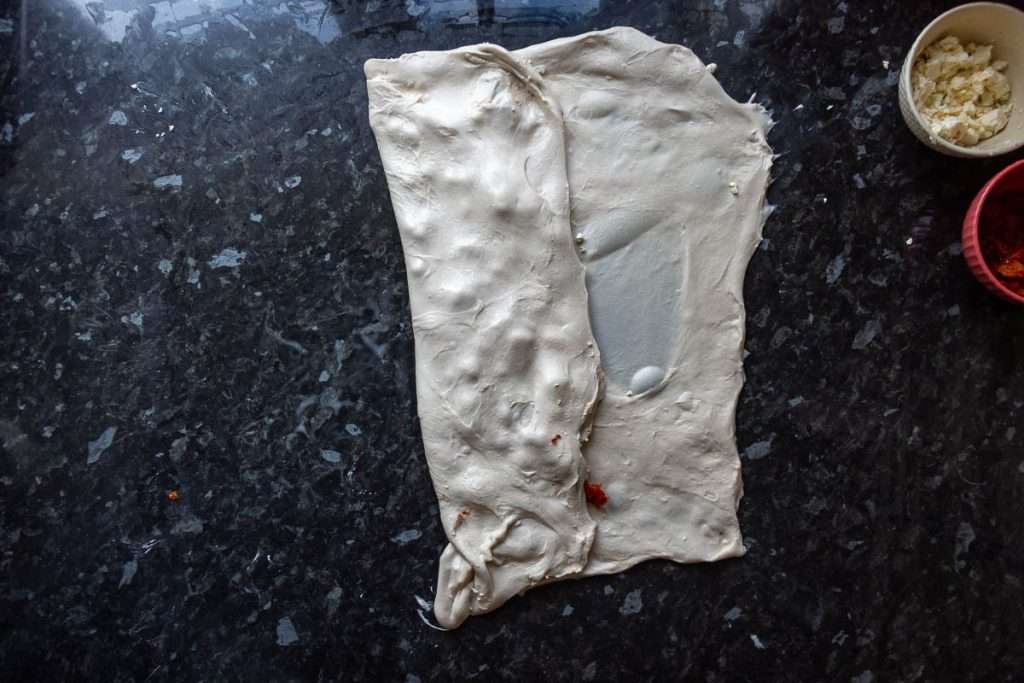
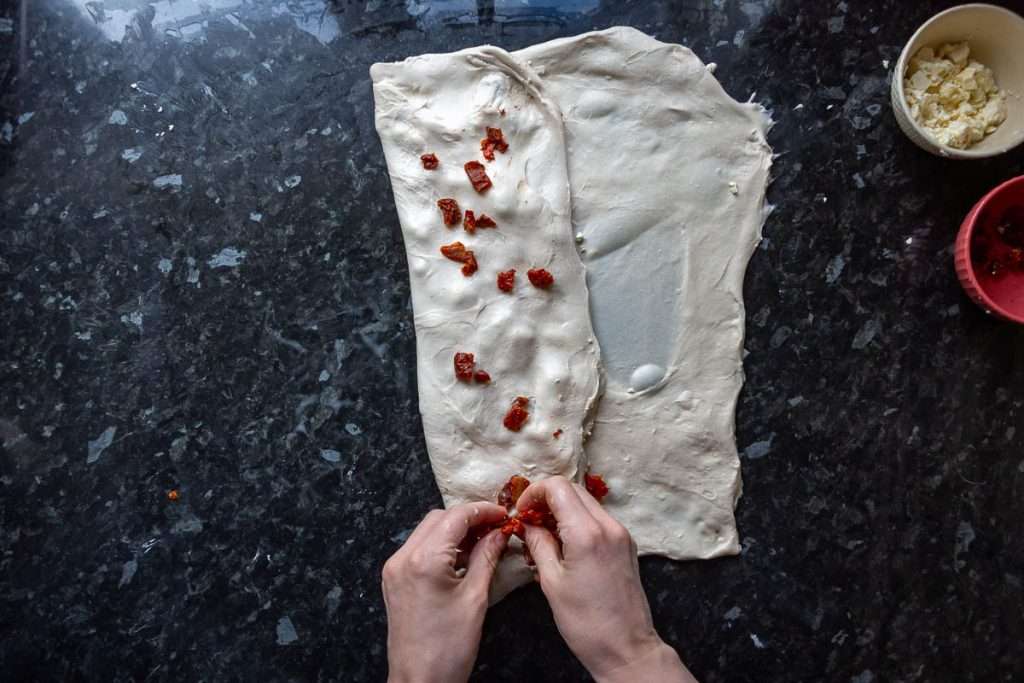
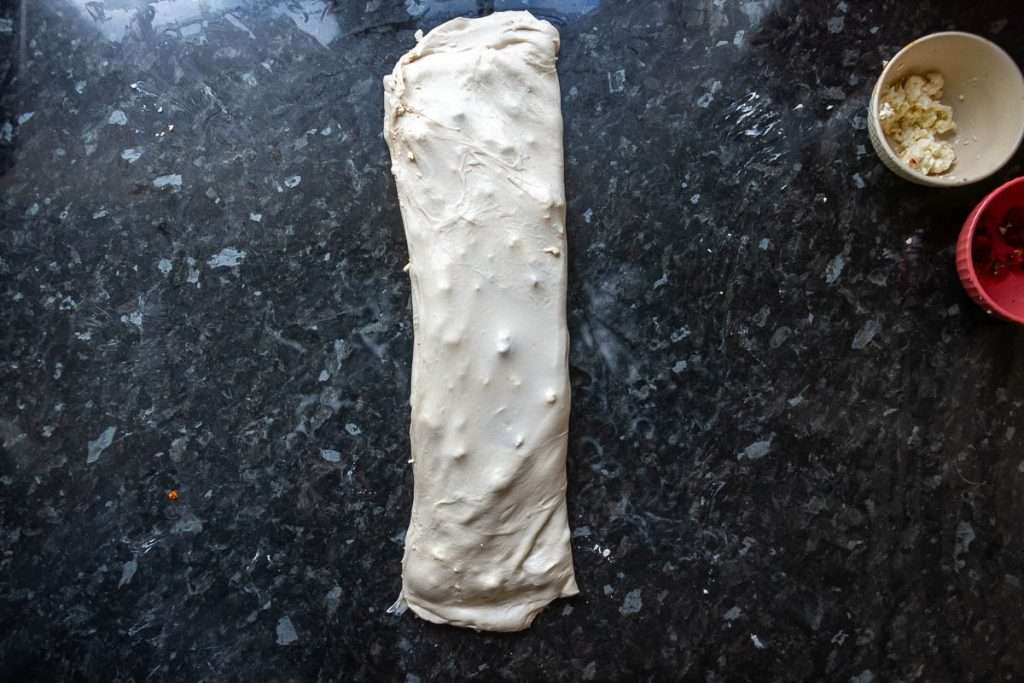
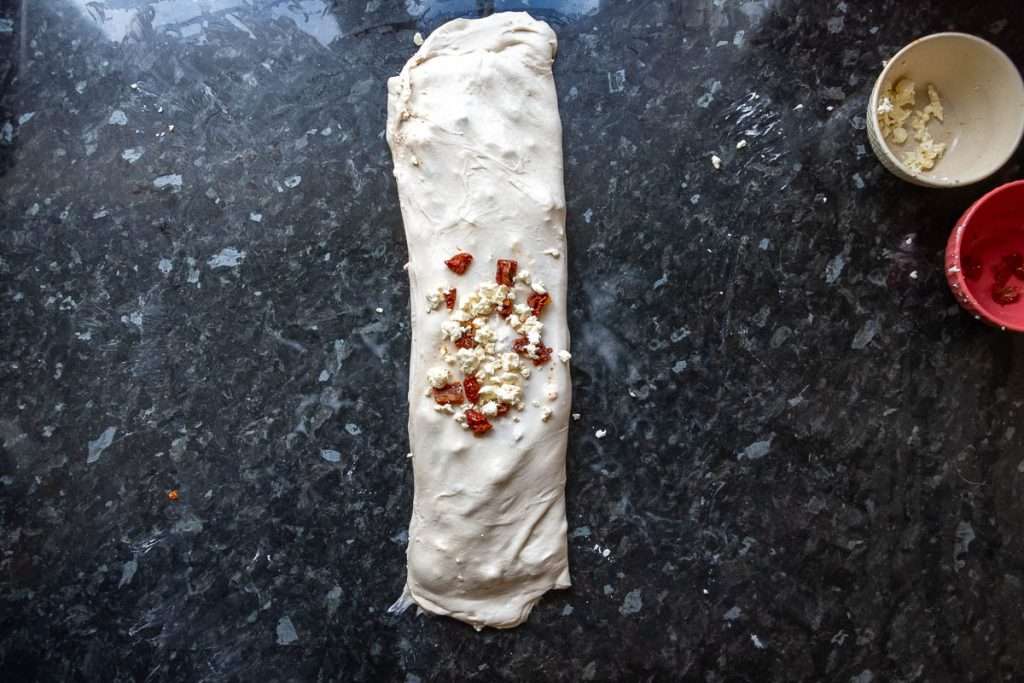
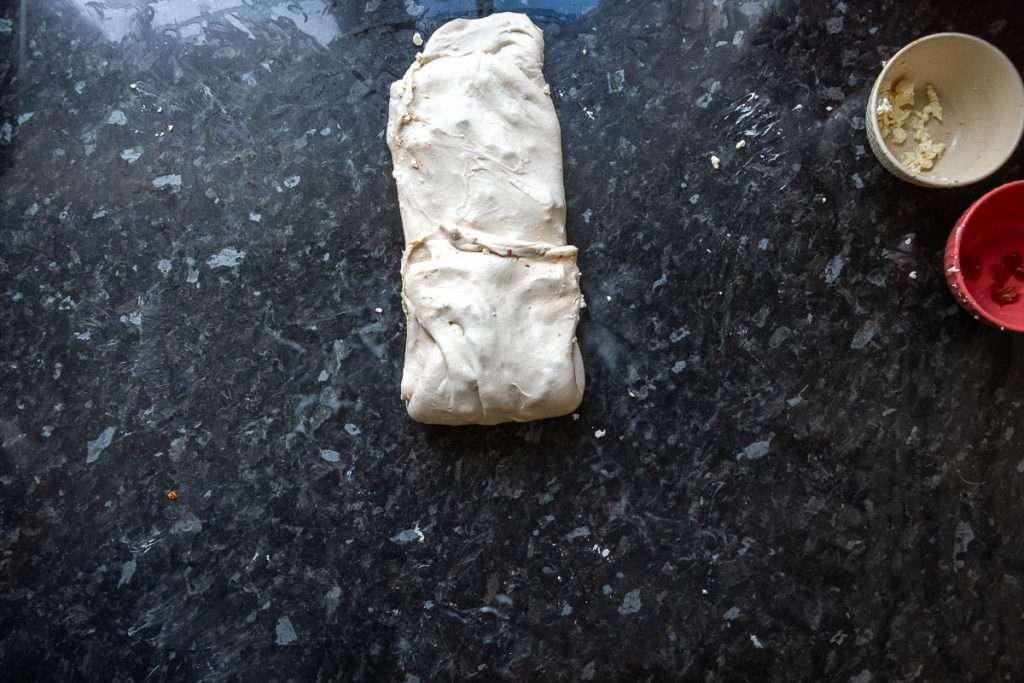
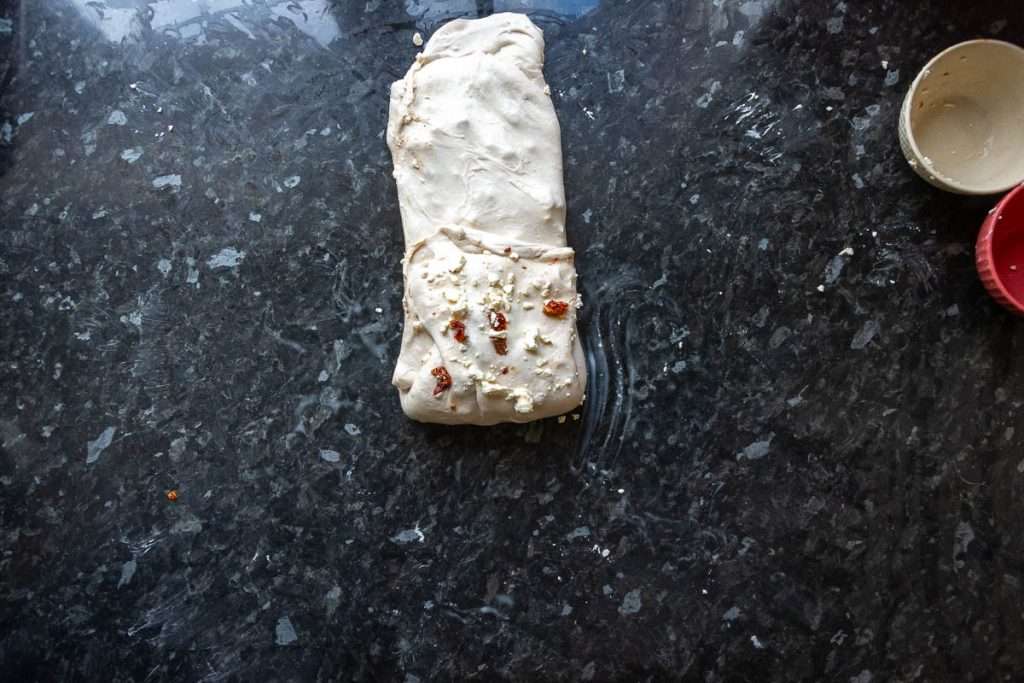
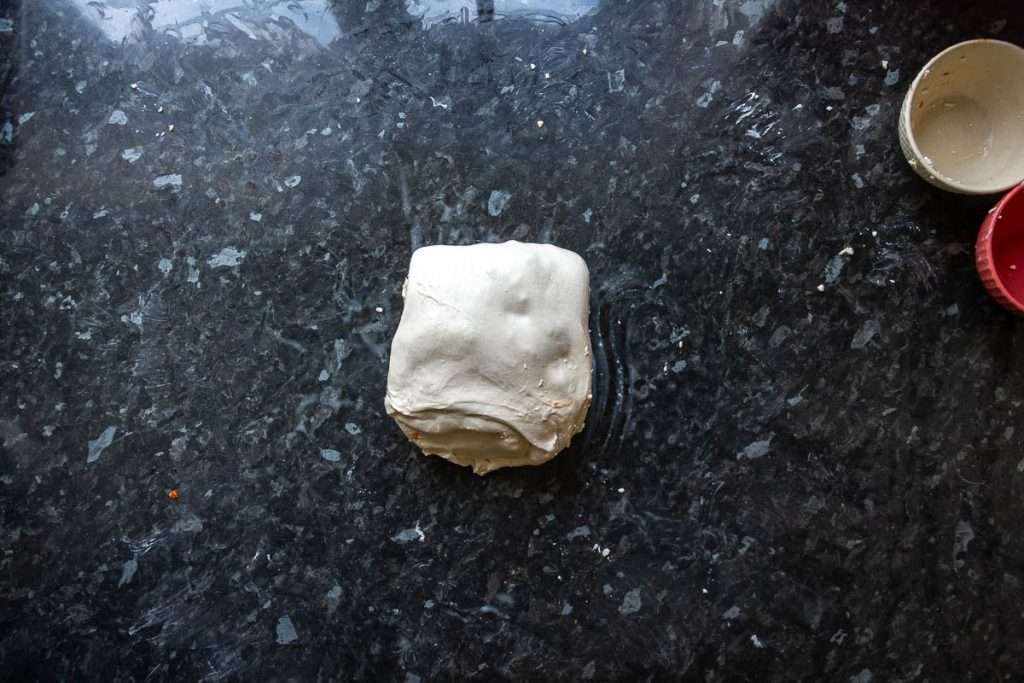
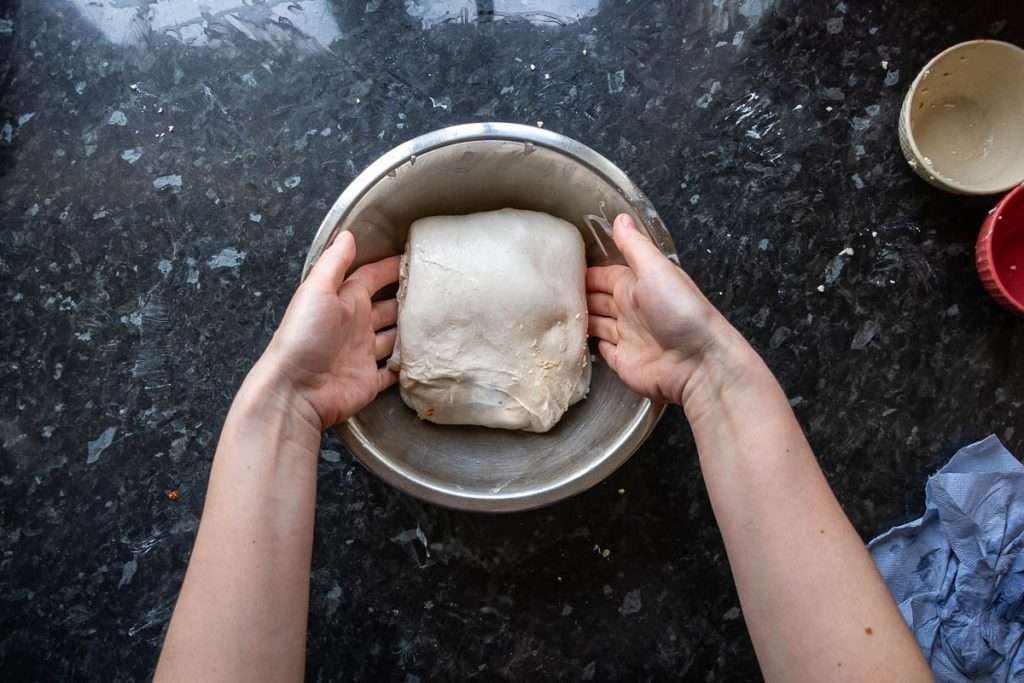
Place the dough into the mixing bowl you used before, cover and let the dough rise for 30 minutes.
At 30-minute intervals, perform 2 more coil folds, being very gentle not to pierce the dough. This will help distribute the mix-ins evenly in the dough.
After two more coil folds, cover the dough well, and leave it to finish its bulk fermentation undisturbed for 2-3 hours. The dough should just about double in size from its original size.
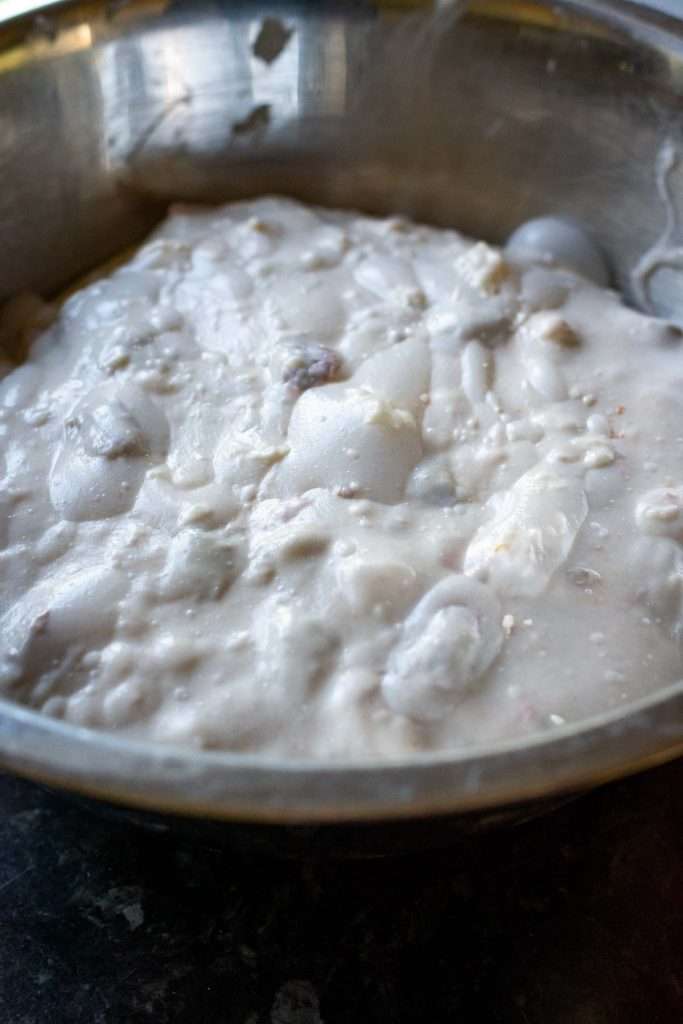
Shaping and Final Proof
At the end of bulk fermentation, using a bowl scraper scoop the dough onto a lightly floured surface. Try and make sure that the smooth top of the dough (the side that is not intact with the bowl) is placed on the floured work surface. Then swiftly fold the four corners of the dough into the centre and flip the dough over.
With your bench scraper held at a shallow angle to the work surface, push the dough while using your hand to tuck it under itself, creating tension. This fluid circular motion involves pushing and gently rounding with the bench knife, while your free hand continues the rounding motion, tucking the dough slightly under itself. It takes some practice, but you should aim for a tight round ball of dough that holds its shape and doesn't spread much.
Place the dough ball into a well-floured banneton basket (or any proofing basket alternatives). We recommend using rice flour for dusting your proofing baskets. The smooth side of the sourdough ball should be at the bottom, with the seam side up.
Pinch the seam together with your fingers, if the dough starts spreading in the bowl to make sure the dough is tight. Sprinkle with some flour, and cover the dough with a clean fabric napkin or small lightweight tea towel.
Place the proofing basket in a large plastic bag - it will protect the dough from drying out. Then place the whole thing in the fridge for its final rise (a.k.a. second rise) in the fridge for 12-36 hours.
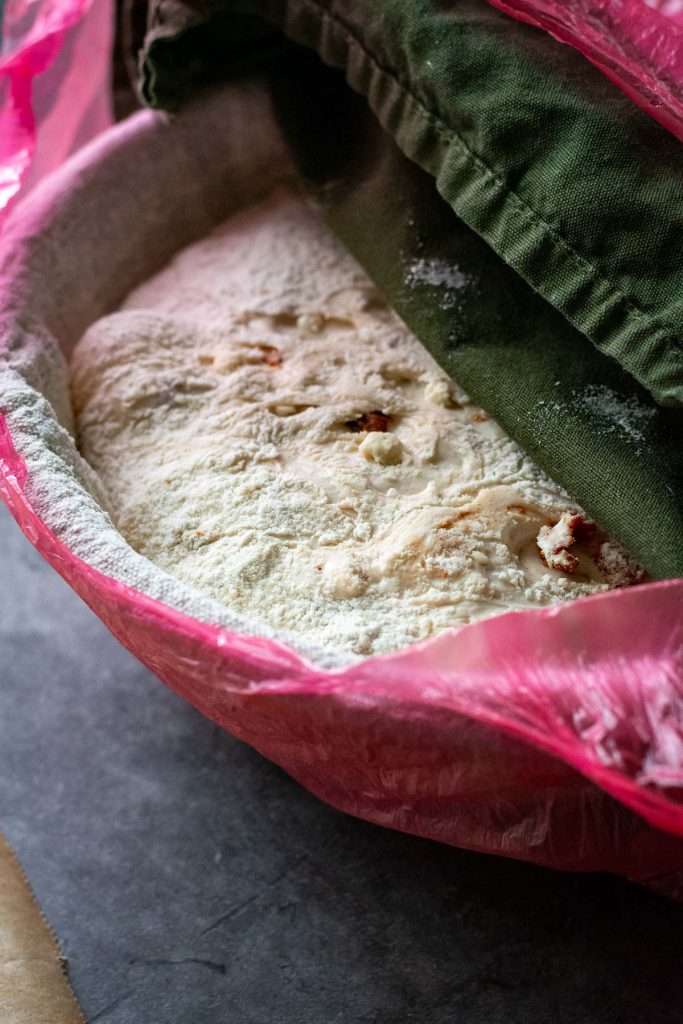
Day 2
Scoring The Sourdough
The next day, place the Dutch Oven in the oven, and preheat it to 240°C (typically, it is the highest temperature home ovens will go to) with the Dutch oven in it. It needs to be piping hot!
Once the oven is hot, take the dough out of the fridge and out of the bag.
Invert the dough gently onto a large sheet of parchment paper. If your dough was properly bulk fermented and shaped correctly, it should not spread once inverted.
Dust the surface of the dough with flour. Using a bread lame or a razor blade, score the dough deeply (approximately 1cm deep) at a 30- 45º angle. One single deep slash is all that's needed for that sought-after sourdough "ear".
Baking and Cooling
Take the hot Dutch Oven out of the oven, take the lid off, and lift the sourdough into it, holding the edges of the parchment paper. Be mindful of how you lift the paper. Sometimes, the scored slash can begin to close up during this process. To prevent this, lift the parchment from the sides that won't push the two edges of the scored dough back together.
Or try baking sourdough in an inverted Dutch Oven.
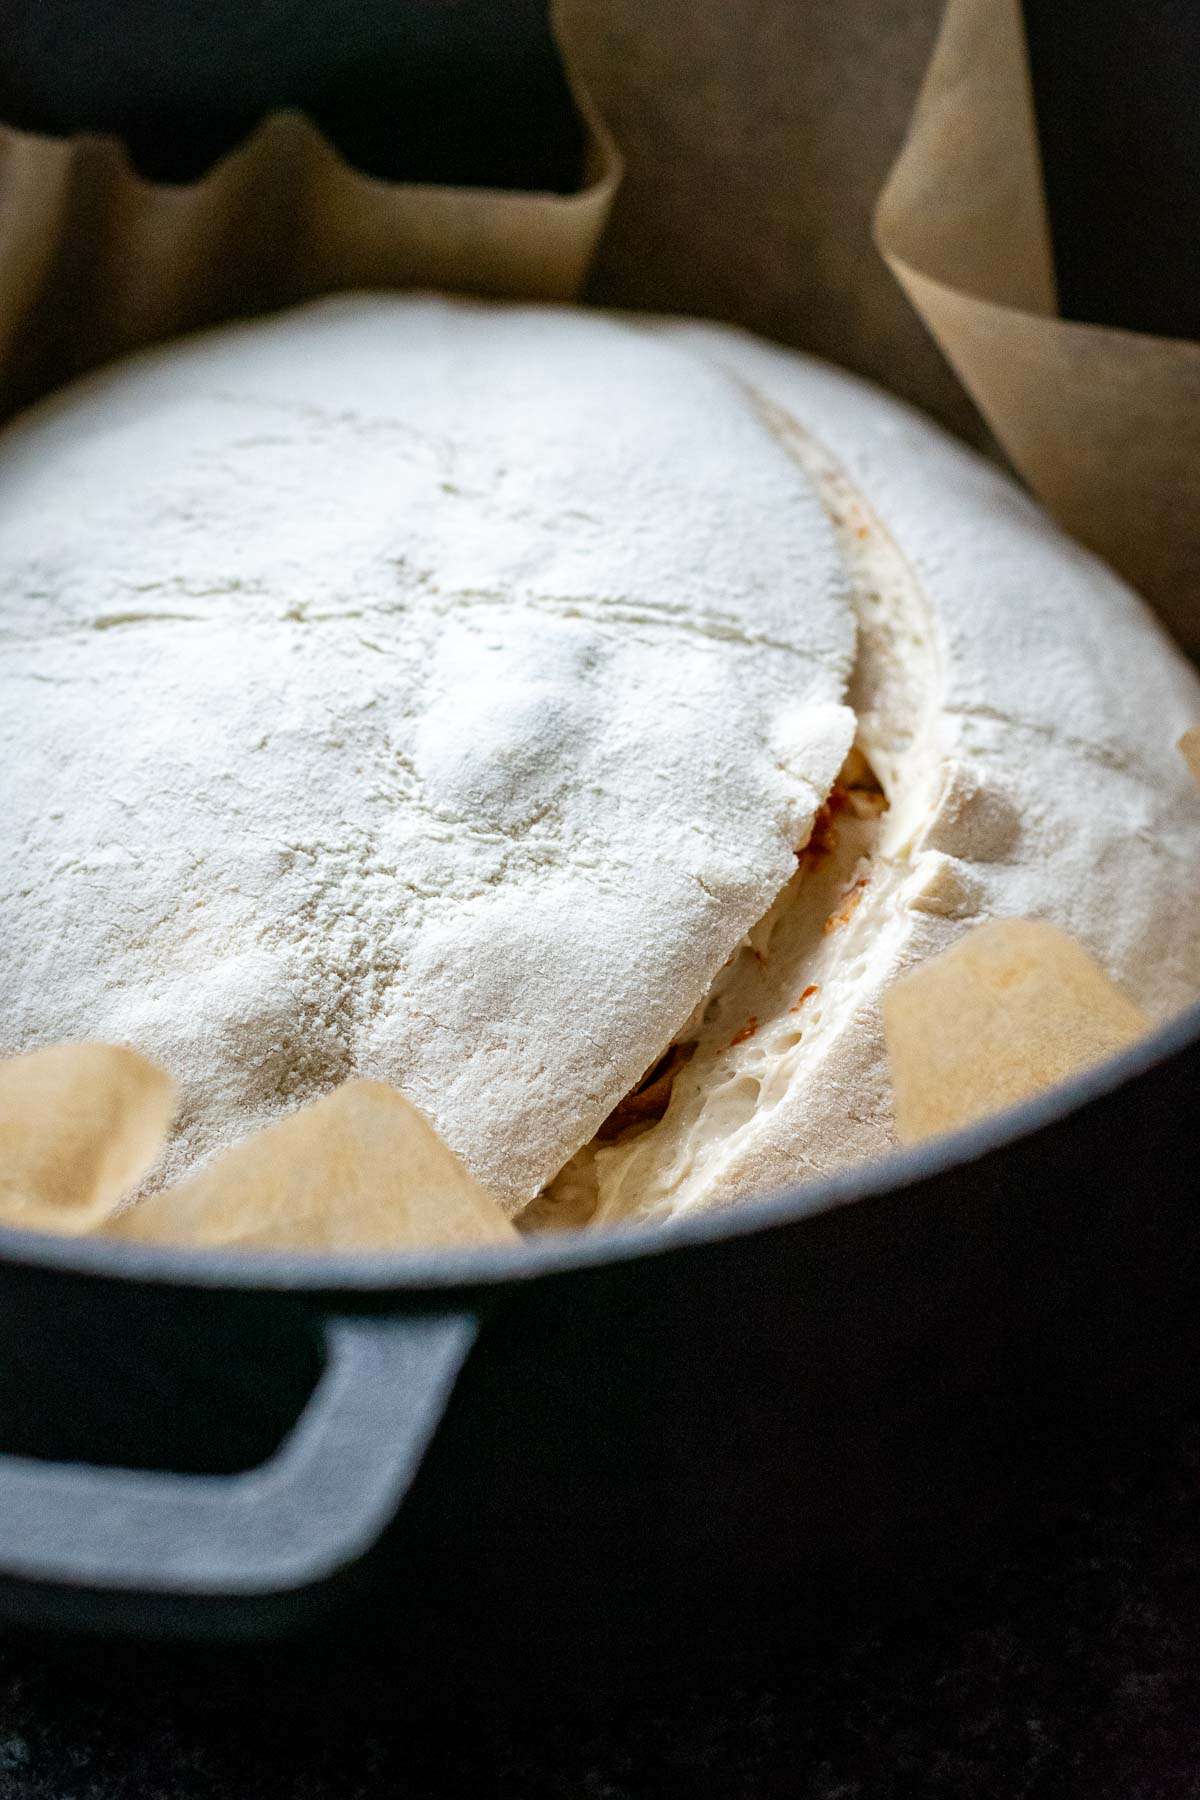
Place the lid back on the Dutch Oven and place the bread into the hot oven for 25 minutes.
After 25 minutes, take the lid off, and return the sourdough to the oven for another 25 minutes to turn golden brown.
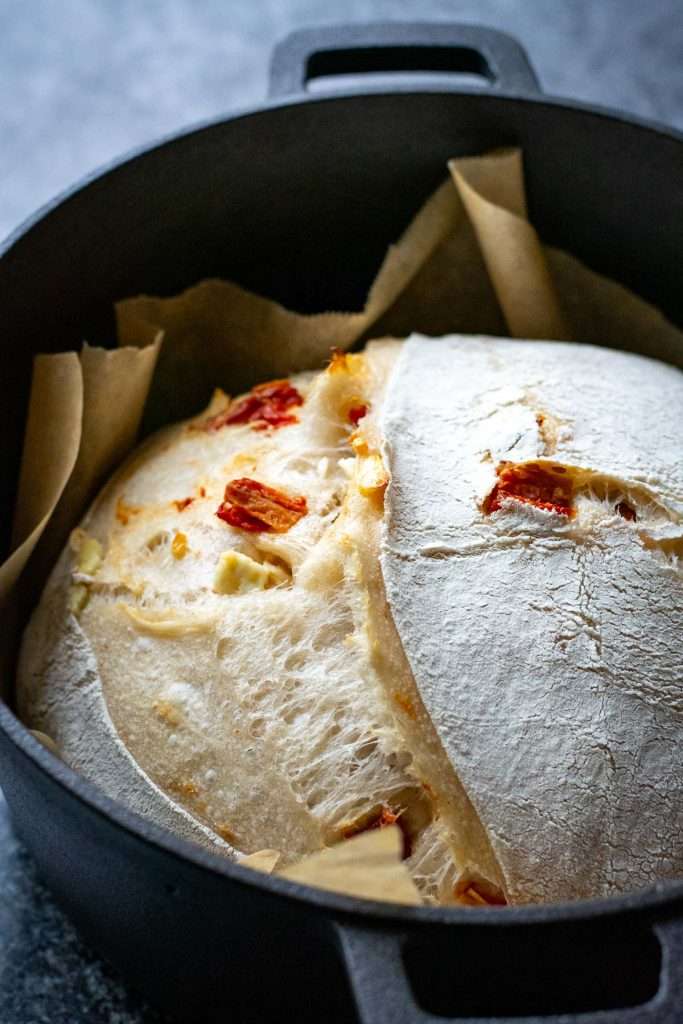

Once baked, take the Dutch Oven out of the oven. Lift the bread out by holding the corners of the parchment paper. Place the bread onto the wire rack, and slide the parchment paper from underneath the loaf.
Leave the sourdough to cool down to room temperature before slicing.
What to Serve With Sun-Dried Tomato Sourdough Bread
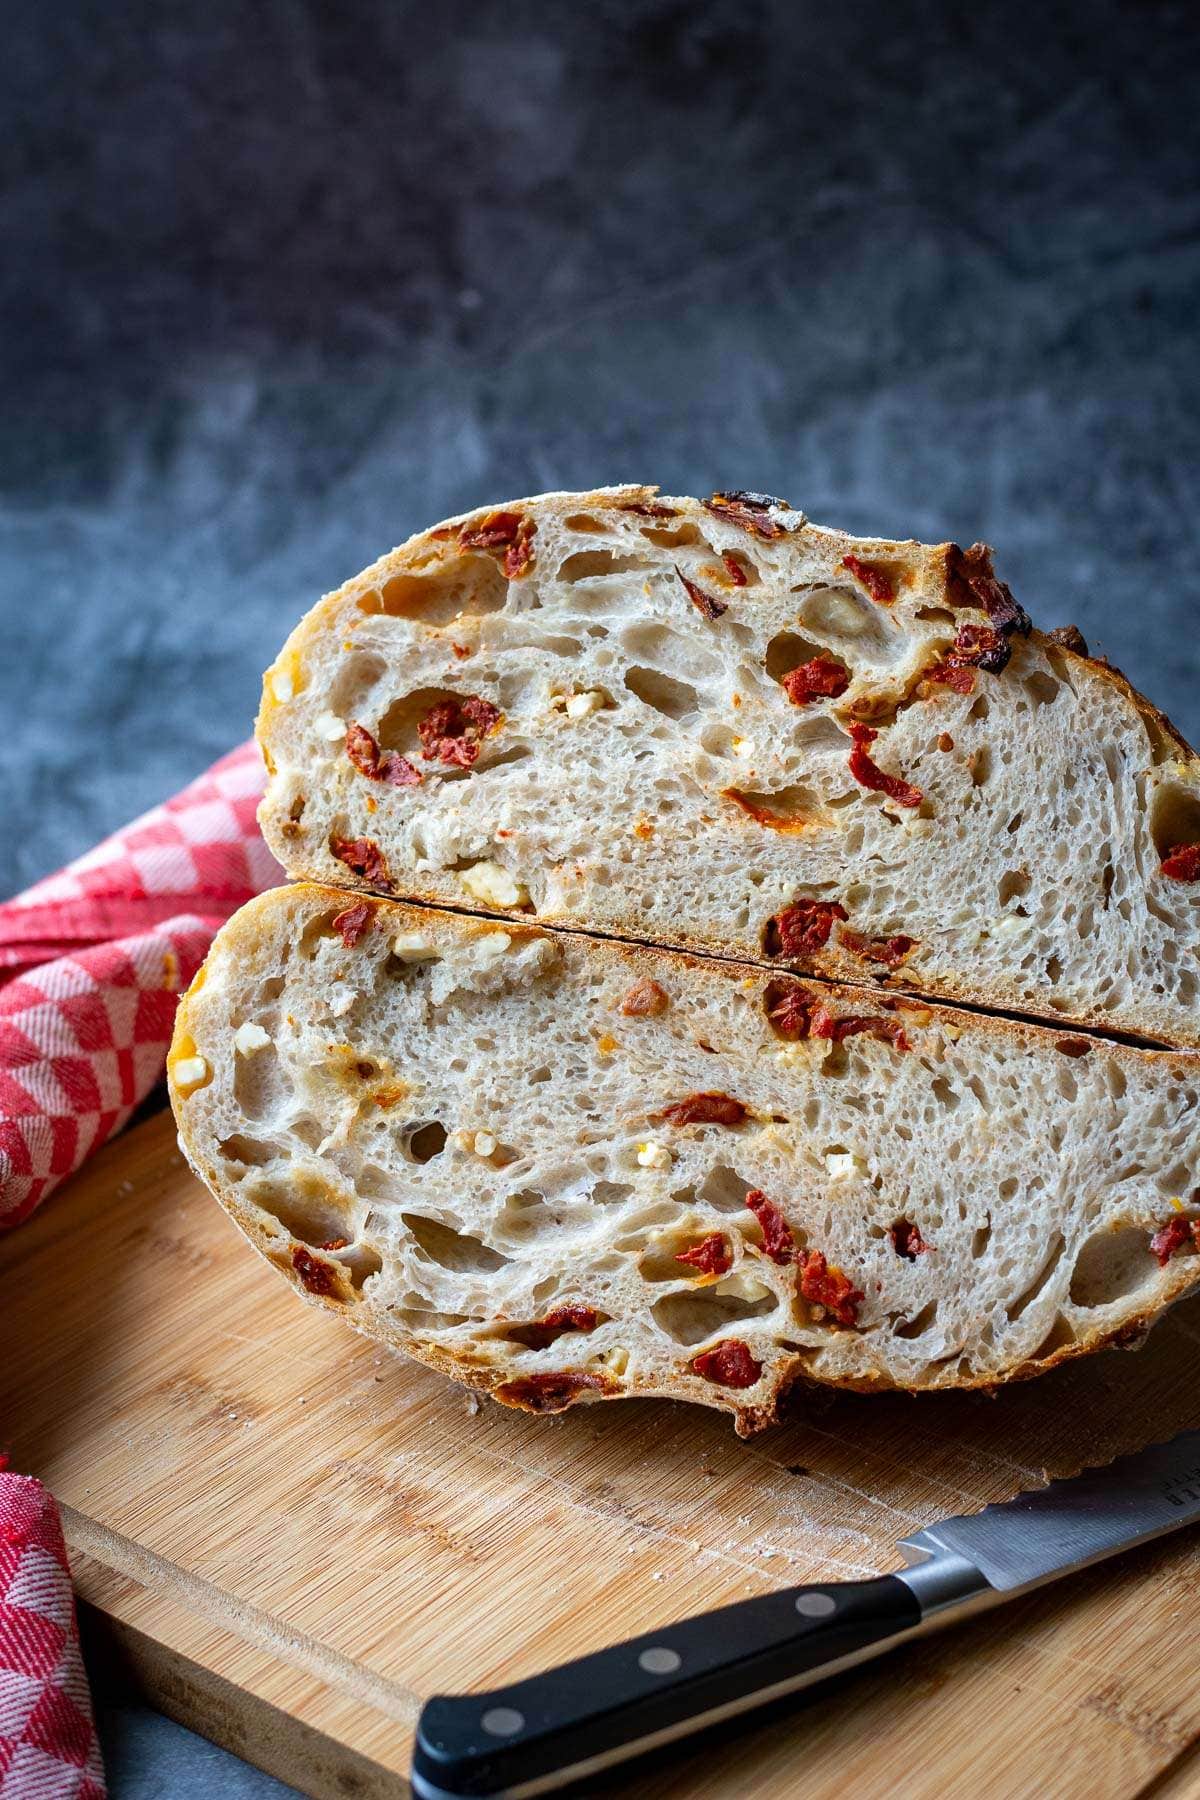
Sun-dried tomato bread is the most delicious on the day that it is baked. It doesn't need much - just slather it with butter or dip it into olive oil and enjoy! The intense sweet-tart flavour is not going to disappoint!
I love serving it with a bowlful of Courgette Ribbon Salad and Italian Green Bean Salad for a light and nutritious lunch!
It is also great for scooping up Lebanese Hummus, Beetroot Dip or Baked Camembert!
Alternatively, serve this delicious bread with Roasted Butternut Squash and Red Pepper Soup, Greek Prawn Saganaki or Gambas Pil Pil.
Storage
You can store homemade sourdough bread with feta and sundried tomatoes at room temperature in an airtight container, a ziplock bag, a bread box or wrapped in a tea towel for up to 2 days. The best way to store it long-term is to freeze it though! It freezes beautifully - and we love having frozen slices to thaw as and when we need a fix of delicious bread!
Go ahead and learn more about storing sourdough bread in the articles below:
- Best Ways to Store Sourdough Bread
- How To Freeze Sourdough Bread? Freeze A Whole Loaf Or Individual Slices!
More Flavoured Sourdough Recipes To Try
I hope you loved this sun-dried tomato sourdough bread! If so, maybe we can tempt you with a delicious Roasted Garlic Sourdough With Green Olives or spicy Jalapeño Cheddar Sourdough Bread? For something unusual, try our Pickle Sourdough Bread or Caramelised Onion and Cheddar Sourdough Bread.
Or do you fancy something a little more earthy and rustic, like our Seeded Sourdough Bread? Have a look at some of our favourite sourdough bread recipes with inclusions below:



LOVE BAKING SOURDOUGH WITH ME?
You can now add Somebody Feed Seb as a preferred source on Google. It only takes a tick box, and tells Google you'd like to see more of my recipes when relevant.

Feta and Sundried Tomato Sourdough Bread
Equipment
- Dough Scraper
- Razor Blade or Bread Lame
Ingredients
- 400 g (3⅕ cups) strong bread flour with at least 12% gluten content
- 230 g (1 cups) water
- 8 g (1 teaspoon) salt
- 160 g (⅔ cups) active sourdough starter 100% hydration
- 90 g (⅔ cups) feta crumbled
- 90 g (⅔ cups) sundried tomatoes chopped*
Instructions
DAY 1
- First thing in the morning, feed the sourdough starter and leave it in a warm place (ideally between 21-27°C), loosely covered, for 4 hours. The starter should double in size by then. If it doesn't, it might need a few more good feedings to be ready.
Autolyse
- Before your starter reaches its peak, start the autolyse. In a bowl of your stand mixer, combine the flour and water into a dry-ish shaggy dough. Simply run the mixer for 1-2 minutes, then cover the bowl with a damp towel and leave the flour to hydrate for 30-60 minutes.
Mixing The Dough
- Sprinkle salt over the hydrated flour and add the active sourdough starter to the shaggy dough mixture. Run the stand mixer for 10-15 minutes until your dough is smooth and elastic. It does not need to pass the windowpane test just yet (the gluten will continue developing when we fold the dough during the bulk fermentation period).
Bulk Fermentation and Coil Folds
- Scoop the dough into a large bowl, cover with a damp kitchen towel or plastic wrap (a.k.a. cling film) and leave it in a warm place (21-27°C) for 30 minutes.
- After 30 minutes, with cold wet hands, perform the first set of coil folds. Simply lift the bread dough with both hands from the sides and tuck it under to form a coil. Rotate the bowl a quarter turn and coil again. Cover the bowl again, and let the dough rest for 30 minutes again.
- Repeat the coil folds twice more. After the third coil fold, your dough should feel a lot less sticky and feel strengthened and elastic. This is important for the next step - lamination!
Laminating The Mix-Ins and Extra Coil Folds
- Wet the surface of a large area of the kitchen surface (you can spray it or simply use your hands to make the surfaces wet). Scoop the dough out onto a wet surface and stretch it out as much as you can without tearing it.
- Scatter ⅓ of crumbled feta and ⅓ of sundried tomatoes all over the middle section of the dough. Then fold one side over the mix-ins. Scatter another ⅓ on top of the folded-over area and fold the other side over. This should look like a large dough pamphlet at this stage.
- Scatter half of the remaining mix-ins in the centre of the pamphlet, then fold the top over. Finally, scatter the remaining mix-ins over the folded-over bit, and fold the bottom over. Please refer to the photos below for a better explanation. You should now be left with a parcel of laminated sourdough.
- Place the dough into the mixing bowl you used before, cover and let the dough rise for 30 minutes.
- At 30-minute intervals, perform 2 more coil folds, being very gentle not to pierce the dough. This will help distribute the mix-ins evenly in the dough.
- After two more coil folds, cover the dough well, and leave it to finish its bulk fermentation undisturbed for 2-3 hours. The dough should just about double in size from its original size.
Shaping and Final Proof
- At the end of bulk fermentation, using a bowl scraper scoop the dough onto a lightly floured surface. Try and make sure that the smooth top of the dough (the side that is not intact with the bowl) is placed on the floured work surface. Then swiftly fold the four corners of the dough into the centre and flip the dough over.
- With your bench scraper held at a shallow angle to the work surface, push the dough while using your hand to tuck it under itself, creating tension. This fluid circular motion involves pushing and gently rounding with the bench knife, while your free hand continues the rounding motion, tucking the dough slightly under itself. It takes some practice, but you should aim for a tight round ball of dough that holds its shape and doesn't spread much.
- Place the dough ball into a well-floured banneton basket (or any proofing basket alternatives). We recommend using rice flour for dusting your proofing baskets. The smooth side of the sourdough ball should be at the bottom, with the seam side up.
- Pinch the seam together with your fingers, if the dough starts spreading in the bowl to make sure the dough is tight. Sprinkle with some flour, and cover the dough with a clean fabric napkin or small lightweight tea towel.
- Place the proofing basket in a large plastic bag - it will protect the dough from drying out. Then place the whole thing in the fridge for its final rise (a.k.a. second rise) in the fridge for 12-36 hours.
DAY 2
Scoring The Sourdough
- The next day, place the Dutch Oven in the oven, and preheat it to 240°C (typically, it is the highest temperature home ovens will go to) with the Dutch oven in it. It needs to be piping hot!
- Once the oven is hot, take the dough out of the fridge and out of the bag.
- Invert the dough gently onto a large sheet of parchment paper. If your dough was properly bulk fermented and shaped correctly, it should not spread once inverted.
- Dust the surface of the dough with flour. Using a bread lame or a razor blade, score the dough deeply (approximately 1cm deep) at a 30- 45º angle. One single deep slash is all that's needed for that sought-after sourdough "ear".
Baking and Cooling
- Take the hot Dutch Oven out of the oven, take the lid off, and lift the sourdough into it, holding the edges of the parchment paper. Be mindful of how you lift the paper. Sometimes, the scored slash can begin to close up during this process. To prevent this, lift the parchment from the sides that won't push the two edges of the scored dough back together.
- Place the lid back on the Dutch Oven and place the bread into the hot oven for 25 minutes.
- After 25 minutes, take the lid off, and return the sourdough to the oven for another 25 minutes to turn golden brown.
- Once baked, take the Dutch Oven out of the oven. Lift the bread out by holding the corners of the parchment paper. Place the bread onto the wire rack, and slide the parchment paper from underneath the loaf.
- Leave the sourdough to cool down to room temperature before slicing.
Notes
Nutrition




Nicole Kendrick says
I love the deep flavor of the tomatoes with the tang of the bread and the feta. Yummy!
Ieva Greber says
It's a great combo, isn't it? 🙂
Claudia says
I made this sundried tomato sourdough bread, and it was delicious! The creamy feta and tangy sundried tomatoes blend perfectly. Definitely a keeper!
Ieva Greber says
Thank you, Claudia! Glad you liked this one too 🙂
Elizabeth says
Such a spectacular bread!!! The feta and sundried tomatoes pushed it over the top!!!
Ieva Greber says
Thank you ! 🙂
Leslie says
Coil folds have become my go-to now. I love to see other bread makers using the same method. This recipe is perfection!! Love the feta cheese!
Ieva Greber says
Thank you so much for the kind comment! I hardly ever stretch and fold now - coil folding is so therapeutic!
Swathi says
I like that you added feta to this tomato sourdough bread. I tried it. perfect taste.