
Start your day on the right foot with this bright, fragrant Lemon Poppy Seed Sourdough Bread. With its golden crust, zesty aroma, and soft, tender crumb, it's the perfect slightly sweet bread to enjoy toasted with a smear of butter or alongside a cup of tea. A citrusy twist on classic sourdough, this loaf brings a little sunshine to every slice.

Jump to:
As an Amazon Associate I earn from qualifying purchases, at no extra cost for you! Thank you!
How Mix-Ins Affect Sourdough Baking?
HYDRATION. Poppy seeds absorb some moisture, subtly tightening the dough and slightly affecting hydration. Lemon zest doesn't absorb liquid but disperses oils that influence texture and moisture retention.
BULK FERMENTATION. Poppy seeds can mildly interrupt gluten development, so extra care with coil folds helps maintain strength. Added sugar slightly accelerates bulk fermentation, so monitor volume and bubbles rather than relying solely on time.
CRUMB AND CRUST. Seeds add crunch and visual appeal to the crumb, while sugar boosts browning and moisture retention for a crisp, golden crust. Proper folding ensures structure despite the mix-ins.
FLAVOUR. Lemon zest adds citrusy brightness that balances sourness, while poppy seeds bring nutty depth. Together with sugar, they enhance flavour without overpowering the dough's natural profile.
Ingredient Notes
Here's everything you will need for this Lemon Poppy Seed Sourdough Loaf:
- strong bread flour: with at least 12% protein content.
- water: use lukewarm water to give bulk fermentation a head start.
- active sourdough starter: 100% hydration.
- salt.
- sugar: caster or granulated sugar.
- zest of fresh lemons.
- poppy seeds.
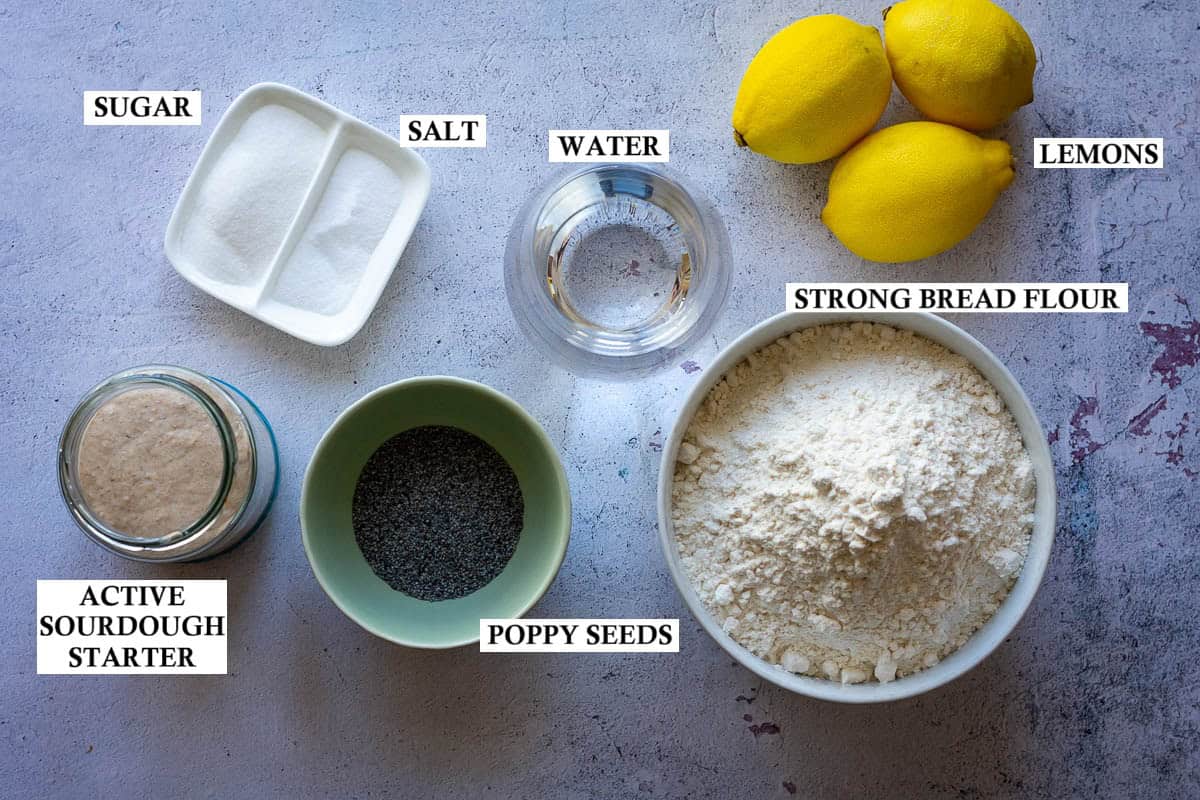
As always, find ingredient quantities, detailed instructions and nutritional information in the recipe card at the bottom of the post.
Loving lemon in sourdough bakes? We have a delicious Lemon Sourdough Focaccia and Sourdough Lemon Roll recipe for you to try next!
For more warm-weather baking ideas, visit our Summer Sourdough Recipe collection that includes our summer favourite - Sourdough Zucchini Muffins With Lemon & Poppy Seeds (Courgette Muffins).
Step-By-Step Method
As usual, this recipe follows my overnight method to develop the flavour during cold retardation in the fridge.
DAY 1
Feed Sourdough Starter
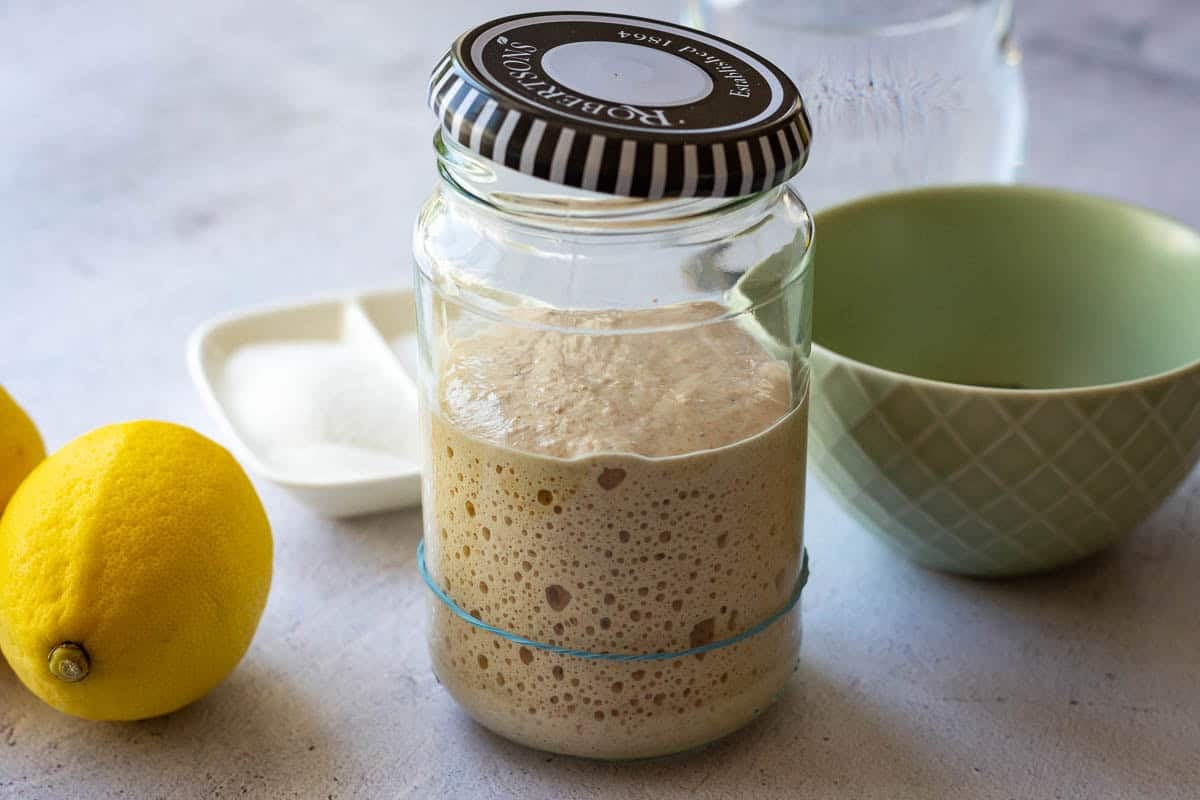
1. First thing in the morning, feed your sourdough starter. I typically feed 70g of my starter in a ratio of 1 part starter:1 part water:1 part flour. This simply means that I mix 70g of starter with 70g water and 70g flour. Scoop the mixture into a clean jar, and leave it in a warm spot (ideally, (21-27°C)), semi-covered for 4 hours.
Your starter should at least double in volume in this time. If it doesn't, it may need a couple of good feeds before it's fit for purpose. Head to our article - Sourdough Starter Not Doubling Within 4 Hours? How To Fix It?
2. I use 160g of active starter for baking and feed the remaining 50g before storing it for the future.
Mixing The Dough
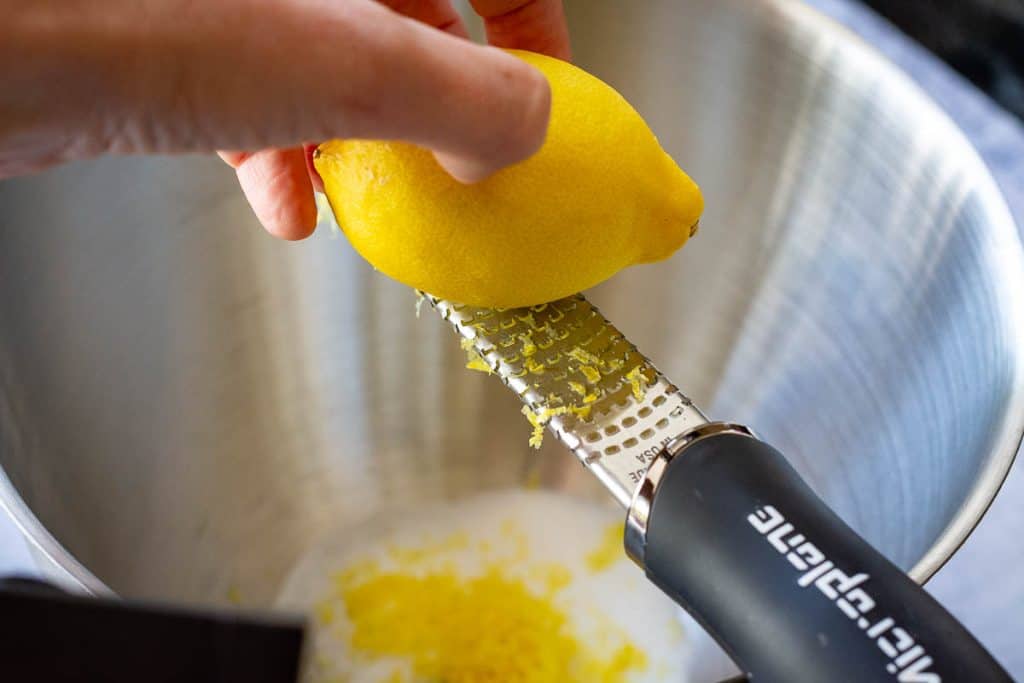
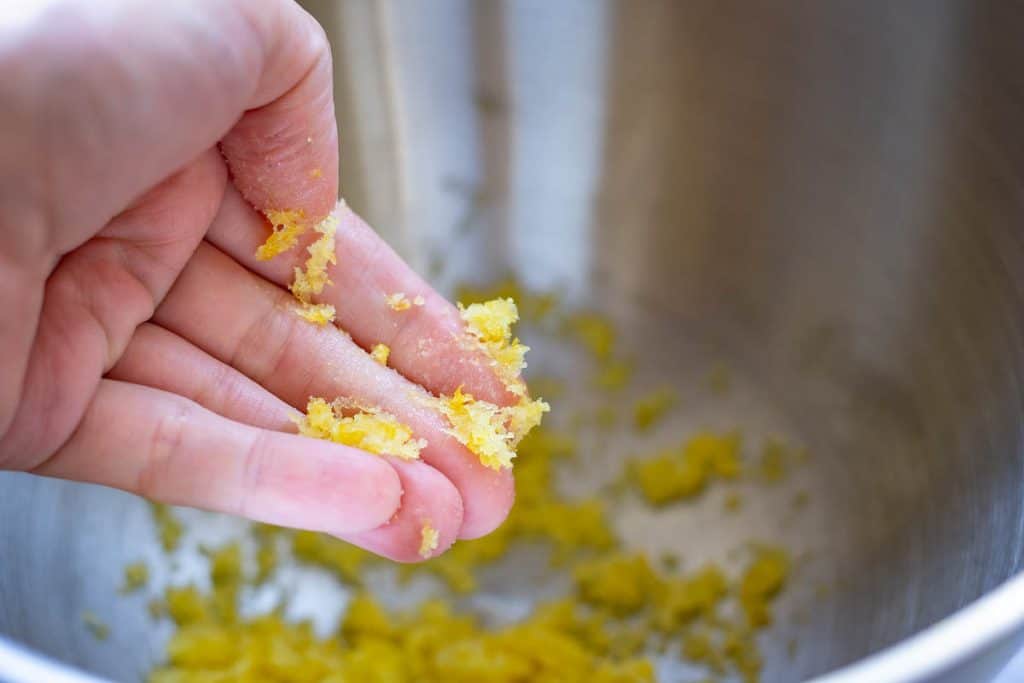
1. Add the fresh lemon zest, salt and sugar to a small bowl. Using your fingertips, rub the zest into the mixture to release the lemon oils - this will enhance the flavour of lemon in your bread.
2. Once the sourdough starter is active and bubbly (and at least doubled in volume), mix the dough. In a bowl of a stand mixer, mix the flour, zesty sugar and salt mixture and poppy seeds. Then add the water and sourdough starter.
QUICK TIP: Don't worry if the dough seems a little wetter than usual - poppy seeds will absorb some of the moisture.
3. Run the mixer, fitted with a dough hook attachment for 10 minutes, until your dough is smooth and elastic. It does not need to pass the windowpane test just yet (the gluten will continue developing when we fold the dough during the bulk fermentation period).
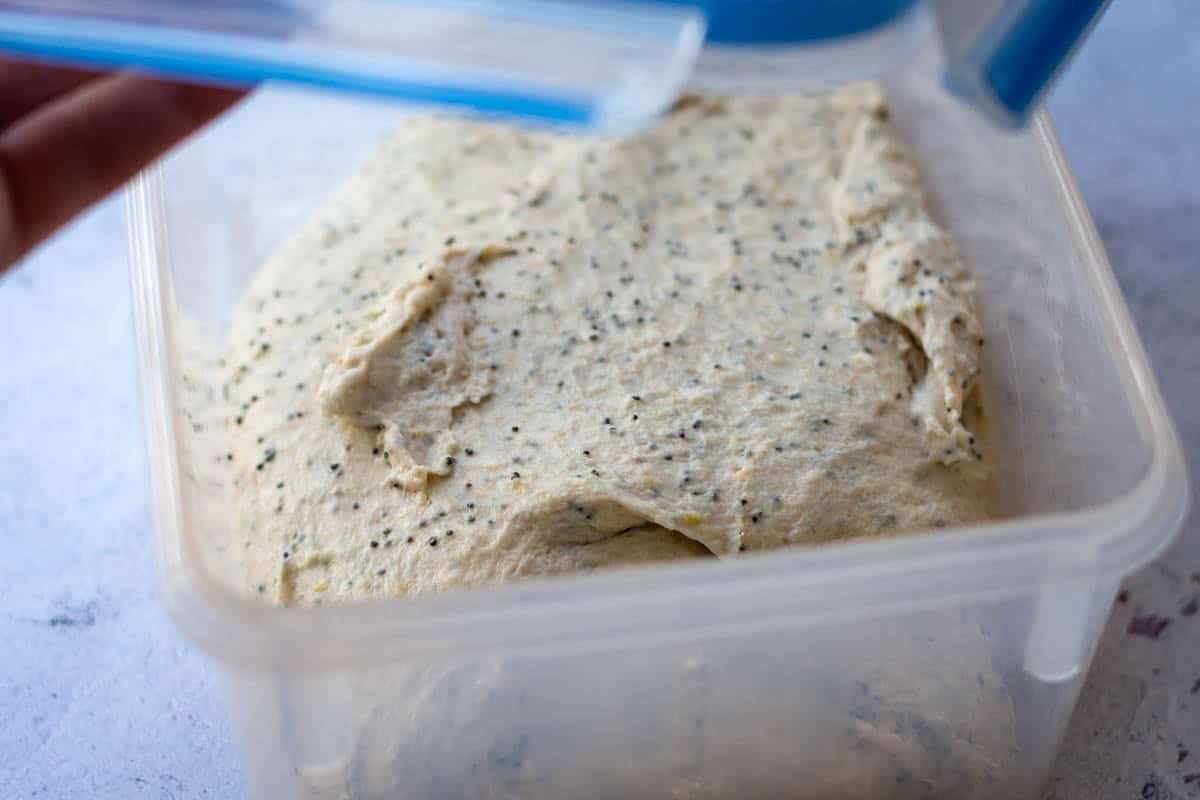
Coil Folds And Bulk Fermentation
1. Scoop the dough into a large bowl, cover with a damp kitchen towel or plastic wrap and leave it in a warm place (21-27°C) for 30 minutes.
2. After 30 minutes, with cold wet hands, perform the first set of coil folds. Simply lift the bread dough with both hands from the sides and tuck it under to form a coil (video below). Rotate the bowl a quarter turn and coil again. Cover the bowl again, and let the dough rest for 30 minutes again.
3. Repeat the folds 3-4 more times at 30 minute intervals. For more information on how to coil fold and when to know when you've done enough folding, head to our dedicated article about Sourdough Coil Folds.
4. Once all the folds have been completed, cover the dough and let the dough rise at warm room temperature for 1.5-2 hours to finish bulk fermentation. Your dough should just about double its original size. If you are using a see-through glass bowl for bulk fermenting, you should see a lot of activity and bubbles forming at the base and sides of the bowl.
Shaping and Final Proof
QUICK TIP: For a more uniform sandwich bread shape, skip the banneton and cold retard the dough directly in a lightly greased (with melted butter or neutral oil), parchment paper-lined loaf pan after shaping. Bake as usual - no Dutch oven needed. Here's more about baking sourdough in a loaf pan.
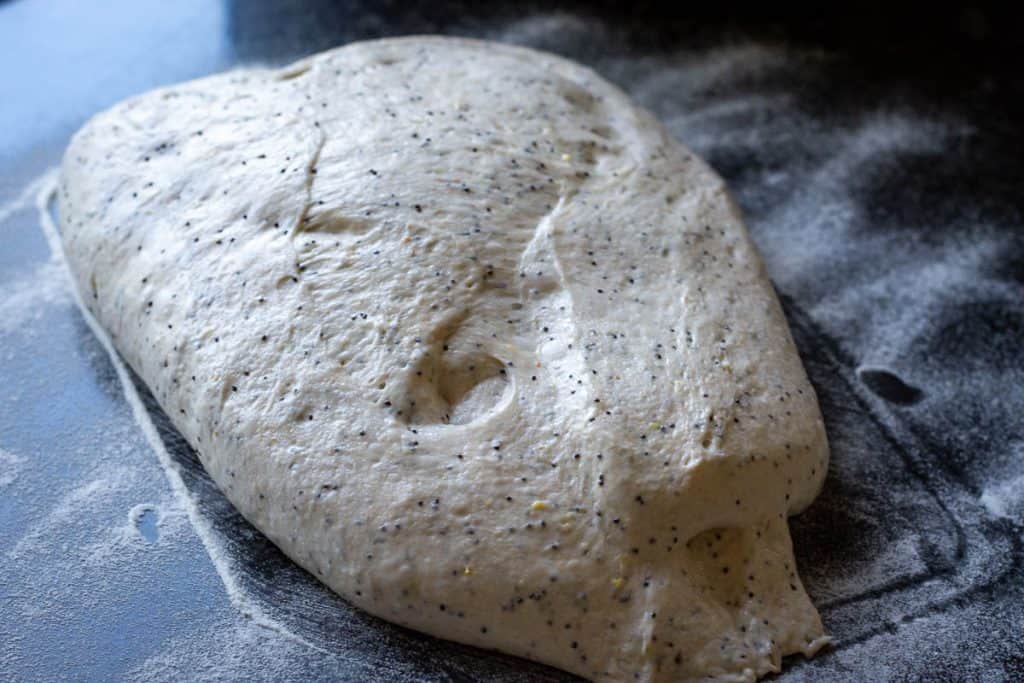
1. At the end of bulk fermentation, scoop the dough onto a lightly floured surface. Try and make sure that the smooth top of the dough (the side that is not contact with the bowl) is placed on the floured work surface. Then swiftly fold the four corners of the dough into the centre.
2. Flip the dough seam-side down and use your hands to cup and rotate it, pulling it slightly against the surface to form a smooth, tight ball.
3. Place the dough ball into a well-floured banneton basket (or any proofing basket alternatives). We recommend using rice flour for dusting your proofing baskets. The smooth side of the sourdough ball should be at the bottom, with the seam at the top.
4. Pinch the seam together with your fingers, if the dough starts spreading in the bowl to make sure the dough is tight. Sprinkle with some flour, and cover the dough with a clean fabric napkin or small lightweight tea towel.
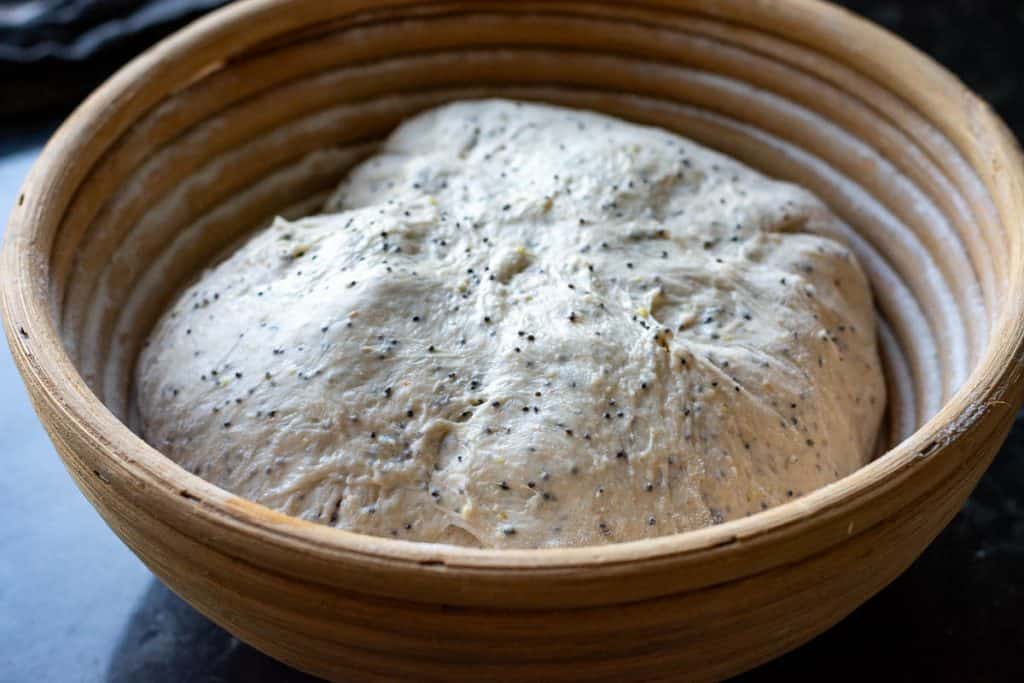
5. If your fridge environment is very dry or your proofing basket has a more open weave, place the proofing basket in a large plastic bag - it will protect the dough from drying out. Then place the whole thing in the fridge for its final rise (a.k.a. second rise) for 12-36 hours.
DAY 2
The next day, place the Dutch Oven in the oven, and preheat it to 240°C (typically, it is the highest temperature home ovens will go to) with the Dutch oven in it. It needs to be piping hot!
Scoring The Dough
1. Once the oven is hot, take the dough out of the fridge and out of the bag.
2. Invert the dough gently onto a large piece of parchment paper. If your dough was properly bulk fermented and shaped correctly, it should not spread once inverted.
3. Dust the surface of the dough with flour. Using a bread lame or a razor blade, score the dough deeply (approximately 1cm deep) at a 30- 45º angle.
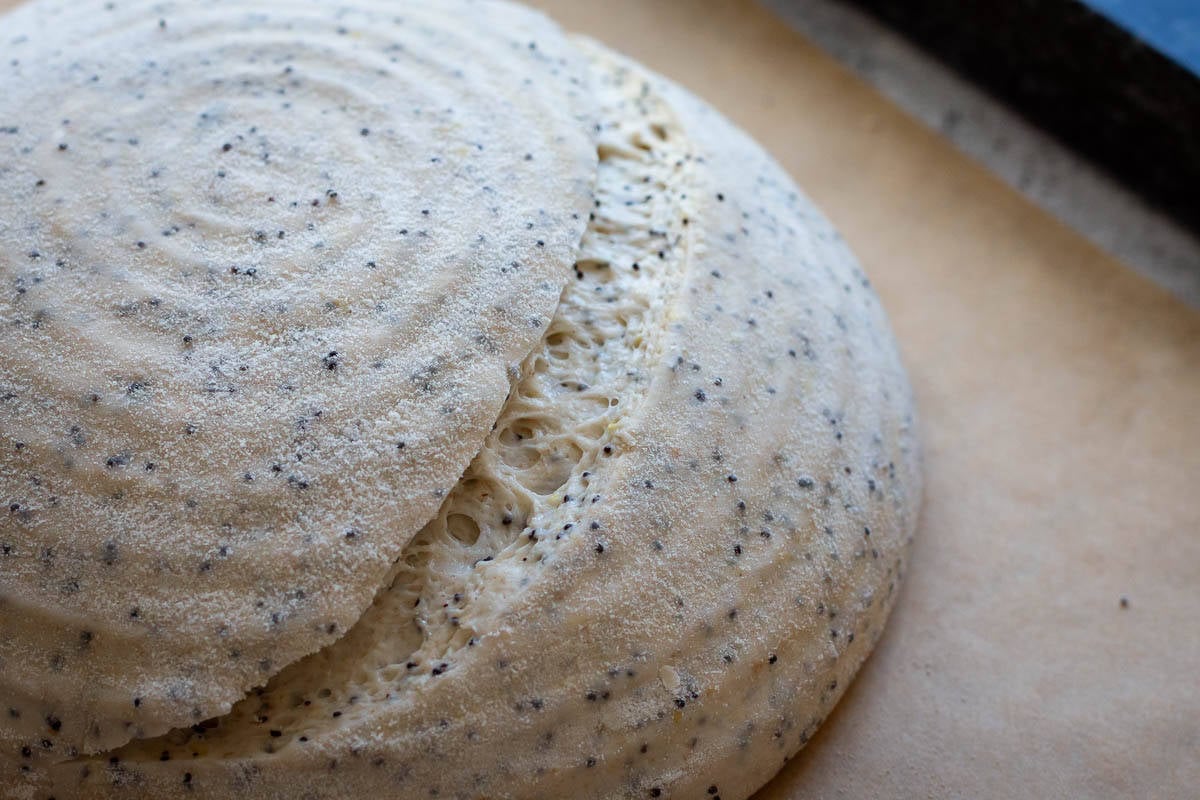
One single deep slash is all that's needed for that sought-after sourdough "ear".
Baking
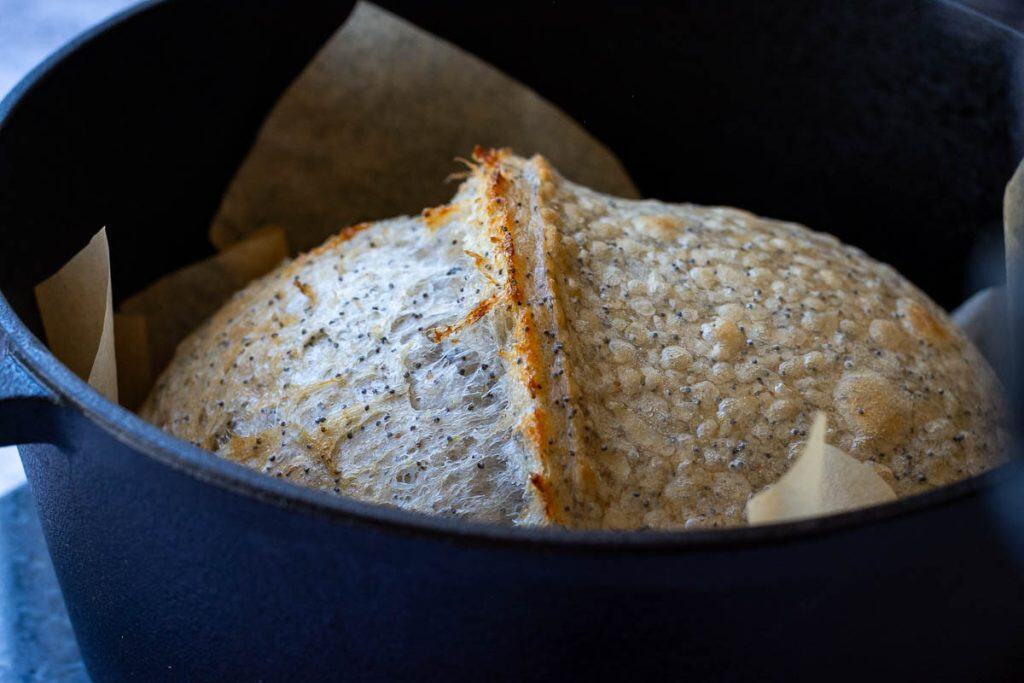
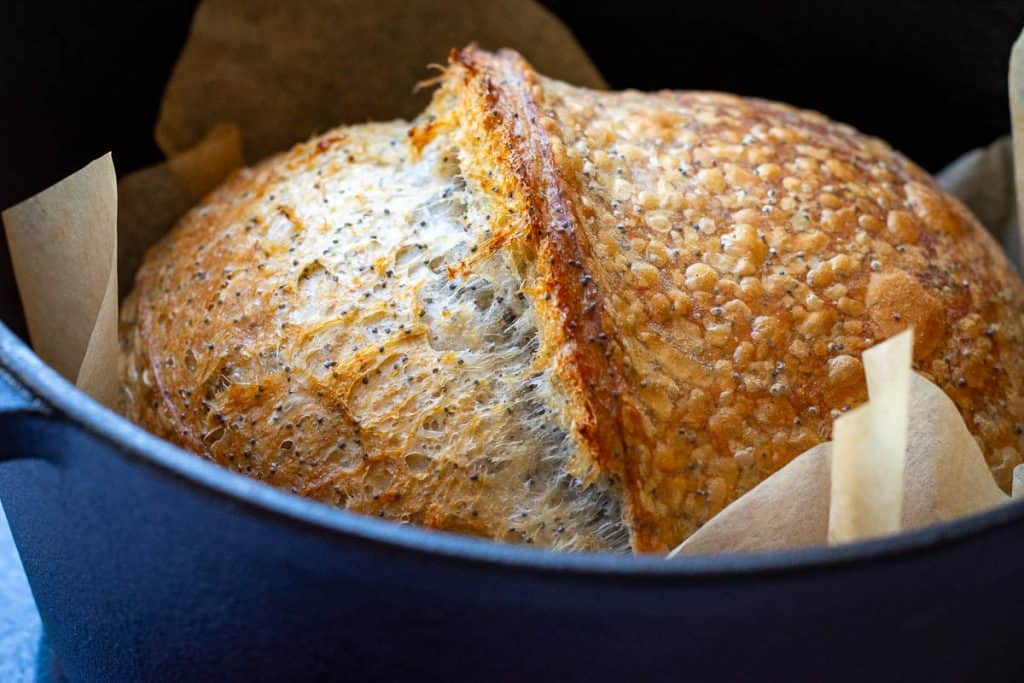
1. Take the hot Dutch Oven out of the oven, take the lid off, and lift the sourdough into it, holding the edges of the parchment paper. Be mindful of how you lift the paper. Sometimes, the scored slash can begin to close up during this process. To prevent this, lift the parchment from the sides that won't push the two edges of the scored dough back together.
2. Place the lid back on the Dutch Oven and place the bread into the hot oven for 25 minutes.
3. After 25 minutes, take the lid off, and return the sourdough to the oven for another 25 minutes. If you don't want your loaf of bread too dark in colour, you can reduce the oven temperature to 200°C.
Cooling
1. Once baked, take the Dutch Oven out of the oven. Lift the golden brown bread out by holding the corners of the parchment paper. Place the sourdough onto the wire rack, and slide the parchment paper from underneath the loaf.
2. Leave the Lemon Poppy Seed Sourdough Bread to cool down to room temperature before slicing.

What Really Makes A Difference
- Don't skip the cold retard: The overnight fridge proof develops that signature sourdough tang, which perfectly complements the bright lemon flavour.
- Boost with extracts: A splash of vanilla extract or lemon extract deepens and lifts the citrusy profile beautifully.
- Use strong bread flour: Opt for high-protein flour over all-purpose flour to support better gluten development and a chewier crumb.
- Rub in the zest: Combine lemon zest with sugar and other coarse dry ingredients using your fingertips to release citrus oils for amplified flavour.
- Choose fresh, high-quality lemons: Fresher zest = brighter, cleaner flavour. Avoid waxed lemons if possible.
- Have culinary lavender? Add 2-3 grams of it to the dough as well for a floral twist. You can find more tips in our Honey and Lavender Sourdough Bread recipe.
Serving Suggestions
This Lemon Poppy Seed Sourdough Bread is incredibly versatile - spread with cream cheese and a dollop of lemon curd for the perfect balance of tangy and sweet. It's also a great way to elevate your breakfast toast or brunch board.
For something unexpected, try it with soft goat cheese and cracked black pepper, or top with smashed avocado and chilli flakes for a zesty, savoury twist.
More Sourdough Recipes With Mix-Ins
If you loved this sourdough lemon poppy seed bread recipe, don't miss our other sourdough bread with inclusions - each one has been tested, loved, and earned a solid star rating from our readers. We particularly love Sesame Sourdough Bread these days!




Lemon Poppy Seed Sourdough Bread
Equipment
- Bench Scraper
- Proofing Basket
- Razor Blade or Bread Lame
Ingredients
- 400 g strong bread flour with at least 12% protein content
- 260 g water
- 160 g active sourdough starter 100% hydration
- 8 g salt
- 15 g sugar
- zest of 3 lemons
- 2 tablespoon poppy seeds
Instructions
DAY 1:
Feed Sourdough Starter
- First thing in the morning, feed your sourdough starter. I typically feed 70g of my starter in a ratio of 1 part starter:1 part water:1 part flour. This simply means that I mix 70g of starter with 70g water and 70g flour. Scoop the mixture into a clean jar, and leave it in a warm spot (ideally, (21-27°C)), semi-covered for 4 hours. Your starter should at least double in volume in this time. If it doesn't, it may need a couple of good feeds before it's fit for purpose.
- I use 160g of active starter for baking and feed the remaining 50g before storing it for the future.
Mixing The Dough
- Add the lemon zest, salt and sugar to a bowl. Using your fingertips, rub the zest into the mixture to release the lemon oils - this will enhance the flavour of lemon in your bread.
- Once the sourdough starter is active and bubbly (and at least doubled in volume), mix the dough. In a bowl of a stand mixer, mix the flour, zesty sugar and salt mixture and poppy seeds. Then add the water and sourdough starter.
- Run the mixer, fitted with a dough hook attachment for 10 minutes, until your dough is smooth and elastic. It does not need to pass the windowpane test just yet (the gluten will continue developing when we fold the dough during the bulk fermentation period).
Coil Folds And Bulk Fermentation
- Scoop the dough into a large bowl, cover with a damp kitchen towel or plastic wrap and leave it in a warm place (21-27°C) for 30 minutes.
- After 30 minutes, with cold wet hands, perform the first set of coil folds. Simply lift the bread dough with both hands from the sides and tuck it under to form a coil (video below). Rotate the bowl a quarter turn and coil again. Cover the bowl again, and let the dough rest for 30 minutes again.
- Repeat the folds 3-4 more times at 30 minute intervals. For more information on how to coil fold and when to know when you've done enough folding, head to our dedicated article about Sourdough Coil Folds.
- Once all the folds have been completed, cover the dough and let the dough rise at warm room temperature for 1.5-2 hours to finish bulk fermentation. Your dough should just about double its original size. If you are using a see-through glass bowl for bulk fermenting, you should see a lot of activity and bubbles forming at the base and sides of the bowl.
Shaping and Final Proof
- At the end of bulk fermentation, scoop the dough onto a lightly floured surface. Try and make sure that the smooth top of the dough (the side that is not contact with the bowl) is placed on the floured work surface. Then swiftly fold the four corners of the dough into the centre.
- Flip the dough seam-side down and use your hands to cup and rotate it, pulling it slightly against the surface to form a smooth, tight ball.
- Place the dough ball into a well-floured banneton basket (or any proofing basket alternatives). We recommend using rice flour for dusting your proofing baskets. The smooth side of the sourdough ball should be at the bottom, with the seam at the top.
- Pinch the seam together with your fingers, if the dough starts spreading in the bowl to make sure the dough is tight. Sprinkle with some flour, and cover the dough with a clean fabric napkin or small lightweight tea towel.
- If your fridge environment is very dry or your proofing basket has a more open weave, place the proofing basket in a large plastic bag - it will protect the dough from drying out. Then place the whole thing in the fridge for its final rise (a.k.a. second rise) for 12-36 hours.
DAY 2:
- The next day, place the Dutch Oven in the oven, and preheat it to 240°C (typically, it is the highest temperature home ovens will go to) with the Dutch oven in it. It needs to be piping hot!
Scoring The Dough
- Once the oven is hot, take the dough out of the fridge and out of the bag.
- Invert the dough gently onto a large piece of parchment paper. If your dough was properly bulk fermented and shaped correctly, it should not spread once inverted.
- Dust the surface of the dough with flour. Using a bread lame or a razor blade, score the dough deeply (approximately 1cm deep) at a 30- 45º angle. One single deep slash is all that's needed for that sought-after sourdough "ear".
Baking
- Take the hot Dutch Oven out of the oven, take the lid off, and lift the sourdough into it, holding the edges of the parchment paper. Be mindful of how you lift the paper. Sometimes, the scored slash can begin to close up during this process. To prevent this, lift the parchment from the sides that won't push the two edges of the scored dough back together.
- Place the lid back on the Dutch Oven and place the bread into the hot oven for 25 minutes.
- After 25 minutes, take the lid off, and return the sourdough to the oven for another 25 minutes. If you don't want your loaf of bread too dark in colour, you can reduce the oven temperature to 200°C.
Cooling
- Once baked, take the Dutch Oven out of the oven. Lift the bread out by holding the corners of the parchment paper. Place the bread onto the wire rack, and slide the parchment paper from underneath the loaf.
- Leave the Lemon Poppy Seed Sourdough Bread to cool down to room temperature before slicing.
Video
Nutrition





Rosie says
This bread is incredible! I made your recipe last week and the lemon zest and poppy seed combination is just perfect. Do you find the dough is stickier than your standard sourdough?
Ieva Greber says
Hi, Rosie. I add more water to this sourdough compared to my Everyday Sourdough Bread, but I don't find the dough to be much stickier, as the poppy seeds absorb quite a bit of water.
Glad you liked the flavours! 🙂
riley says
this lemon poppy seed sourdough bread is incredible! such a delicious recipe.
Jo says
One of my favorite flavor combos. I love it with Irish butter!
Ieva Greber says
Mine too, any time of year! 🙂
ally says
this lemon poppy sourdough bread is so delish!!
Shannon says
Are you able to add a little fresh juice to boost the flavor or will that ruin the dough?
Ieva Greber says
Hi, Shannon! Yes, you can add a little lemon juice (but no more than 1-2% of your flour amount (so 1-1.5 tsp). Citric acid, used excessively will inhibit yeast activity and mess up the fermentation process. I would also note, that since this bread isn't very sweet, the lemon juice will add to the sourdough tang, so you will have a more sour loaf (you may love that, though!). A little lemon extract would probably do a better job here at enhancing the lemon flavour! Hope this helps 🙂
Lindsey says
This is the stickiest dough I have ever worked with. I’m not sure where I went wrong? It was honestly impossible to shape. Any ideas why this may have happened? I’d like to try it again!
Ieva Greber says
Thank you so much for trying it, and I’m really glad you’re up for giving it another go!
The dough hydration for this recipe is about 71%, which is a little higher than many of my other sourdough loaves — my typical base recipes are usually around 67% hydration. That said, it shouldn’t be unmanageably sticky. I increased the water slightly here because, in my experience, poppy seeds absorb quite a bit of moisture, so the dough usually balances out as it rests.
A couple of things may have been going on. What hydration are you normally used to working with? It may be as simple as reducing the water slightly next time to a level you feel comfortable shaping.
Another possibility is that the dough fermented faster than expected. The sugar in the dough, plus a warm kitchen, can speed things up a little, and over-fermented dough often becomes sticky, loose and difficult to shape. Was the dough wet and sticky right from the start, or did it become messy towards the end / at the shaping stage?
Flour can also make a big difference. Some flours just don’t absorb water as well, even if they’re labelled as bread flour. I’ve written more about that here, which may help: https://somebodyfeedseb.com/flour-absorption-capacity-of-flour/
I hope that helps troubleshoot it — and honestly, well done for not being put off by a tricky dough. Sourdough likes to keep us humble sometimes!
Lindsey says
I appreciate you taking the time to respond!
I typically work with 65-76% hydration depending on the recipe. I’ve also never used a stand mixer before while making sourdough, so this was new for me! I definitely could have messed up during this stage.
The dough was fairly sticky from the beginning, but in fairness we are working with 100% humidity outside right now so that definitely could have had something to do with it! I’ll adjust the water level and try again!
Swathi says
This lemon poppy seed sourdough bread is delicious I to make this combo so good.
Nora says
This loaf turned out so lovely! Soft and tender inside with subtle but such a bright lemon flavor. The poppy seeds make it feel extra special, and it was absolutely perfect toasted with butter.
Ieva Greber says
Thanks so much, Nora! I’m really glad you enjoyed it. Toasted with butter is such a lovely way to serve this loaf, have you tried with lemon curd? It's soo good! And I agree — the poppy seeds make it feel that little bit more special.
Andrea Hofer says
this bred looks good, can I use a mix of all-purpose and whole flour?
Ieva Greber says
I tend to keep it light to go with zingy fresh flavours, as whole flour will make it a little heavier and denser, but a small fraction will defuiitely work! Whole wheat flour absorbs more water, so I'd increase the hydration slightly, depending on how much whole flour you're adding.
Personally, I am not a fan of using all-purpose flour for bread, unless its protein content is over 11.5-12%. Everytime I try, I can't build enough structure in the dough to get a good rise/oven spring. But if you find a magic formula/ratio of all-purpose to whole, please let me know!
Andrea Hofer says
I'll do 350 grams all-purpose flour and 50 grams whole wheat. how dose the sound?
Ieva Greber says
That should work well! All-purpose flour usually absorbs a little less water than strong bread flour, but the whole wheat flour should help absorb some of that extra moisture.
If you’re not used to working with higher-hydration doughs, I’d suggest holding back 10–20ml of the water at first and adding it only if the dough feels manageable. Also, because all-purpose flour has a little less gluten strength, give the dough plenty of stretch and folds/coil folds to build as much strength as possible. That will help it hold its shape better. Hope it turns out beautifully!
Andrea Hofer says
what would de the temperature in ferenheight to bake? my oven only has ferenheight.
Ieva Greber says
About 460 F for covered bake, then I tend to reduce to 400 F after uncovering the Dutch oven to avoid the crust getting too dark. Hope this helps 😉
Liz says
This was so bright and fragrant with the lemon and poppy seeds. It’s perfect toasted with butter or served with tea for a simple morning treat.
Ieva Greber says
Love that you enjoy it with just butter - let's the sourdough flavours shine bright!
Andrea Hofer says
why is the water amount in ml but all other ingredients are in grams?
Ieva Greber says
Great question! Water is listed in ml because it’s easy to measure in a jug, but 1ml of water weighs 1g, so the amount is exactly the same in grams. For this recipe, 260ml water = 260g water (however, I've updated the recipe card to reduce confusion) . Hope that helps!
Maria says
This lemon poppy seed sourdough bread turned out really soft with a bright lemon taste and a nice little crunch from the seeds. I like it sliced up for breakfast or as a light snack during the day.
Ieva Greber says
Ah, thank you! I can never resist a slice of it with a little lemon curd with my midmorning coffee!
Jen says
This loaf has such a fresh citrus flavor with a soft, tender crumb. It’s perfect sliced for breakfast with butter or enjoyed with a cup of tea.