
Lamination isn't just for croissants! This technique can work wonders for your sourdough, helping you build dough strength by encouraging gluten development and incorporate mix-ins beautifully. And no, you don't need butter for sourdough lamination!
Jump to:
- What Is Sourdough Lamination?
- Benefits of Sourdough Lamination
- But is Laminating Sourdough Really Necessary?
- At What Stage Should You Laminate The Dough?
- Step-By-Step Lamination Method
- Watch The Video
- What To Do After Lamination Of Sourdough?
- Sourdough Lamination FAQs
- More Sourdough Baking Techniques To Master
- Recipes To Practice Laminating Sourdough
As an Amazon Associate I earn from qualifying purchases, at no extra cost for you! Thank you!
What Is Sourdough Lamination?
Lamination is a technique most commonly used in puff pastry to create flaky layers by folding dough around a butter block. In sourdough bread making, we use a similar process, but without the butter. Instead, the focus is on stretching and folding the lean dough-that is, a simple bread dough without added fats like butter or oil.
While laminating in pastry aims to create buttery layers, in sourdough it's all about building dough strength, improving the gluten structure, and making it easier to handle, especially with wetter, higher hydration sourdoughs. Plus, it's a great technique that allows to distribute and seal in various mix-ins.
Benefits of Sourdough Lamination
Let's explore how the lamination process can take your sourdough to the next level.
1. Strengthens the Dough
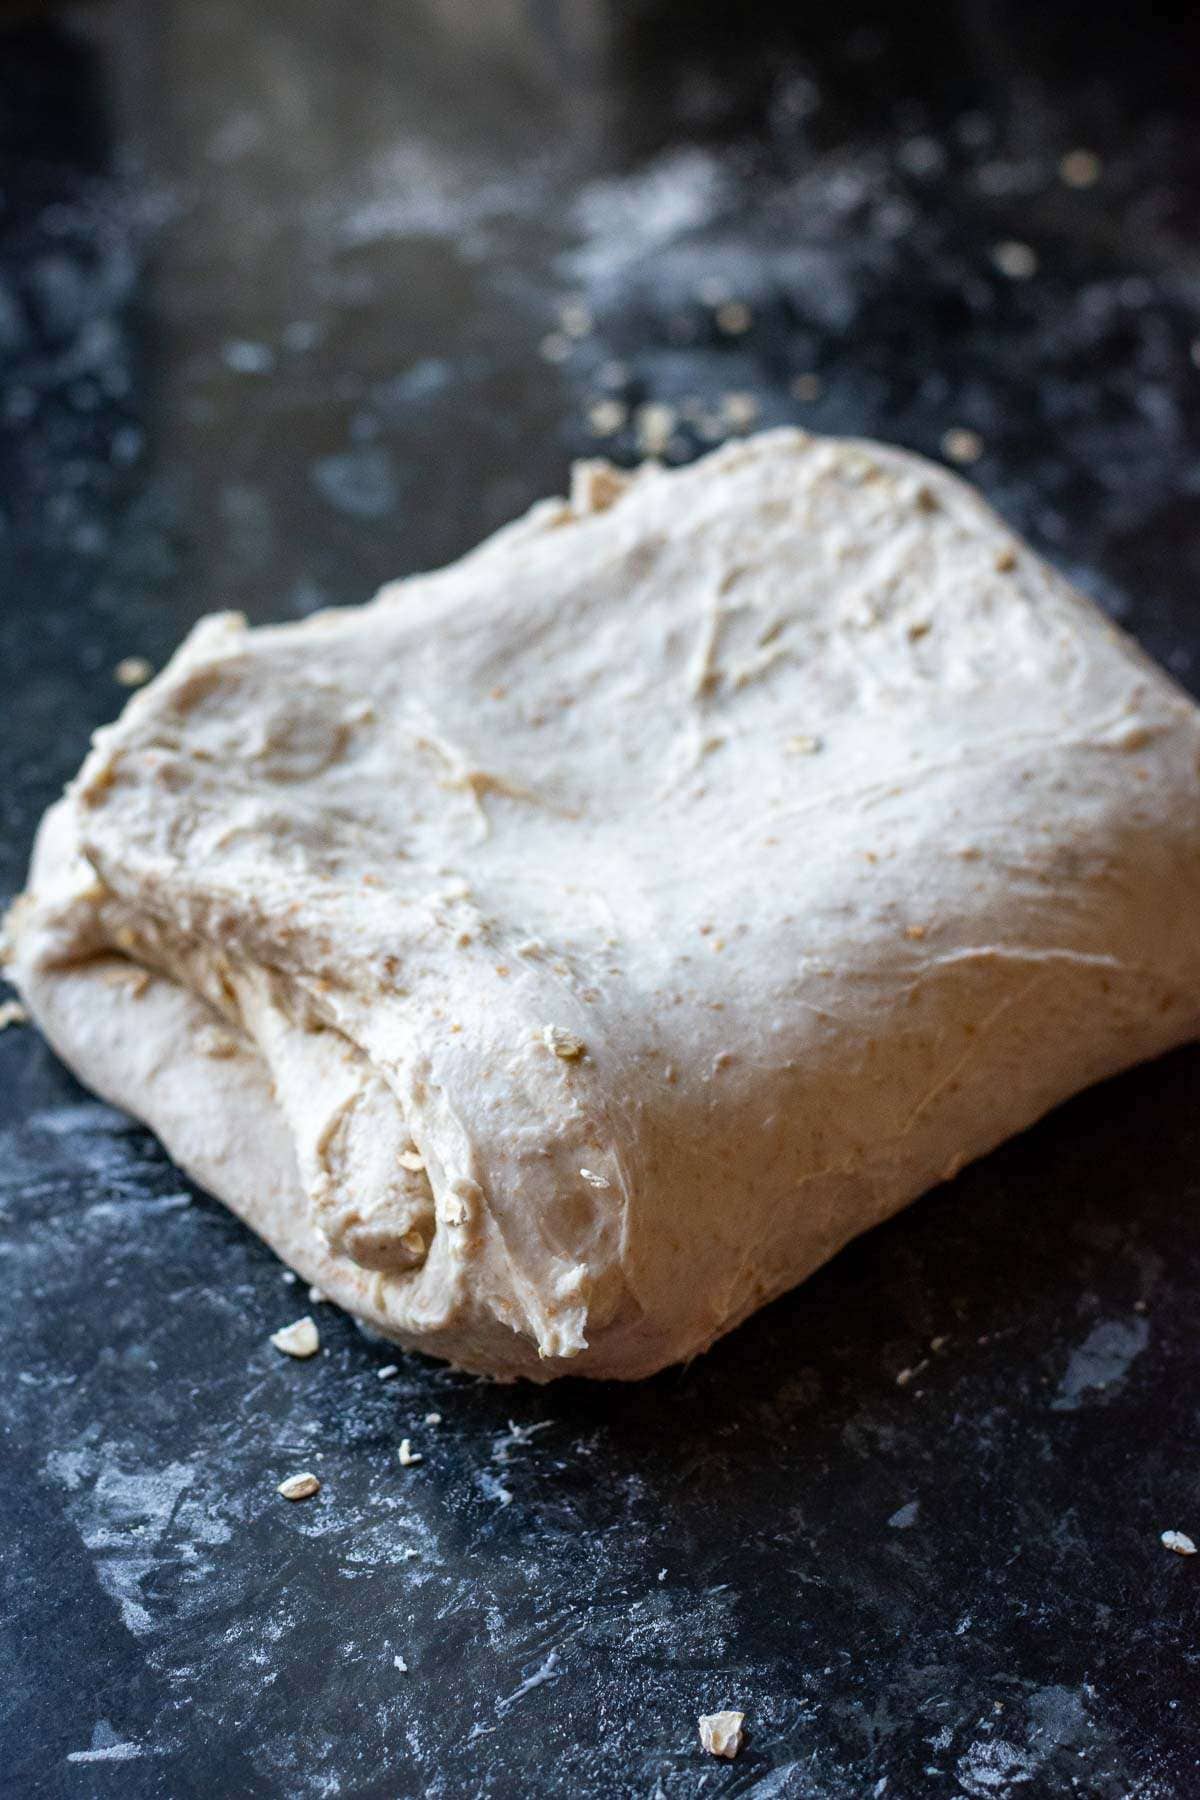
One of the key benefits of lamination is that it helps build the overall strength of the dough. By stretching the dough into a thin layer and then folding in back up, you're not only introducing extra structure but also reinforcing the gluten network.
This makes the dough more resilient, especially when handling high-hydration doughs, which tend to be trickier to manage. Strong dough means a taller, well-risen loaf.
2. Improves Gluten Structure
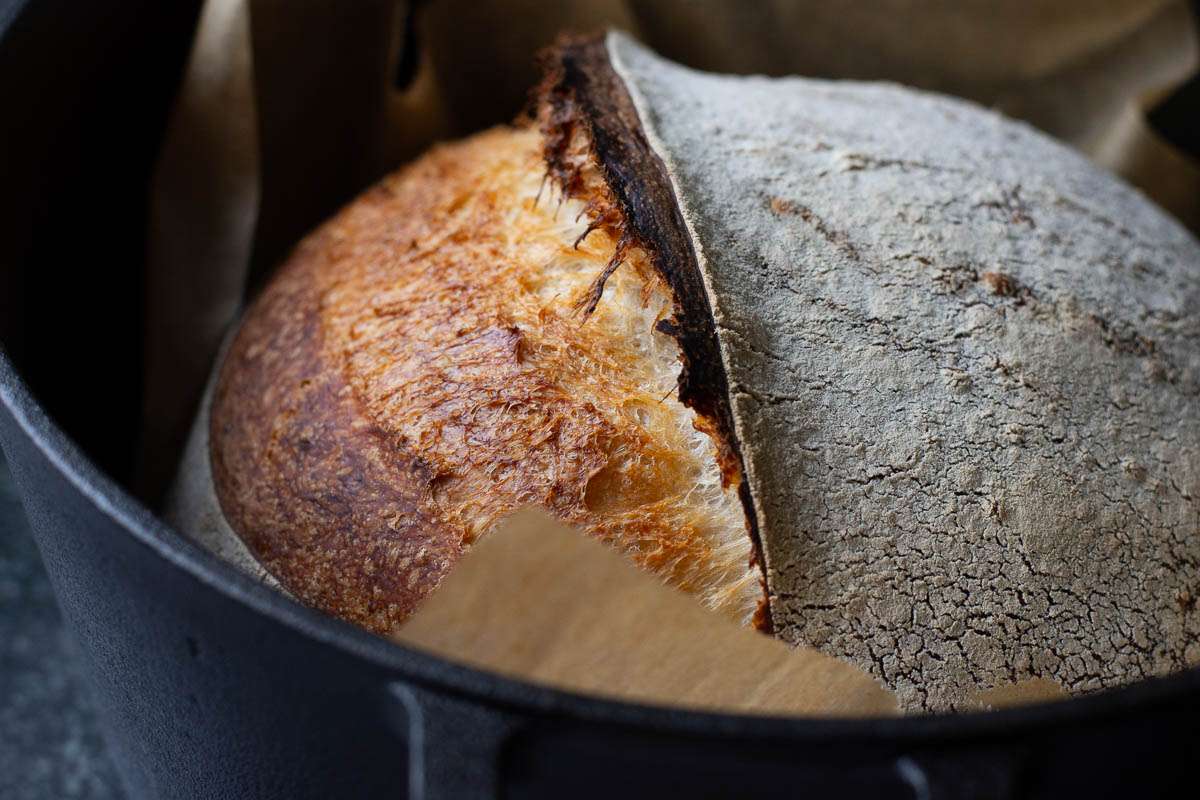
Lamination further develops the gluten strands, creating a dough that has the elasticity and flexibility (but it also depends on flour P/F ratio) needed for a great rise. A strong gluten network also ensures the dough can trap gas more effectively during the rest of the bulk fermentation, resulting in a better crumb structure.
3. Promotes a More Open Crumb
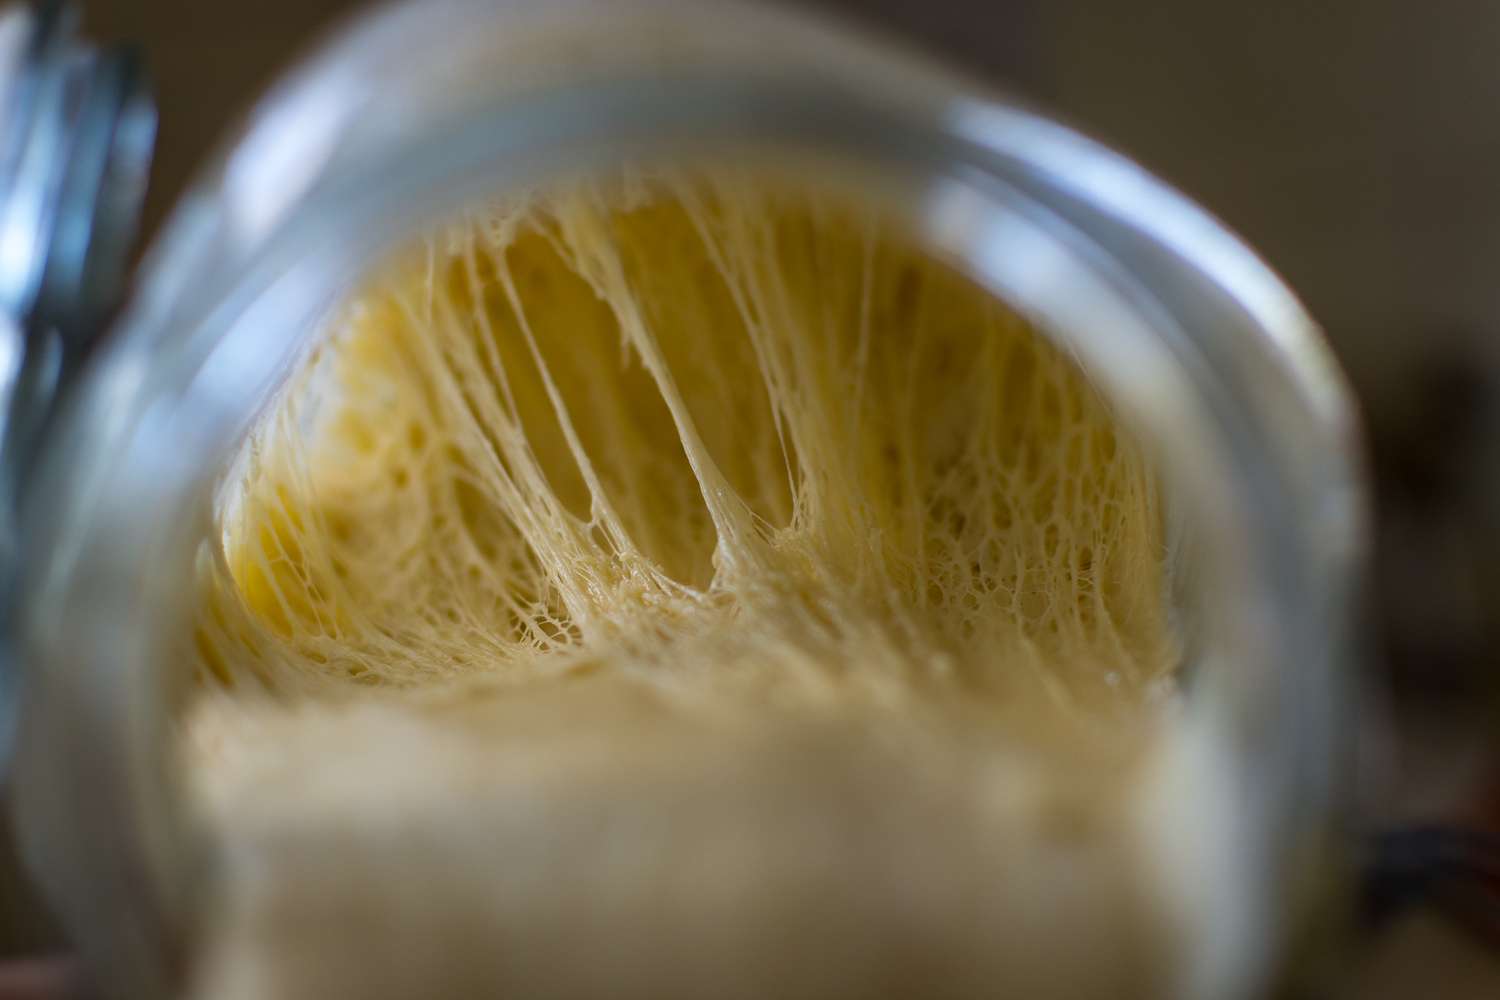
Who doesn't love those big, airy holes in a loaf of sourdough? The lamination process can help you achieve a more open crumb. The thin layers created during lamination give the dough more room to expand, allowing for better gas retention and a more desirable texture in the final sourdough loaf.
4. (Almost) Irreplaceable Method For Mix-In Distribution
If you're working with sourdough recipes with mix-ins, the lamination technique is your best friend. It ensures even distribution without damaging the dough or squashing delicate ingredients.
By stretching the dough into a large, thin sheet before folding, you can scatter your mix-ins evenly, guaranteeing they're well-incorporated throughout. The result? No clumps of raisins or uneven pockets of flavour-just beautifully distributed sourdough inclusions for consistently great results.

Mix It Up: Turn Your Sourdough into a Flavour Adventure.
But is Laminating Sourdough Really Necessary?
Lamination is an advanced technique, and it's not essential for making a good loaf of everyday sourdough bread. If you master the coil fold method or classic stretch and folds for sourdough, you'll still develop a strong gluten network and structure in your dough.
That said, lamination does have its perks, especially when working with certain types of dough.
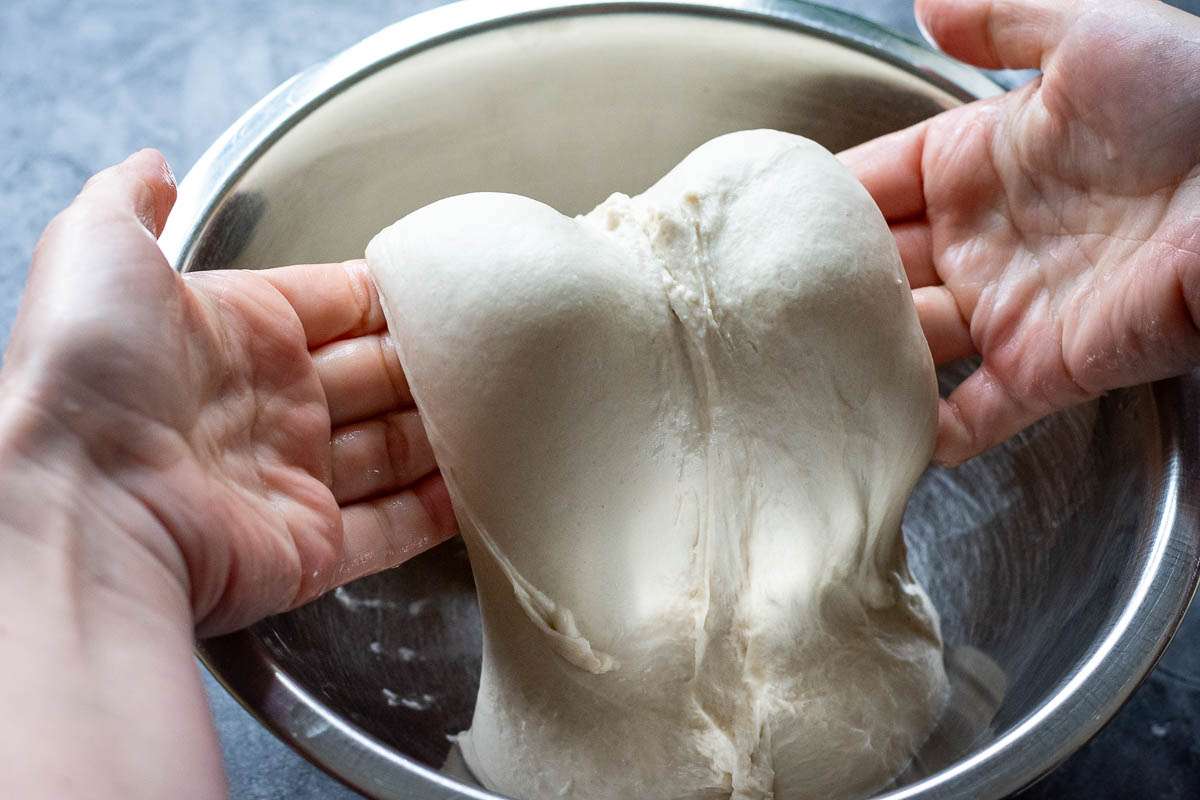
For instance, if you're dealing with a high hydration sourdough, where the dough is a bit wetter and harder to handle, lamination can help build extra strength, making shaping easier.
It's also a fantastic technique for incorporating extra ingredients for flavoured sourdough - especially when those ingredients are tricky to fold in with traditional methods.
So let's talk about the mix-ins. Lamination really shines when you're working with messy mix-ins like caramelized onions or thawed fruit. These types of ingredients can be problematic when exposed on the top of the dough, as they tend to burn during baking. Laminating seals them in and keeps them safe from scorching.
Larger mix-ins? No problem. For big items like chunks of cheese or uncut olives, lamination ensures that they stay securely within the dough instead of migrating out.

You also get that lovely swirl effect when laminating with smaller ingredients like seeds or herbs, adding not only flavour but a gorgeous aesthetic. We use it to laminate onion jam our Caramelised Onion Sourdough Bread recipe.
Lastly, if you're working with fragile mix-ins, such as delicate berries or nuts, lamination is your best bet. It prevents these more sensitive ingredients from breaking apart during the folding process, giving you a loaf that's as beautiful as it is tasty.
TIP: We don't recommend laminating the dough made with a high proportion of spelt flour (like our Spelt Sourdough Bread), as spelt flour requires gentler handling and may tear easily.
At What Stage Should You Laminate The Dough?
When it comes to laminating sourdough, timing is everything. There are two main points during the bulk fermentation process when you can introduce lamination: midway through bulk fermentation or right at the end of the bulk fermentation. Both options have their merits, depending on your desired outcome.
1. Midway Through Bulk Fermentation
The first option is to laminate midway through the sourdough bulk fermentation process, usually after a couple of rounds of coil folding. By this point, your dough should have developed enough strength and elasticity, making it easier to stretch thin without tearing.
Laminating at this stage is especially useful if you're working with mix-ins like seeds or fruit, as it helps distribute them evenly. Plus, it continues building gluten strength. The sweet spot for this method is about halfway through bulk fermentation when the dough is already strong enough to stretch out without tearing but still has time left to rise and mature.
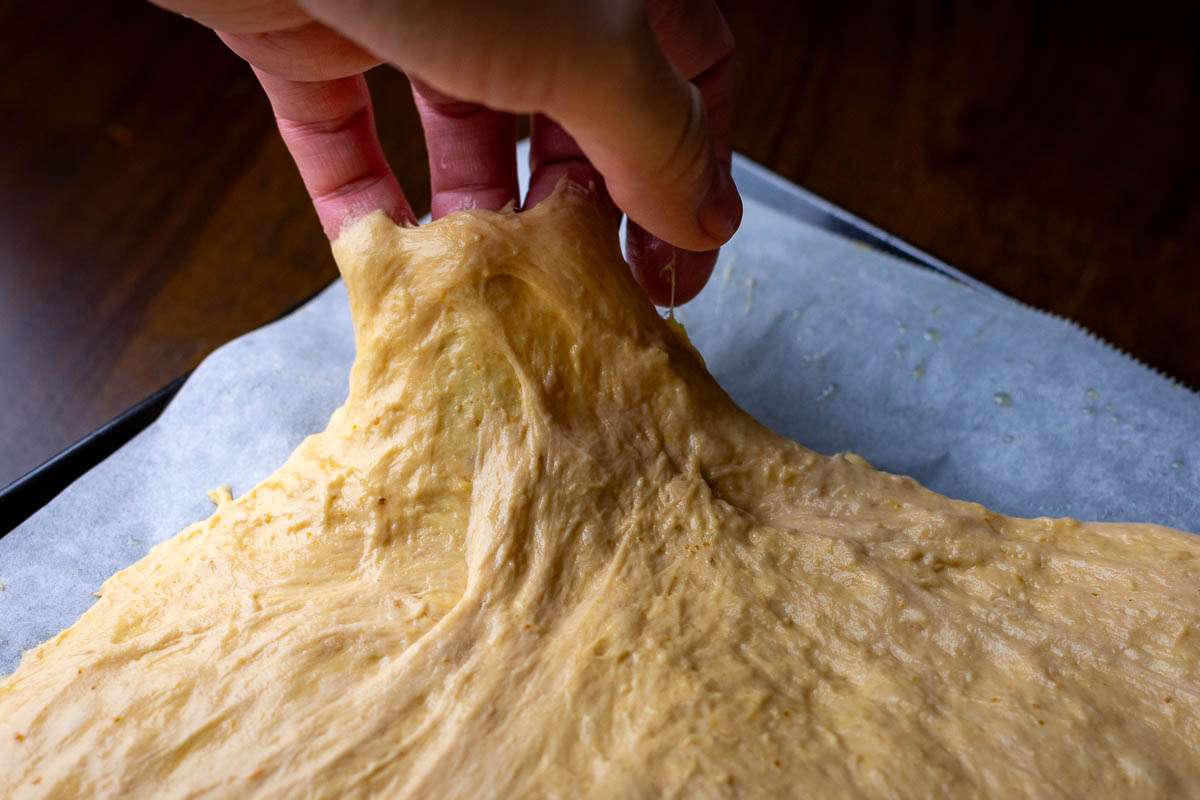
2. At the End of Bulk Fermentation
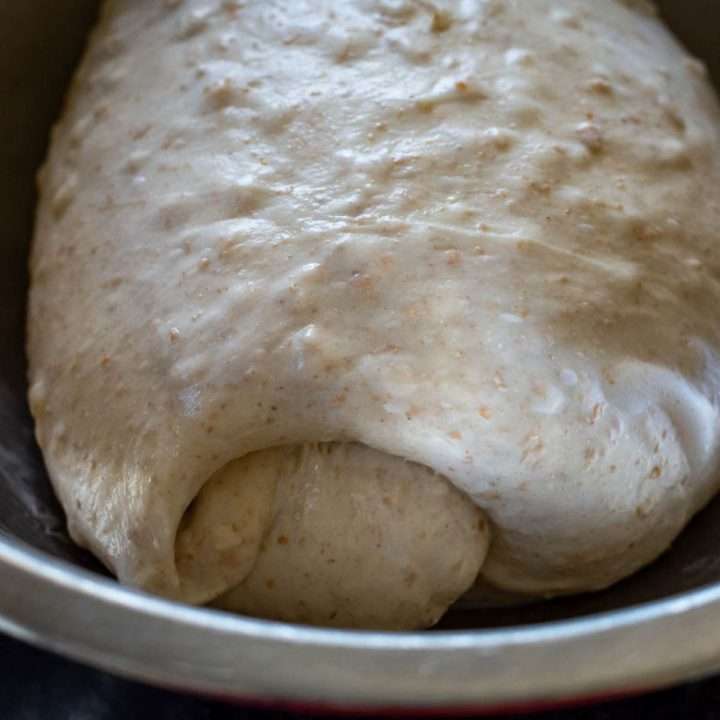
Alternatively, you can laminate at the end of the bulk fermentation period. In this case, lamination acts as a pre-shape, gently shaping the dough without overhandling it. This method can create a beautiful swirl pattern in the final loaf if you add mix-ins, and the dough will be more structured as it enters its final resting phase. We do it in our Cinnamon Swirl Sourdough Bread recipe.
Both methods have their benefits, so experiment with each to see which works best for your sourdough baking style and schedule.
Step-By-Step Lamination Method
Laminating sourdough is a great way to build strength in your dough and incorporate mix-ins if desired, all while creating a lovely, even structure. Whether you're adding delicious mix-ins to your sourdough, or simply looking to improve your dough's texture, the method remains the same.
STEP 1: Prepare Your Work Surface
First things first, you need a smooth, clean work surface to stretch your dough. Lightly spritz the surface with water, but avoid flour or oil, which can interfere with the dough's stretch or create pockets of dry flour in between layers.
STEP 2. Stretch the Dough
Once your dough has had a couple of rounds of folds (usually after the second or third set), it's time to start laminating. As previously discussed, you may choose to laminate sourdough after the last coil fold instead of pre-shape.
Place the dough in the centre of your work surface, and gently begin to stretch it out.
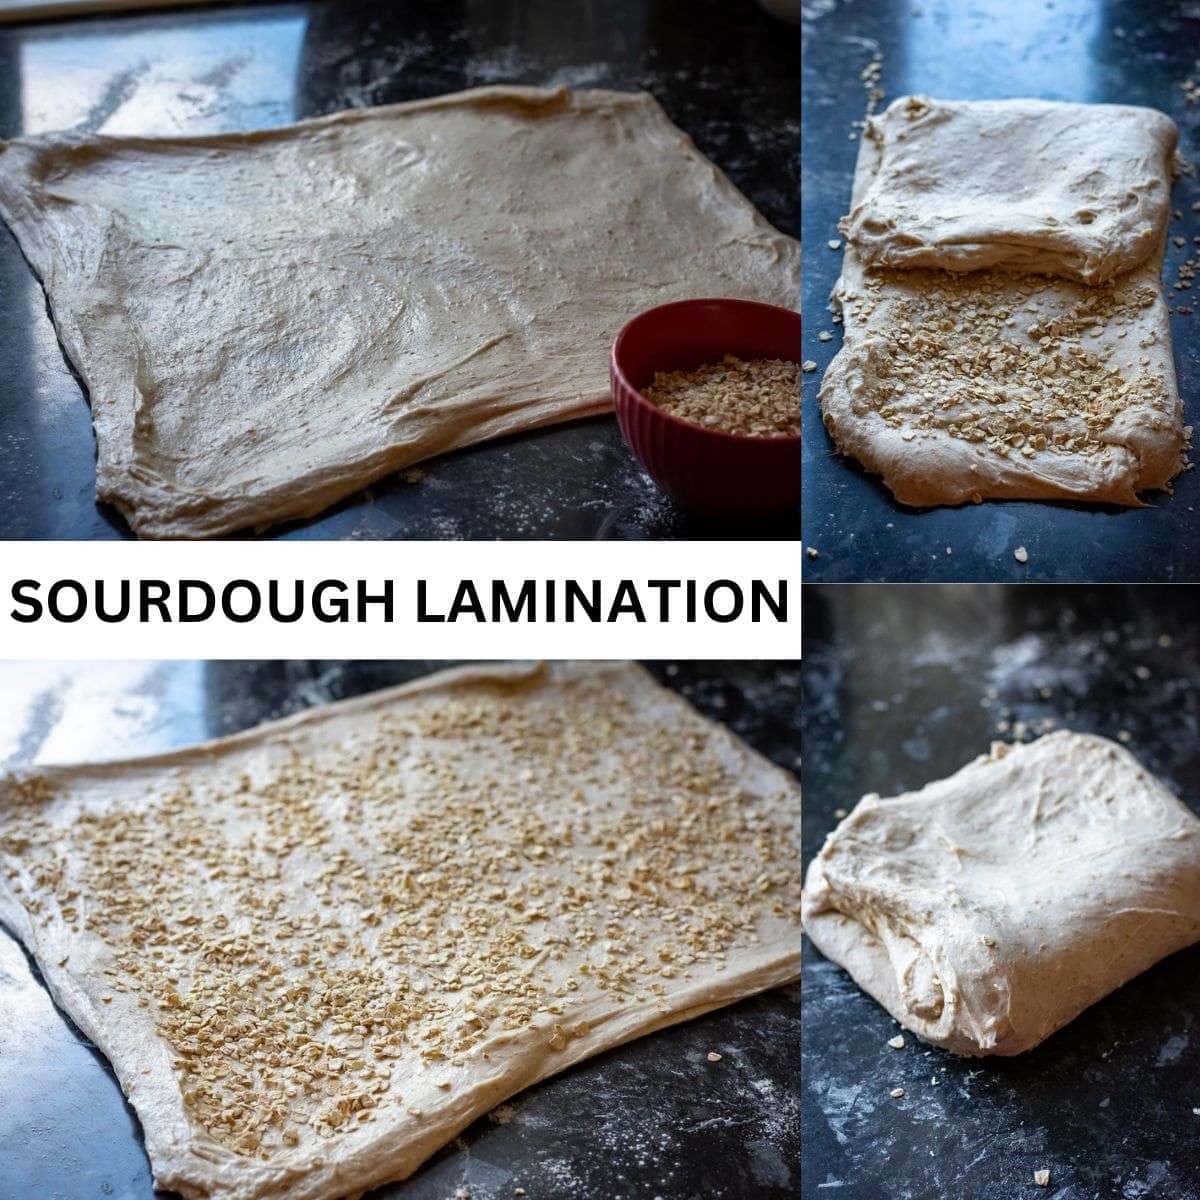
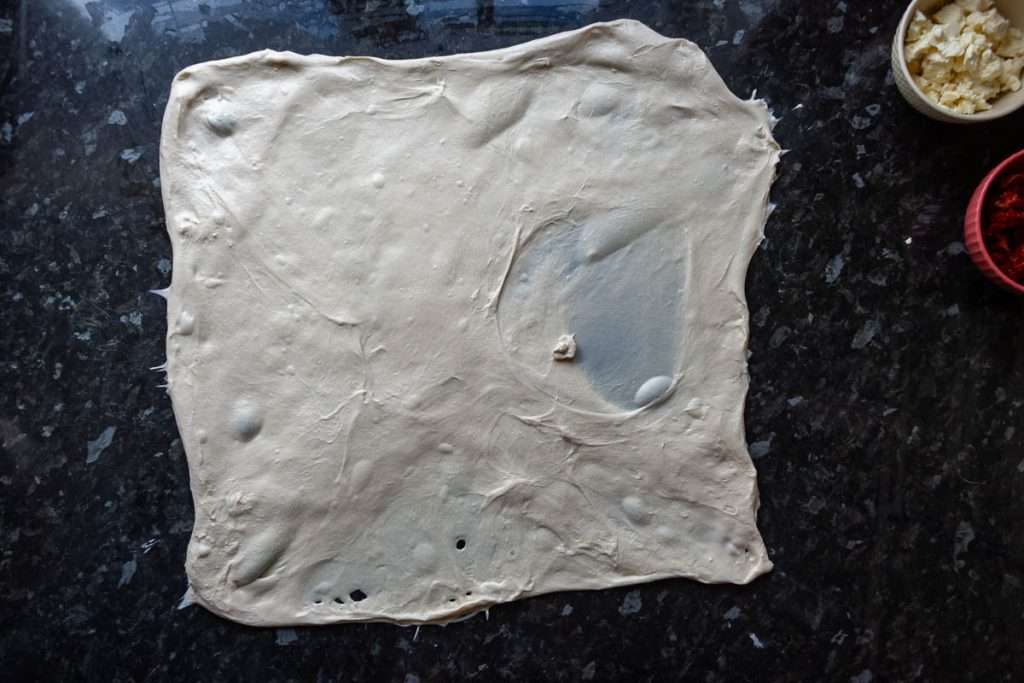
Ease the dough outward from the centre using your hands. Work in a circular motion, gently tugging each corner and side until the dough becomes a large, thin rectangle or square.
The goal here is to stretch the dough as thin as possible without tearing it. It should look almost like a translucent sheet by the time you're done.
STEP 3: Incorporate Mix-Ins (Optional)
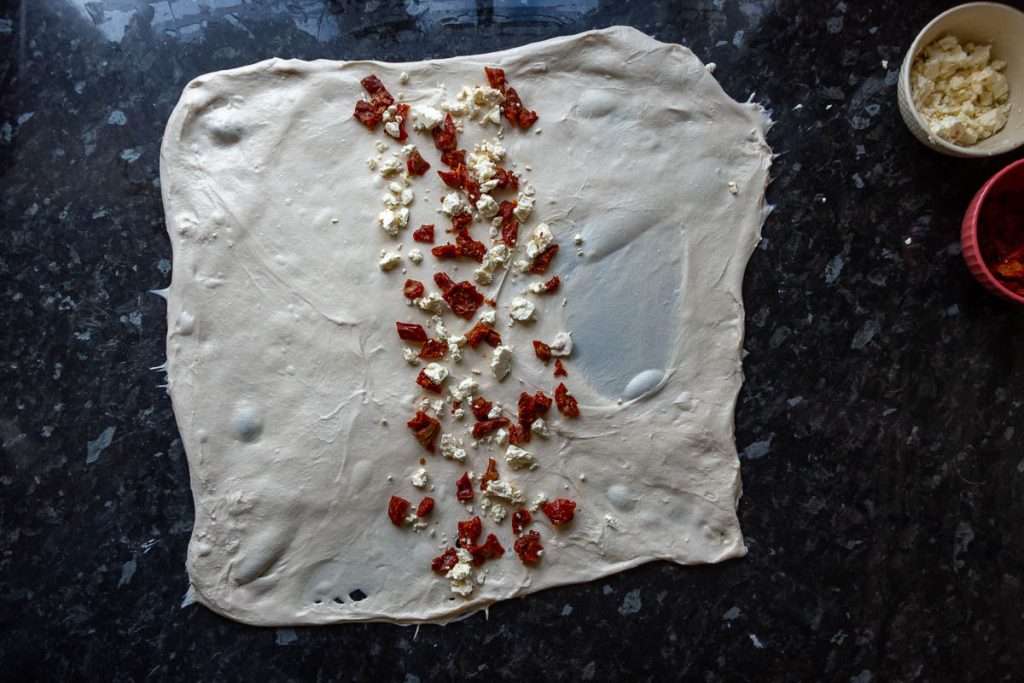
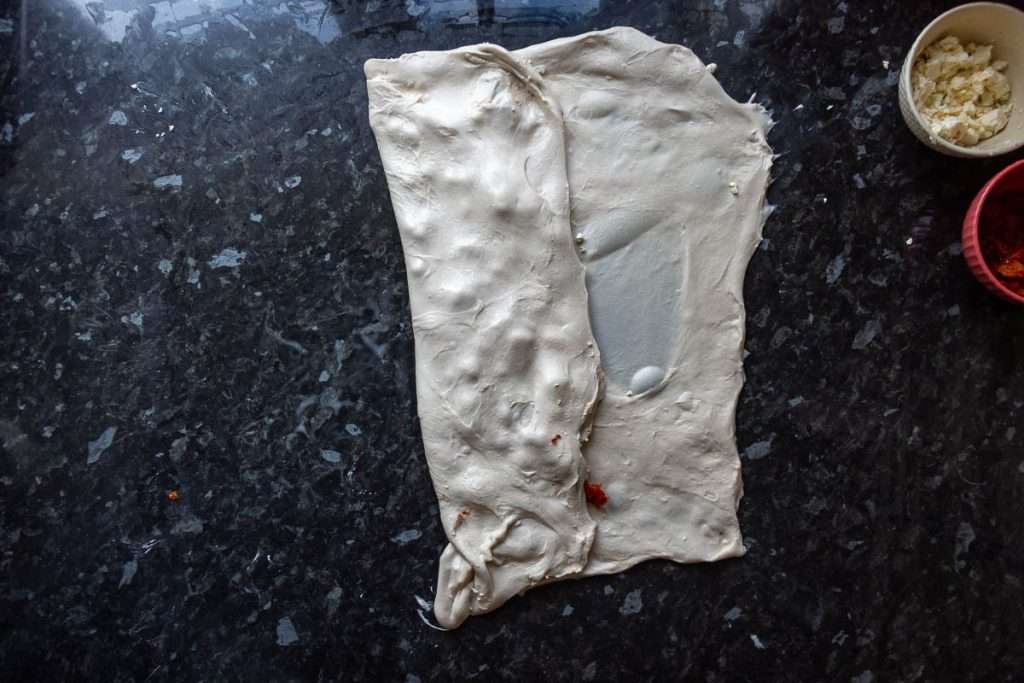
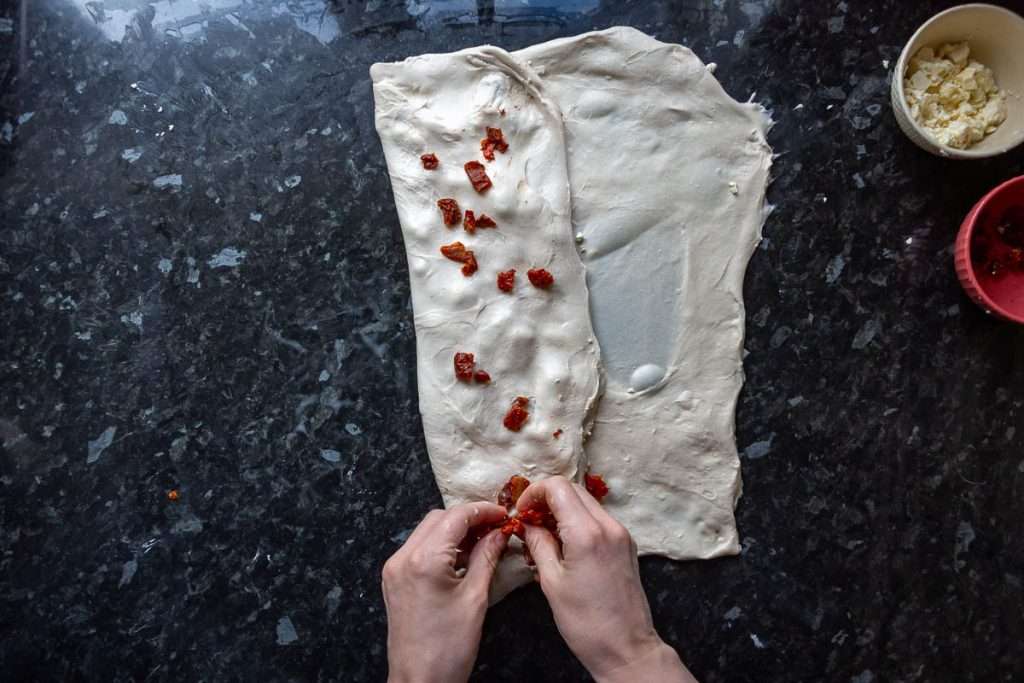
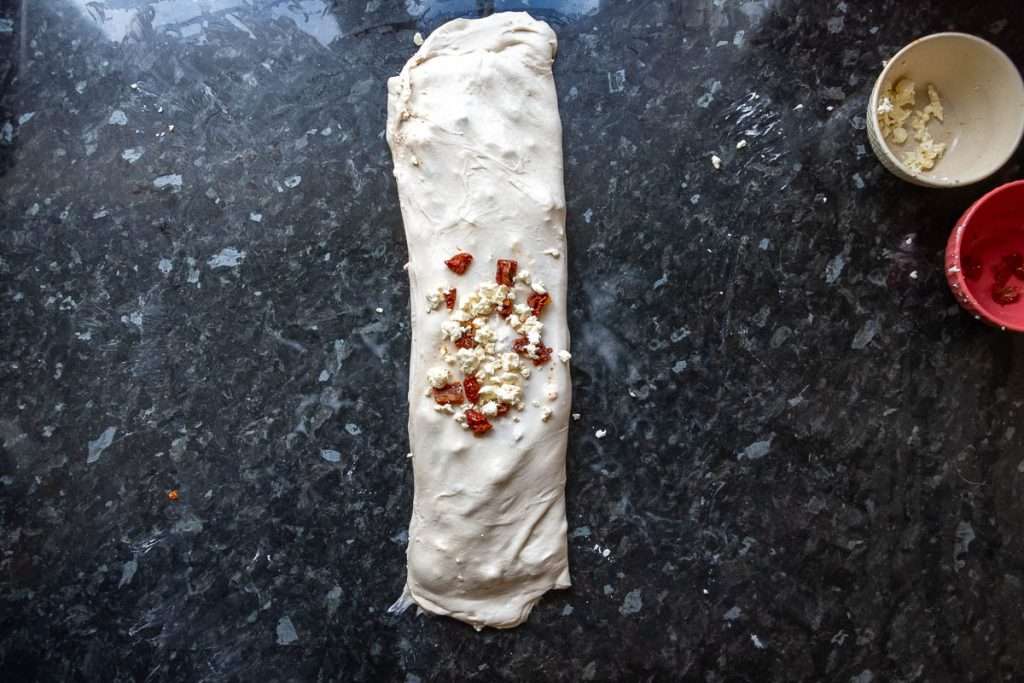
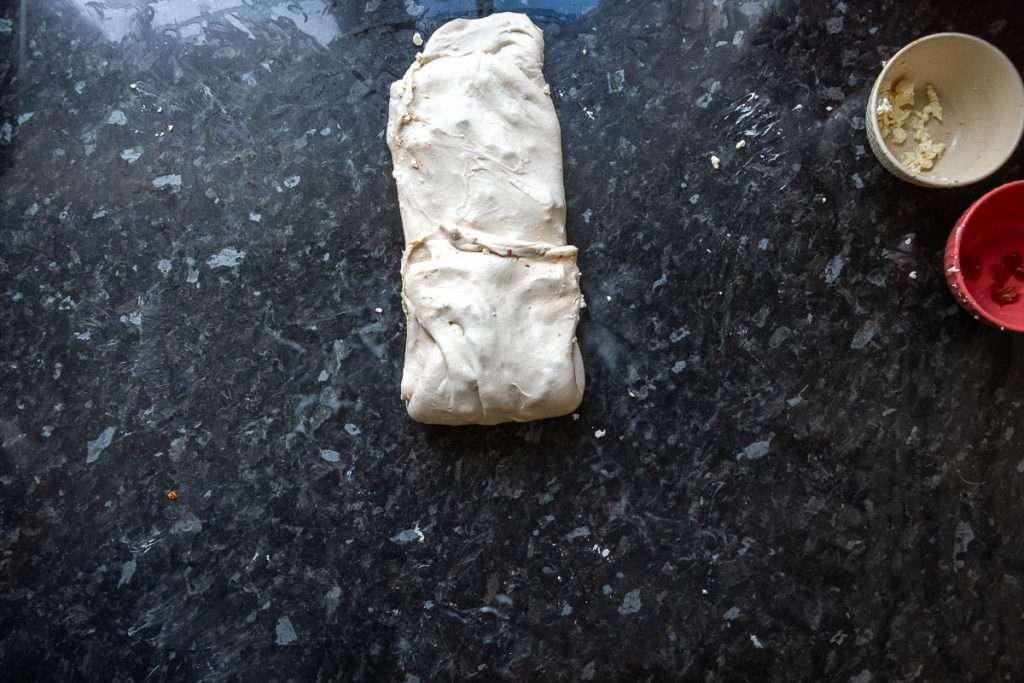
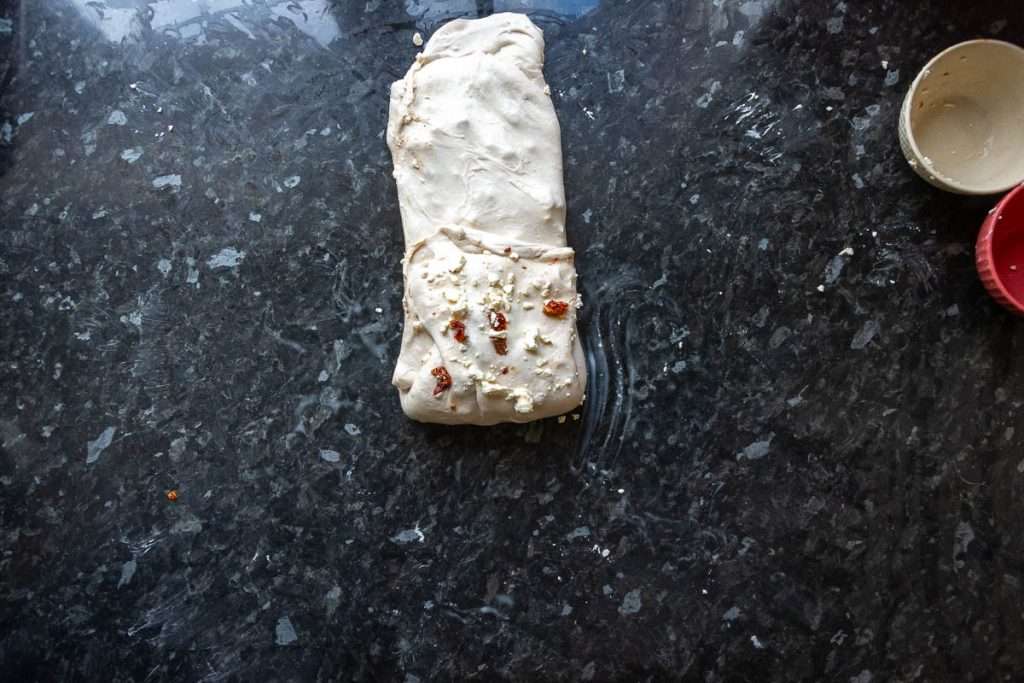
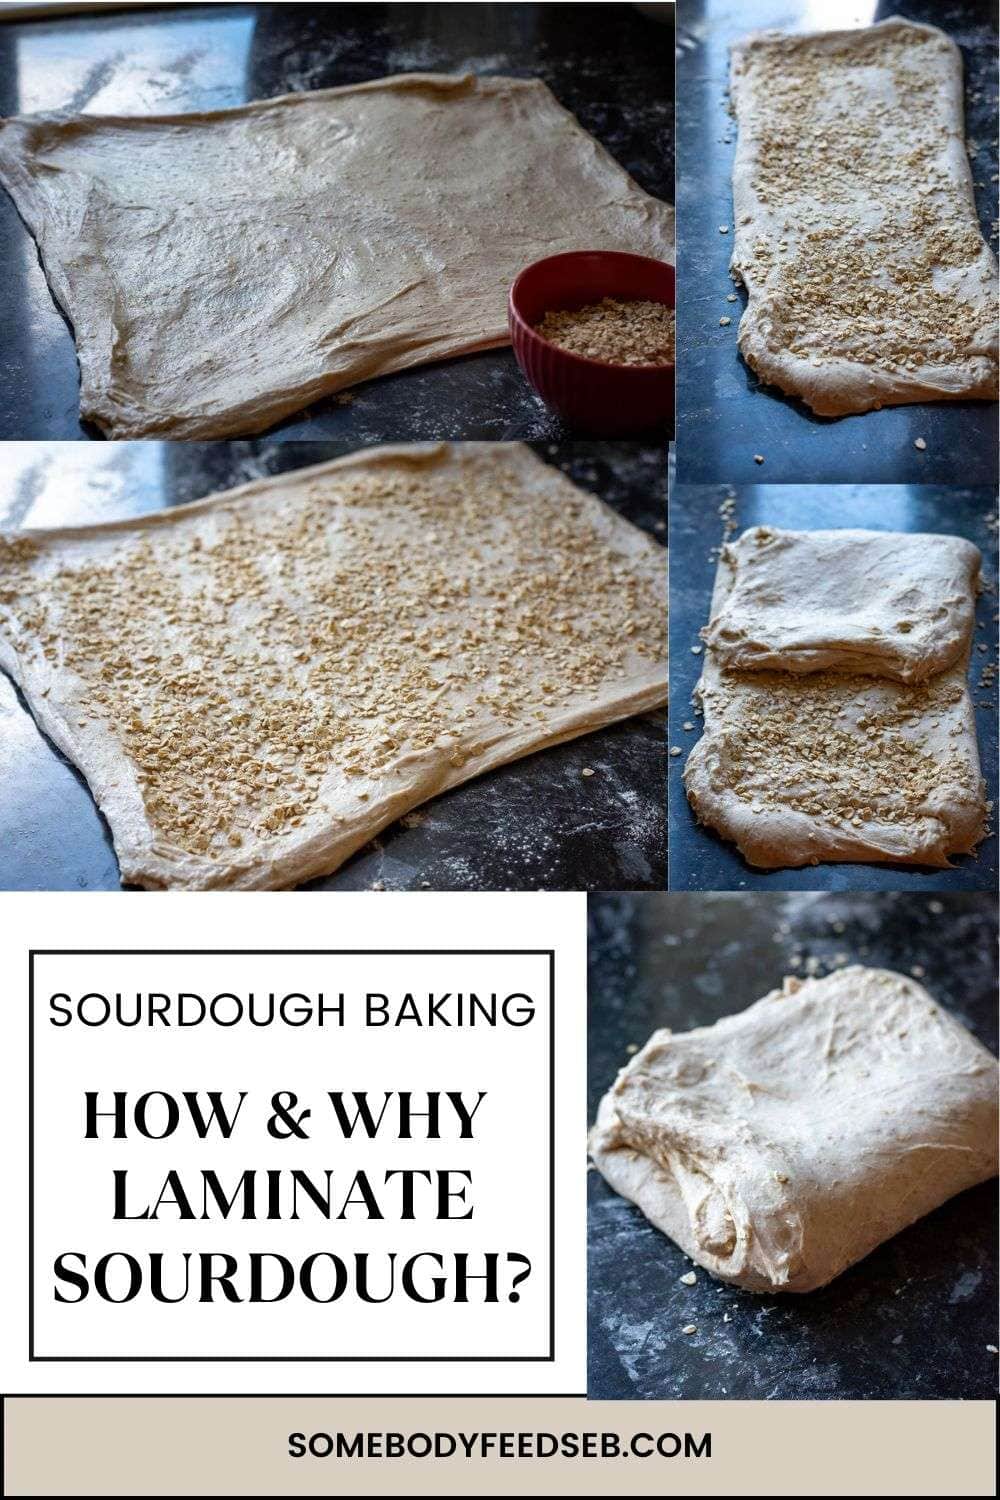
If you're laminating sourdough with mix-ins, now's the time to add them. Evenly sprinkle your mix-ins over the entire surface of the stretched-out dough (you can see step-by-step photos of laminating the mix-ins evenly into the sourdough below). If you're keeping it plain, just don't add anything, but laminate exactly the same.
STEP 4: Fold the Dough
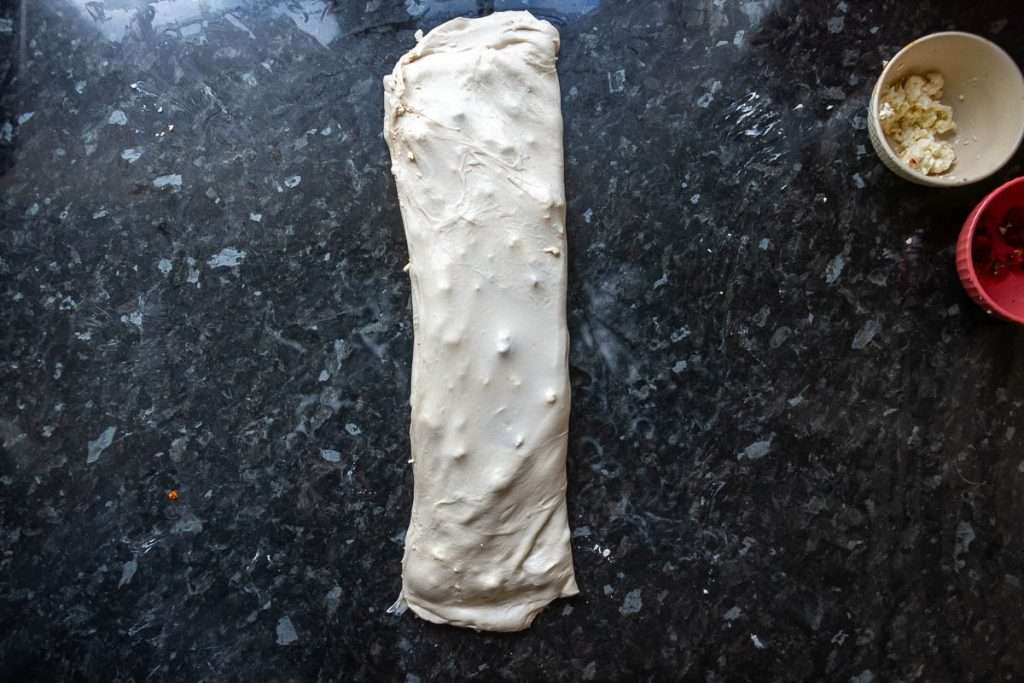
Start by folding the dough like a letter. Bring one third of the dough towards the centre, then fold the other side over that, just as if you were folding a letter for an envelope.
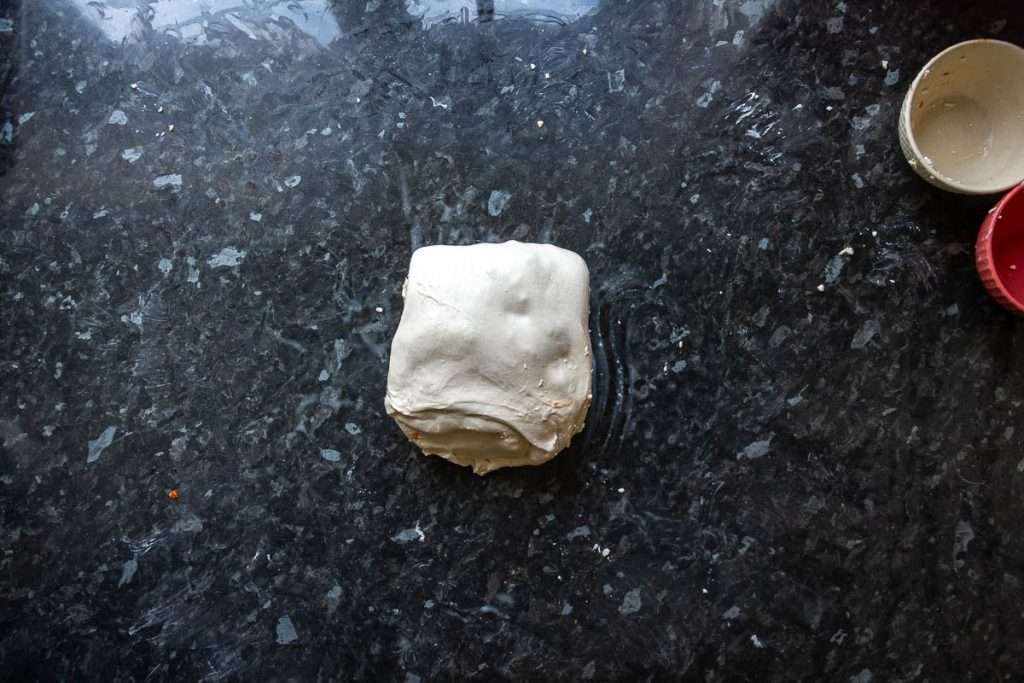
If you added mix-ins, make sure they're neatly tucked inside the folds. Continue adding mix-ins every time you are about to fold the dough over as shown in the photo series above.
STEP 5: Re-Fold for a Compact Package
Once you've done your first fold, it's time to repeat. Take the short edge and fold it again towards the centre, and then the other end over to create a compact square or rectangle. You should now have a neatly folded package with multiple layers.
This process is a great way to strengthen the dough structure without overworking it, creating those beautiful open crumbs and a more resilient, well-risen loaf.
Watch The Video
What To Do After Lamination Of Sourdough?
What you do next depends on whether you've added mix-ins or if you're using lamination as your final step before shaping.
If You Added Mix-Ins
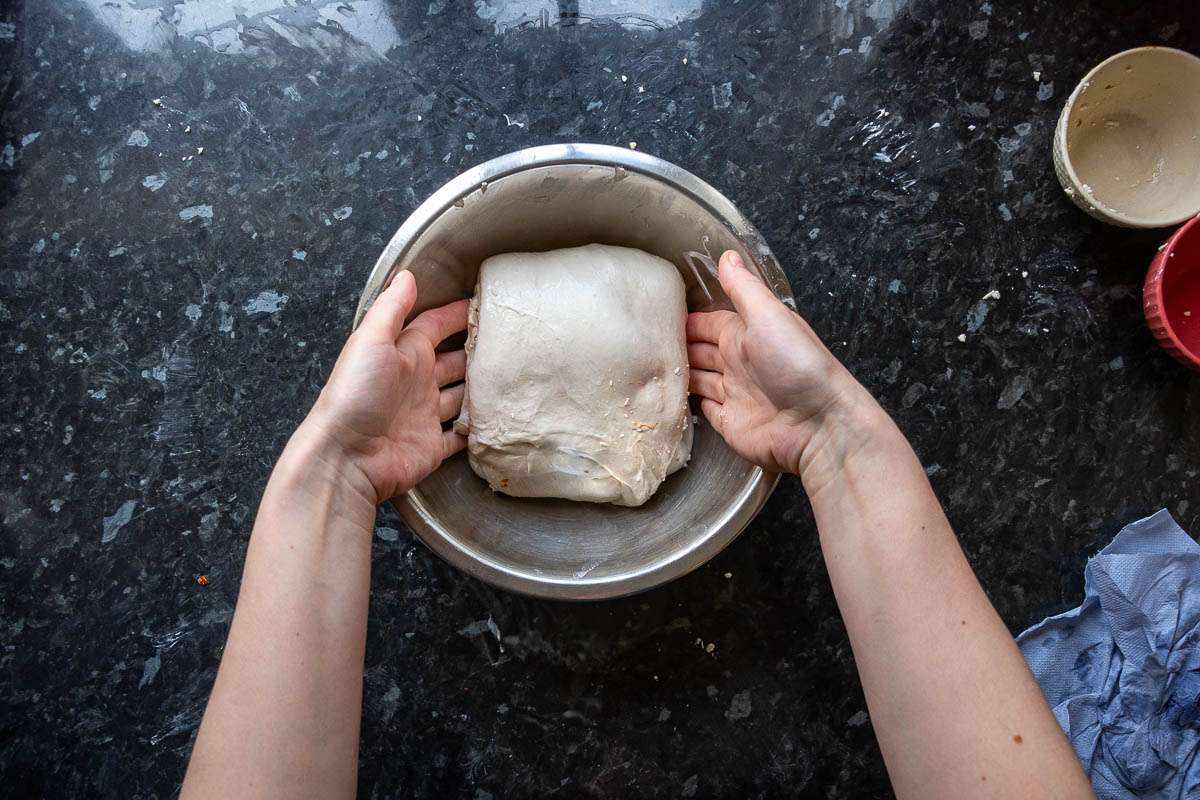
After laminating sourdough with mix-ins like nuts, seeds, or fruit, it's a good idea to do a couple more gentle coil folds to help distribute the mix-ins evenly throughout the dough. These folds also provide extra strength to the dough structure, ensuring it will hold its shape beautifully during baking. After each fold, allow the dough to rest for 30 minutes at room temperature before proceeding with another coil fold.
If Lam ination Is Your Final Step Before Shaping
If you're using lamination at the end of the bulk fermentation period, this step can act as a pre-shape. In this case, let the dough rest at room temperature for another hour or two after laminating. This allows the dough to relax and develop further before you move on to the final shaping and cold retardation.
Either way, whether you added mix-ins or not, lamination leaves your dough in a perfect state to move forward into shaping, resulting in a well-structured, delicious loaf.
Sourdough Lamination FAQs
One common reason is insufficient gluten development at the stage of lamination. If the dough hasn't been properly kneaded or folded, the gluten structure may be weak and unable to withstand the stretching. Additionally, over-hydration can cause the dough to become too slack, making it more prone to tearing. Lastly, if the dough is too cold, the gluten may not be as pliable.
You may not be able to properly stretch out low-hydration dough (generally, lower than 65-70% hydration) without it tearing, as it lacks elasticity.
Laminating sourdough can complement, but not completely replace, traditional folding methods. Both techniques help to strengthen the gluten structure in the dough, improving its elasticity and gas retention. However, you may benefit from one-time lamination if you kneaded the dough enough to pass windowpane test first, and then left it to bulk ferment without any folds.
More Sourdough Baking Techniques To Master
Unlock the secrets of sourdough artisan bread with our collection of articles designed to take your baking skills to the next level, ensuring you create delicious loaves with perfect texture and flavour every time.



Recipes To Practice Laminating Sourdough







Leave a Reply