
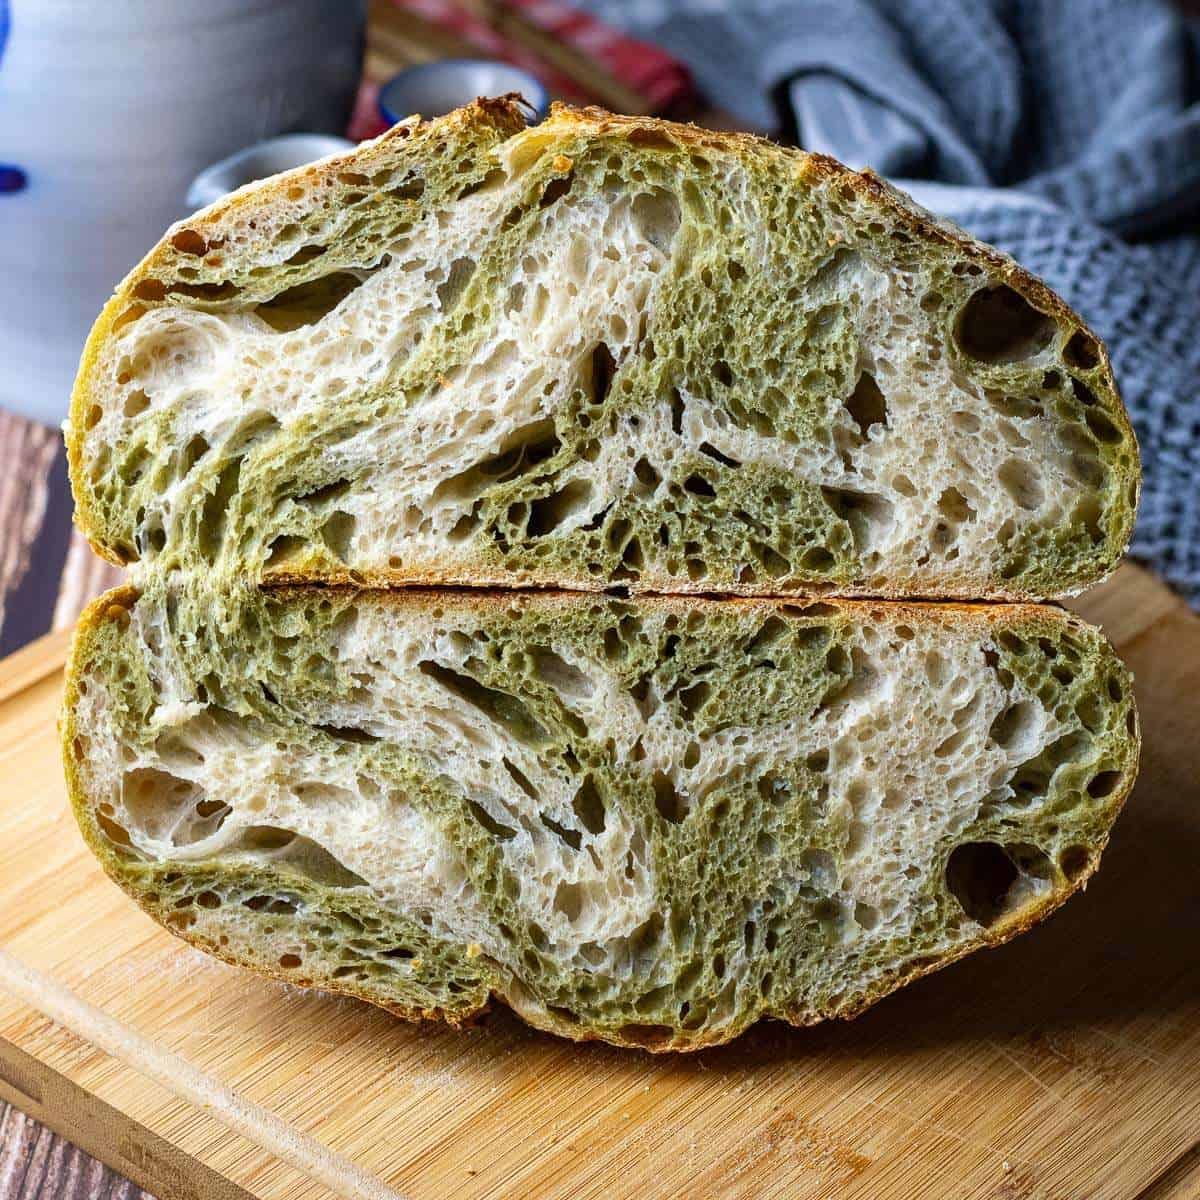
If you're into experimenting with flavour and love a loaf that looks as good as it tastes, this Matcha Sourdough Bread is absolutely worth a go. Swirled with earthy green tones and made with simple ingredients, it's a fun little twist that's just different enough to keep things interesting, without messing with the fundamentals.
Jump to:
As an Amazon Associate I earn from qualifying purchases, at no extra cost for you! Thank you!
Whether you're a full-blown matcha lover or just curious to try a matcha version of something you already enjoy, this loaf brings colour, flavour, and a bit of drama to your baking routine. And yes, it still has that crispy crust and chewy crumb we all want from a good sourdough.
Now, I'll be honest - matcha tea isn't really my thing. But I do like matcha-flavoured things (like Matcha Overnight Oats, Matcha Sourdough Cookies and Matcha Ice Cream). After seeing all those swirl sourdoughs online made with cocoa powder and blue pea powder, I finally knew what to do with that tin of ceremonial matcha I brought back from Japan last year.
This Matcha Sourdough Bread recipe is what came out of that idea: half everyday sourdough bread, half green, fully satisfying.

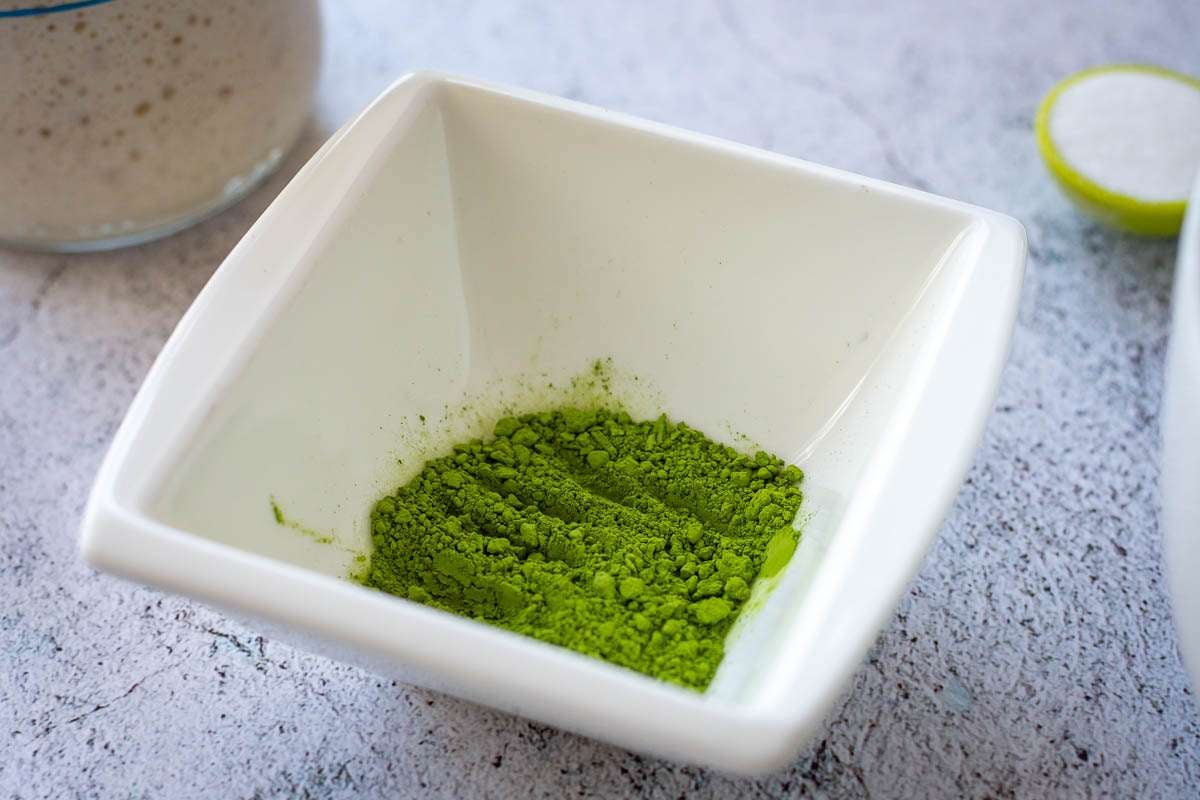
Ceremonial Matcha
Matcha is finely ground green tea powder that originated in Japan, traditionally used in tea ceremonies and now found in everything from lattes to cake. It's got a bold, earthy flavour and offers a natural energy boost without the jitters of coffee.
For the best flavour and colour, I recommend using ceremonial matcha in this recipe. It's smoother, less bitter, and gives the dough that vibrant green swirl that really stands out. You can use cheaper culinary grade matcha powder if that's what you have, but the flavour will be more robust and the colour more muted.
How Does Matcha Affect Sourdough Baking?
HYDRATION: Matcha powder absorbs water differently than flour, which can slightly tighten the dough. You may notice the matcha portion feels firmer or less elastic, even with the same sourdough hydration.
BULK FERMENTATION: The caffeine in matcha can slow down natural fermentation by inhibiting the activity of wild yeast. To keep the bulk fermentation of the matcha dough in sync with the plain dough, we add a small amount of sugar to help boost yeast activity.

DOUGH HANDLING: Matcha can make the dough a bit stiffer and slightly more prone to tearing early on. That's normal - just be gentle with your coil folds and let time and gluten development do their thing.

CRUST AND CRUMB: The addition of matcha won't impact oven spring much, but it can lead to a slightly denser crumb if fermentation is underpowered. It may also cause a matte finish on the crust if the matcha layer is close to the surface.

Mix It Up: Turn Your Sourdough into a Flavour Adventure.
Creating A Swirl in Sourdough Bread
To get that beautiful swirl effect in your matcha bread, we combine the two doughs after bulk fermentation, using a quick lamination step during pre-shape. Here's how to do it:
- Lightly spray your surface with water to prevent sticking - no flour needed here.
- Place the plain dough down and gently stretch it into a square, about 35x35cm.
- Using wet hands, stretch the matcha dough into a similar square (like you're stretching a pizza dough hovering in the air) and carefully lay it over the plain dough. Then tug the edges to fit the shape of your plain sourdough.
- Take your time here-if the doughs are too sticky, they'll glue together before you get a clean stretch. A light mist of water helps.
- Fold the right third of the dough into the centre, then the left third over the top (like folding a letter).
- Roll the dough up into a log and cover it for a short rest.
After this rest, the final shape is simple: no pulling or corner folding - just tuck the edges under gently and round the dough by cupping with your hands. We want to keep that swirl intact.
Place the matcha sourdough seam side up into a floured proofing basket, and once it's in, give it a quick stitch with your fingers to tighten it up. This helps the dough hold its shape and spread less when baked the next day.
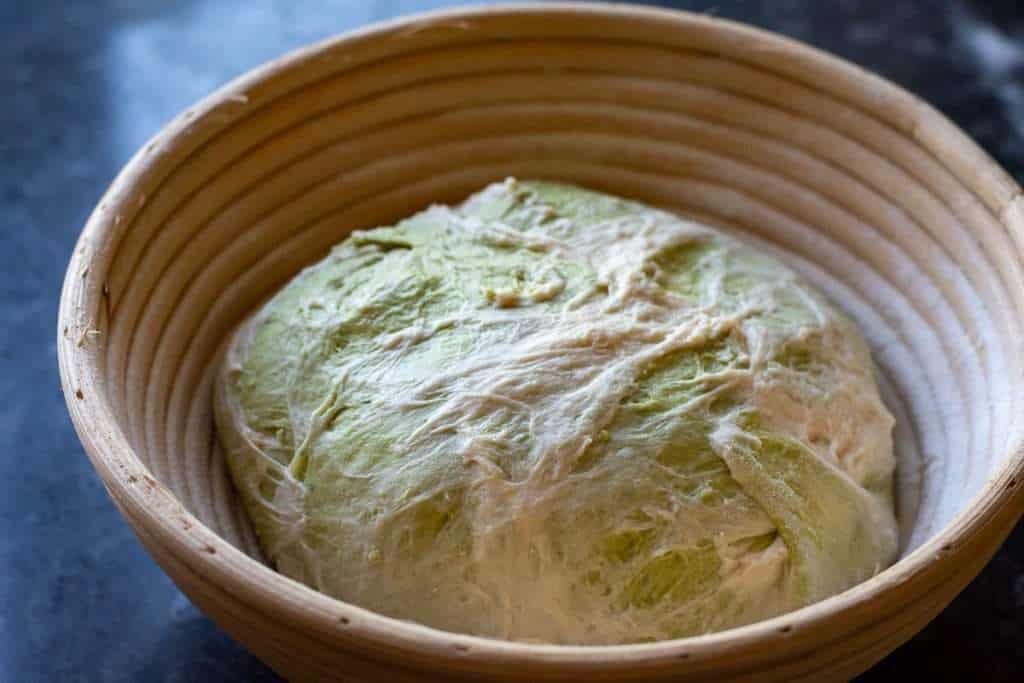

TIP: Use higher protein content flour - as it will create the dough more suitable for stretching out thin and laminating. Learn more how protein content in flour affects sourdough.
You can use this same method in our Turmeric Swirl Sourdough Bread and Marbled Purple Sourdough Bread With Raspberry Powder.
Serving Suggestions
This matcha sourdough isn't sweet, so it plays well with both savoury and sweet toppings. Try it toasted with a slather of white chocolate spread.
Or keep it savoury with a swipe of cream cheese and a few slices of smoked salmon (trust me on this one). It also makes a mean grilled cheese, especially with a sharp cheddar that can stand up to the earthy notes of the matcha.

Matcha Sourdough Bread
Equipment
- Bench Scraper
- Proofing Basket
- Razor Blade or Bread Lame
Ingredients
For Plain Sourdough:
- 200 g strong bread flour with at least 12% protein content
- 4 g salt
- 80 g active sourdough starter 100% hydration
- 120 ml water
For Matcha Sourdough:
- 200 g strong bread flour with at least 12% protein content
- 5 g matcha powder ceremonial matcha will give you the best colour
- 4 g salt
- 5 g white sugar caster or granulated*
- 80 g active sourdough starter 100% hydration
- 120 ml water
Instructions
DAY 1:
Feed Sourdough Starter
- First thing in the morning, feed your sourdough starter. I typically feed 70g of my starter in a ratio of 1 part starter:1 part water:1 part flour. This simply means that I mix 70g of starter with 70g water and 70g flour. Scoop the mixture into a clean jar, and leave it in a warm spot (ideally, 21-27°C), semi-covered for 4 hours. Your starter should at least double in volume in this time. If it doesn't, it may need a couple of good feeds before it's fit for purpose.
- I use 160g of active starter for baking and feed the remaining 50g before storing it for the future.
Mixing The Plain Dough
- Once the sourdough starter is active and bubbly (and at least doubled in volume), mix the plain dough. I use a stand mixer for this. Simply mix the flour and salt in the bowl of a stand mixer. Then add the water and sourdough starter. Run the mixer, fitted with a dough hook attachment for 10 minutes, until your dough is smooth and elastic. It does not need to pass the windowpane test just yet (the gluten will continue developing when we fold the dough during the bulk fermentation period).
- Scoop the dough into a large bowl (reserve the mixer bowl and dough hook attachment for the next step- no need to wash them), cover with a damp kitchen towel or plastic wrap, and leave it in a warm place (21-27°C) for 30 minutes.
Mixing Matcha Sourdough
- To the bowl of a stand mixer, combine the flour, matcha powder, salt and sugar. Add sourdough starter and water, and, just like before, run the mixer for 10 minutes, until smooth dough forms.
- Scoop it into a separate container, cover and place in a warm spot for 30 minutes.
Coil Folds And Bulk Fermentation
- You will have to repeat the same steps to fold the two doughs in this section.
- After 30 minutes, with wet hands, perform the first set of coil folds on the plain sourdough. Simply lift the bread dough with both hands from the sides and tuck it under to form a coil (video below). Rotate the bowl a quarter turn and coil again. Cover the bowl again, and let the dough rest for 30 minutes again. Repeat with the matcha dough.
- You should repeat the process every 30 minutes until you have done 4-6 sets of coil folds. Your doughs will spread less with every set of folds, and by the end of it, you will have a much less sticky, very soft and elastic doughs that have blisters on top. For more information on how to coil fold and when to know when you've done enough folding, head to our dedicated article about Sourdough Coil Folds.
- Once all the folds have been completed, cover both doughs and let them rise at a warm room temperature for 1-2 hours. Your dough should just about double its original size. If you are using a see-through glass bowl for bulk fermenting, you should see a lot of activity and bubbles forming at the base and sides of the bowls.
Shaping and Cold Retardation
- At the end of bulk fermentation, using a bowl scraper, scoop the plain dough onto a kitchen surface sprayed with a little water to prevent sticking.
- Stretch the dough into a rough square of about 35x35cm (14 x14 inches) by pulling on the sides of the dough. It doesn't have to be precise, but try to keep the dough thickness relatively even.
- Take the matcha dough and spread it into a square on top of your plain dough, by pulling the sides of the dough (see video below for more guidance).
- Fold ⅓ of the right side of the layered dough into the centre, then ⅓ of the left side over (like a pamphlet).
- Roll the dough away from you into a right log, and pinch the seam together.
- Place it on a lightly floured section of the worktop, covered with an upside-down large bowl or a light tea towel for 30-60 minutes.
- After the rest period, come back to the dough. With your bench scraper held at a shallow angle to the work surface, push the dough while using your hand to tuck it under itself, creating tension. This fluid circular motion involves pushing and gently rounding with the bench knife, while your free hand continues the rounding motion, tucking the dough slightly under itself. It takes some practice, but you should aim for a tight round ball of dough that holds its shape and doesn't spread much.
- Place the dough ball into a well-floured banneton basket (or any proofing basket alternatives). We recommend using rice flour for dusting your proofing baskets. The smooth side of the sourdough ball should be at the bottom, with the seam at the top.
- Pinch the seam together with your fingers, if the dough starts spreading in the bowl to make sure the dough is tight. Sprinkle with some flour, and cover the dough with a clean fabric napkin or small lightweight tea towel.
- Place the whole thing in the fridge for its final rise (a.k.a. second rise) in the fridge for 12-36 hours (NOTE: If your fridge tends to dry things out, place the dough (in its basket) into a large plastic bag).
DAY 2:
- The next day, place the Dutch Oven in the oven, and preheat it to 240°C (typically, it is the highest temperature home ovens will go to) with the Dutch oven in it. It needs to be piping hot!
Scoring The Dough
- Once the oven is hot, take the dough out of the fridge and out of the bag.
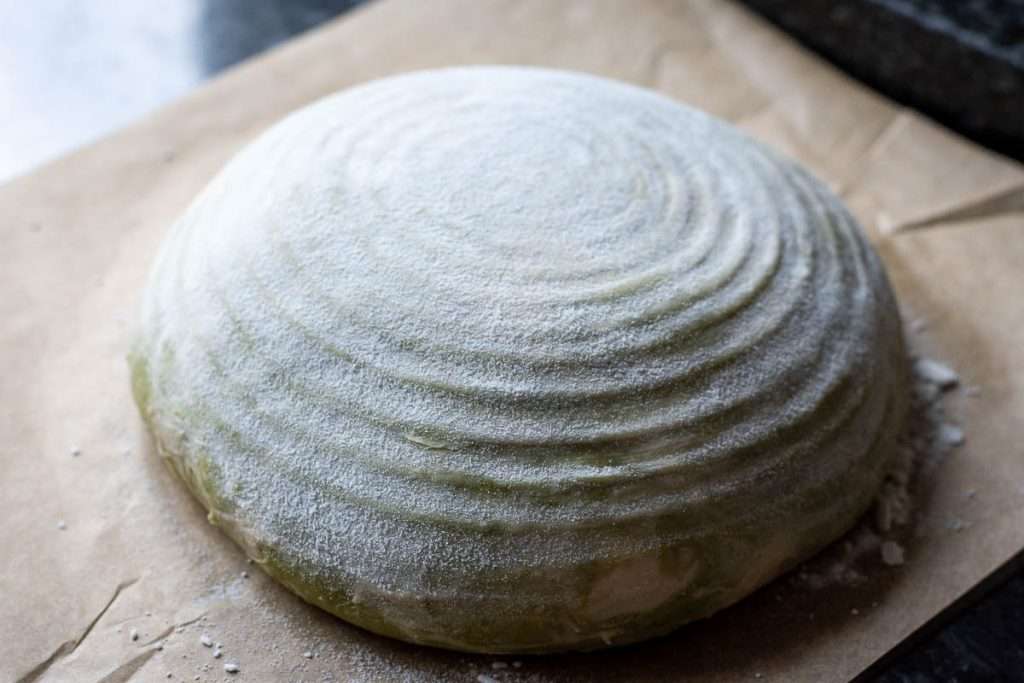
- Invert the dough gently onto a large piece of parchment paper. If your dough was properly bulk fermented and shaped correctly, it should not spread once inverted.
- Dust the surface of the dough with flour. Using a bread lame or a razor blade, score the dough deeply (approximately 1cm deep) at a 30- 45º angle. One single deep slash is all that's needed for that sought-after sourdough "ear".
Baking
- Take the hot Dutch Oven out of the oven, take the lid off, and lift the sourdough into it, holding the edges of the parchment paper. Be mindful of how you lift the paper. Sometimes, the scored slash can begin to close up during this process. To prevent this, lift the parchment from the sides that won't push the two edges of the scored dough back together.
- Place the lid back on the Dutch Oven and place the bread into the hot oven for 25 minutes.
- After 25 minutes, take the lid off, and return the sourdough to the oven for another 25 minutes. If you don't want your loaf of bread too dark in colour, you can reduce the oven temperature to 200°C.
Cooling
- Once baked, take the Dutch Oven out of the oven. Lift the bread out by holding the corners of the parchment paper. Place the bread onto the wire rack, and slide the parchment paper from underneath the loaf.
- Leave the matcha sourdough to cool down to room temperature before slicing.
Video
Notes
Nutrition
More Exciting Sourdough Recipes
If you loved this sourdough recipe, there's plenty more to try with your bubbly sourdough starter. From bold flavour twists to everyday staples, I'm always testing new recipes to keep things interesting. Here are some solid 5-star rating recipes for you to try:







Lilly says
Wow, what a pretty bread! I happened to have matcha at home from a recent project and decided to use it in this loaf. Guess I have to buy more now, as the gentle earthy and grassy matcha flavor just worked so well with the sourdough!
Ieva Greber says
Thank you so much for such a kind comment. We are not really matcha drinkers, but we love using it in baking and desserts!
Rose says
That swirl is stunning! I’m adding this to my “weekend bakes” list—can’t wait to try it with cream cheese and smoked salmon.
Ieva Greber says
Thank you Rose! I love the way you're thinking! It will go beautifully with salmon and cream cheese 🙂
Sara says
This bread is tender and delicious, and I love the matcha swirl! Perfect crust. Great recipe.
Ieva Greber says
Thank you so much, glad you enjoyed it 🙂 I find it's as much fun to make, as it is to slice into and eat! 🙂
Carmen says
I love this sourdough recipe so much! I have made it several times now. I put the matcha dough on top of the plain dough and roll it like a cinnamon roll to give it a classic and distinct swirl! A favorite I make often! Thank you for sharing this recipe! P.S. I also will double the plain sourdough portion of this recipe and omit the matcha when I want a simple and delicious sourdough. Just beautiful!
Ieva Greber says
Thank you so much — I’m so glad you’ve been enjoying it! Your shaping idea is brilliant, I’ll definitely have to try that myself! 😊
And funnily enough, today I’m working on a pink swirl sourdough using dragonfruit powder, with pretty much the same formula as this one. It failed miserably the first few times - the colour faded completely 😅 but I think I may have finally found a solution!
Lora says
This matcha swirl sourdough is as beautiful as it is delicious. The earthy flavor and stunning green swirl make it a standout loaf.