
If you've ever wanted to combine the comfort of soft sourdough buns with the indulgence of chocolate babka, these Sourdough Chocolate Knots are exactly that sweet spot. Think soft, enriched dough, swirled with a rich chocolate filling and shaped into beautiful knots that bake up golden brown and irresistibly glossy. This recipe walks you through everything - from mixing and bulk fermentation to the shaping process and final glaze - so you can confidently create bakery-worthy sourdough chocolate rolls at home.

Jump to:
As an Amazon Associate I earn from qualifying purchases, at no extra cost for you! Thank you!
These buns are a bit of a hybrid in my kitchen - inspired by my sourdough cardamom buns and my sourdough chocolate babka. The result? Soft, buttery sourdough chocolate buns that are perfect with a mid-morning coffee (and dangerously easy to keep reaching for).
Fancy something a little bit extra? Try a similar concept but in our Sourdough S'mores Rolls!
Ingredient Notes
- Bread flour. Strong bread flour (good quality white flour with at least 12% protein) gives structure and helps the dough pass the windowpane test. You can substitute with purpose flour, but expect a less manageable dough.
- Active sourdough starter. Use a bubbly active sourdough starter at peak activity. This ensures a steady fermentation process and good rise.
- Whole milk. Adds richness and softness. You can substitute with plant-based milks, but whole milk gives the best results.
- Egg. Adds structure and tenderness to the dough.
- Butter. Softened butter enriches the dough, making it soft and fluffy. Always use room temperature butter for easy incorporation.
- Sugar. Adds sweetness and balances the tanginess of sourdough.
- Salt. Enhances flavour - don't skip it, even in sweet doughs.
- Dark chocolate. Use the type of chocolate that melts easily. A high-quality chocolate bar is best reserved for enjoying on its own.
- Double cream and butter. Creates a smooth, spreadable filling.
- Rich cocoa powder. Intensifies the deep chocolate flavour.
- Powdered sugar. Sweetens and thickens the filling.
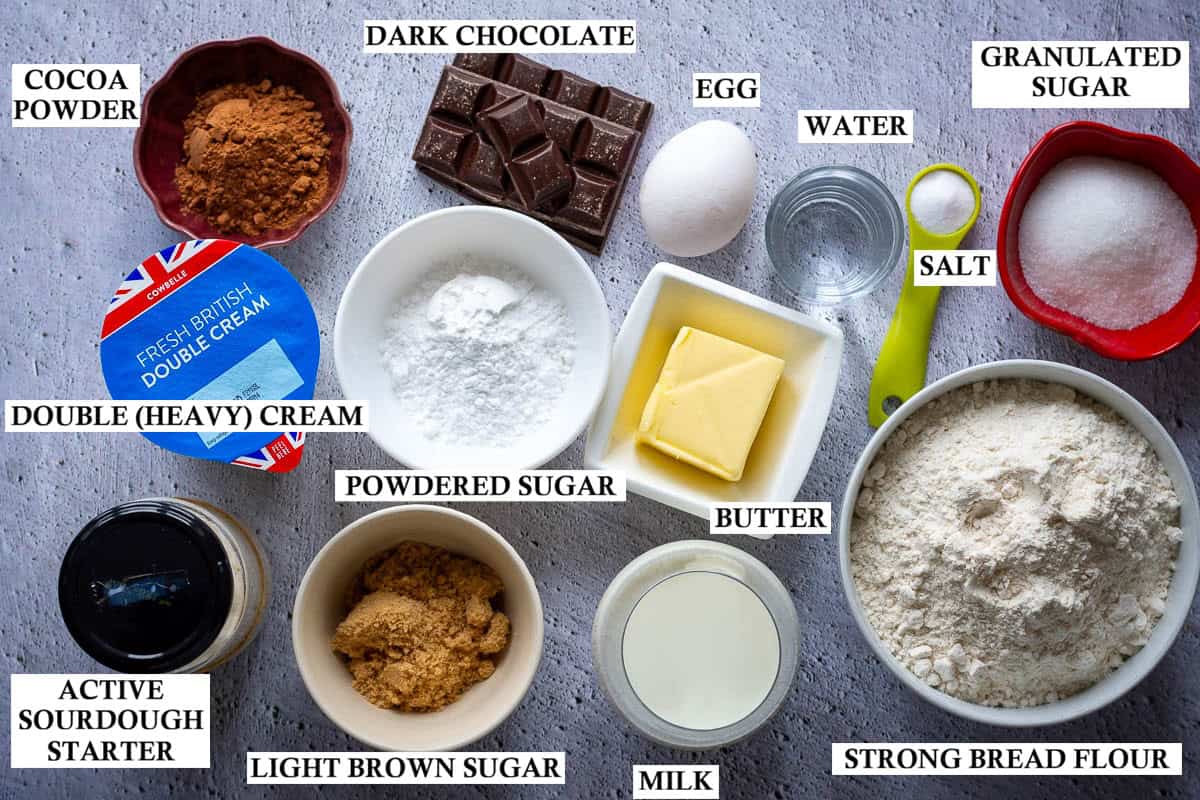
A simple mixture brushed over the buns after baking gives them shine and keeps them soft for longer storage.
Step-By-Step Method
DAY 1
Feed the Starter
1. Feed your sourdough starter and leave it in a warm spot until doubled and bubbly. If you have trouble, head to our article about Sourdough Starter Not Doubling Within 4 Hours, or download our FREE Sourdough Starter Troubleshooting Guide below.
Mixing The Dough
1. In the bowl of a stand mixer, combine flour, sugar and salt.
2. Add active starter, milk and egg. Using a dough hook attachment, mix on low speed until a rough dough forms and no dry bits of flour remain.
3. Gradually add softened butter and increase to medium speed, kneading until smooth and elastic.
Top Tip: The dough should pull away from the sides of the bowl and feel soft but not sticky.
Bulk Fermentation
1. Shape the dough into a ball and place it into a lightly oiled large bowl.
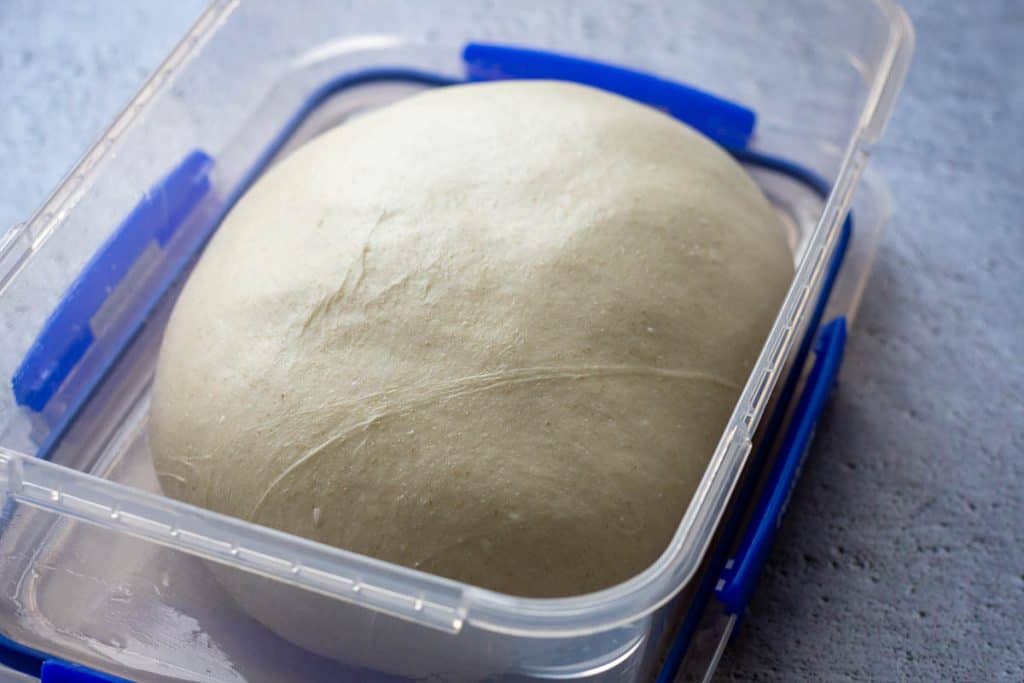
2. Cover with plastic wrap or a damp towel and leave in a warm spot to bulk ferment until nearly doubled.
3. Transfer to the fridge overnight for a slow fermentation.
Top Tip: Cold dough is much easier to handle during the shaping process.

DAY 2
Filling
1. In a small bowl or saucepan, gently heat cream and butter until melted.
2. Add chopped dark chocolate and stir until smooth. Whisk in cocoa powder and sugar until thickened.
3. Allow to cool to a spreadable consistency.
Top Tip: If the filling is too warm, it will leak during shaping. Patience pays off here.


Shaping And Final Proof
1. Turn the dough onto a lightly floured surface.
2. Using a rolling pin, roll into a large rectangle.
3. Spread the chocolate filling evenly across the surface.
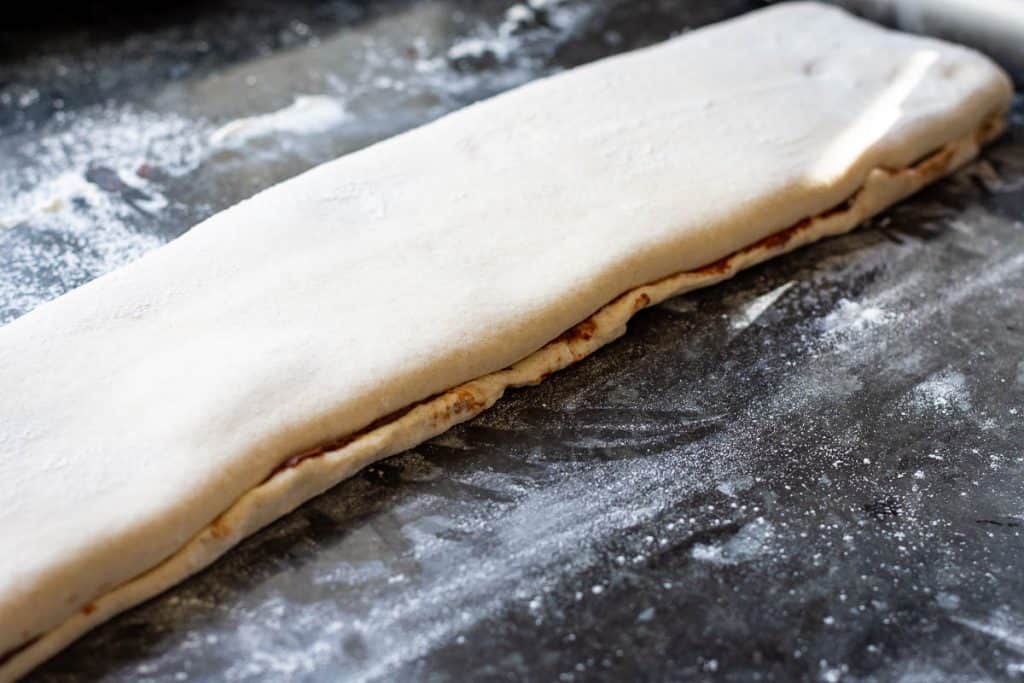
4. Fold the dough like a letter, then cut into long strips.
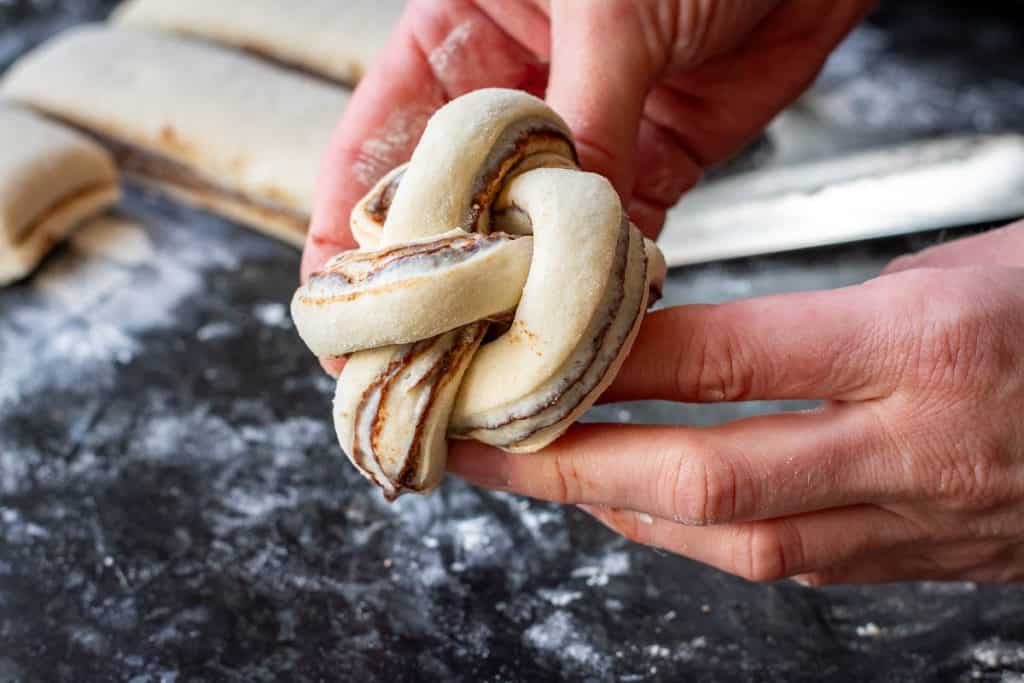
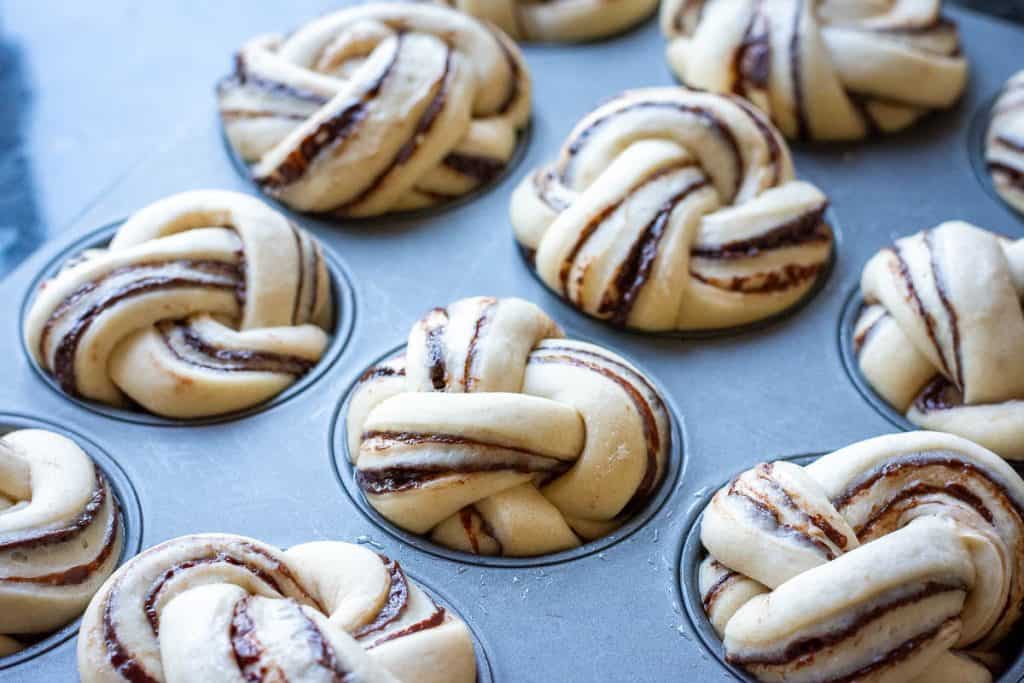
5. Slice each strip into three strands and braid. Roll each braid into a knot and place into a prepared muffin tin. (There is a shaping video in the recipe card at the bottom of the post).




6. Cover with lightly oiled plastic wrap and leave in a warm spot until doubled.
Bake
1. Preheat the oven to 180°C (350°F).
2. Bake for 16-20 minutes until golden brown.

Sugar Syrup
1. Heat sugar and water until dissolved.
2. Brush over the buns while still warm.
Top Tip: Apply syrup while hot - it soaks in better and gives that glossy bakery finish.
3. Transfer to a wire rack to cool slightly.

Variations
Once you've made these once, you'll start thinking of ways to tweak them.
- Add melty chocolate chips (or white chocolate chips) - you will have to be careful when cutting before shaping, though, as the blade will catch
- Fold in very finely chopped crunchy walnuts for texture
- Swirl in a little peanut butter with the chocolate
- Add a splash of vanilla extract for extra depth
- Use a ready-made chocolate spread if you're short on time
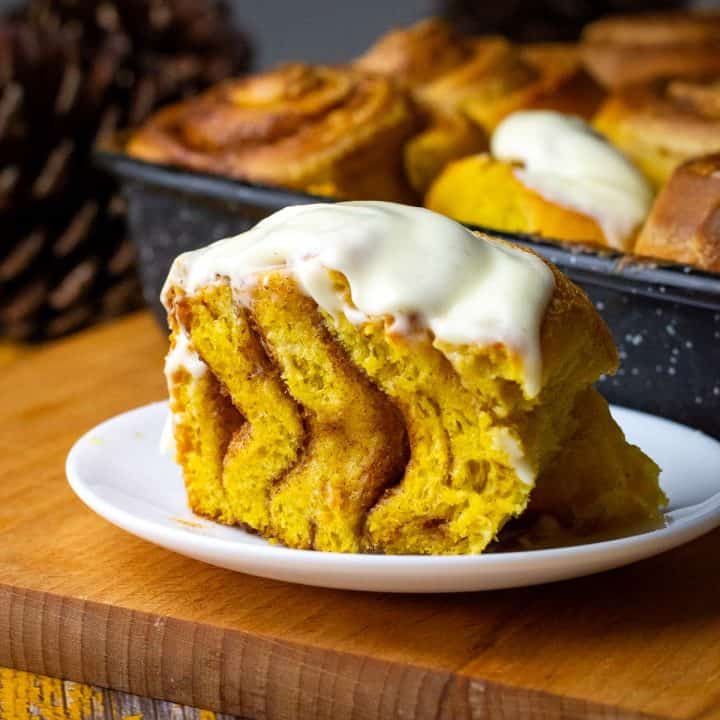
You can also switch up the shaping - shape into classic sourdough chocolate rolls, like our sourdough cinnamon rolls.
More Sourdough Chocolate Recipes
Next time, why not try our Chocolate Sourdough Bread recipe or our favourite Sourdough Chocolate Chip Cookies!


Storage
Store in an airtight container at room temperature for up to 3 days.
For longer storage:
- Freeze once cooled
- Defrost at room temperature
- Warm slightly before serving
They stay surprisingly soft thanks to the enriched dough and syrup.
Serving Suggestions
These Sourdough Chocolate Buns are best slightly warm.
My favourite ways to serve them:
- with a strong mid-morning coffee
- as a weekend bake when you want something a little indulgent mid-afternoon
- with fresh berries and sweetened cream cheese on the side
They also make a great centrepiece for a relaxed brunch or even a casual dinner party - no one complains about warm chocolate and soft bread.

More Sourdough Buns and Rolls
If you enjoyed these Sourdough Chocolate Knots, there's a whole world of sweet sourdough recipes to explore - all built on that same tangy depth of sourdough, just dressed up in different ways.



Sourdough Chocolate Knots
Equipment
- Sharp Knife or Pizza Wheel
Ingredients
Sourdough:
- 420 g strong bread flour
- 50 g granulated sugar
- 1 teaspoon salt
- 160 g active sourdough starter 100% hydration
- 220 ml milk
- 1 egg large
- 60 g unsalted butter softened
Chocolate Filling:
- 60 g unsalted butter cubed
- 60 g double cream/ heavy cream
- 100 g dark chocolate finely chopped
- 45 g powdered sugar icing sugar
- 15 g unsweetened cocoa powder
Sugar Syrup:
- 40 g light brown sugar
- 40 g water
Instructions
DAY 1
- First thing in the morning, feed your sourdough starter in the ratio of 1:1:1. Leave it in a warm spot for 4-5 hours until at least doubled in volume.
Mixing The Dough
- When your sourdough starter is active and bubbly, start making the dough for the buns. In the bowl of a stand mixer, combine strong flour, sugar and salt. Add the sourdough starter, milk and egg. Mix the dough in your stand mixer, fitted with a dough hook attachment for 4-5 minutes until combined (it does not have to be smooth and elastic at this point).
- Bit by bit, add the softened butter. Increase the mixer to medium speed and keep on kneading for about 10 minutes, or until the dough passes the windowpane test (until you can stretch the dough so thin that you can see through it without tearing it).
Bulk Fermentation
- Tip the dough onto a work surface, shape it into a ball and place it into a large lightly oiled bowl.
- Cover it with plastic wrap and leave it in a warm place to bulk ferment for 4-5 hours, until it almost doubles in volume.
- Transfer the bowl to the fridge and let the dough rest overnight (8-16 hours).
DAY 2
Filling:
- Heat butter and cream in a small pan over low-medium heat until melted. Add the finely chopped chocolate and mix until it melts, then remove the pan off the heat.
- Whisk in the cocoa powder and powdered sugar - make sure no dry lumps remain. Allow the mixture to cool for about 45 minutes, until it thickens to a spreadable consistency.
Shaping And Final Proof
- Lightly grease a 12-hole muffin tin with butter.
- Take the sourdough out of the fridge and scoop it all out onto a lightly floured surface.
- Roll it out into a rectangle, measuring approximately 50x30cm.
- Spread the chocolate filling across the surface of the rolled-out dough.
- Fold ⅓ of the long edge towards the middle, then the other ⅓ over the folded bit (like a pamphlet, or a letter). You should now have a long strip (approx 50x10cm) of three dough layers with chocolate filling in between.
- Trim the uneven sides, then cut the laminated dough into 12 strips (approx 4cm wide, 10cm long).
- Cut each strip into three, keeping one end intact - like cutting three legs (see photos above or video below for reference). Then create a three-stranded plait, and roll it up, placing it seam down on the kitchen surface.
- Place the shaped buns in a prepared muffin tin.
- Cover the buns loosely with a lightly oiled cling film and leave the buns for their final rise in a warm spot until they double in size. This can take anywhere from 3 to 6 hours.
Bake
- When your sourdough chocolate knots are doubled in size, preheat the oven to 180°C (355°F). Bake for 18-22 minutes.
Sugar Syrup
- Add the light brown sugar and water in a small saucepan. Stir over medium heat until sugar dissolves and starts bubbling around the edges of the pan. Take the syrup off the heat.
- As soon as the chocolate rolls are out of the oven, brush the sugar glaze over the top of the buns, and leave them for 5 minutes to firm up, before transferring them onto a wire rack to cool down.
- Enjoy these sourdough chocolate rolls slightly warm or at room temperature.
Video
Nutrition


Jane says
I'm always searching for new sourdough bread baking recipes. This one is the one I'll be making on repeat. Because of the chocolate! Theses are great for breakfast or a snack!
Ieva Greber says
Thank you! So glad you tried the recipe and enjoyed them 🙂
Mike says
Made these sourdough chocolate knots and they turned out amazing! Soft, slightly tangy dough with a rich chocolate filling—so good warm from the oven. I’ll definitely be baking these again.
Ieva Greber says
This makes me so happy to read! 😊 So glad they turned out well for you!
Dani says
These are amazing! The rich chocolate flavor with the softness of the bread and the slight tang. So good.
Ieva Greber says
Thank you so much! So happy you loved them. That soft sourdough dough with the chocolate filling is a dangerously good combination, isn’t it?
Ann says
These sourdough chocolate knots are really addictive and easy to put together. I am going to make it again. Thanks for sharing.
Ivey says
These were soft, chocolatey, and so pretty with that glossy sourdough knot shape. They feel like a bakery style treat you can make at home
Ieva Greber says
Thank you so much! I’m really glad you enjoyed them 🙂
Erica says
That tang from the sourdough with the sweet melted chocolate is a combo I didn't know I needed—these knots disappear fast.
Ieva Greber says
Thanks so much, Erica! I’m so glad you enjoyed them. The sourdough tang with the melted chocolate is such a lovely combo, and I agree — these have a habit of vanishing very quickly!
Mollie says
Okay, these turned out so great. I was a little intimidated at first, but your instructions were easy to follow!
Ieva Greber says
I know - they look intimidating, but the shaping isn't that difficult after the first try. And the rest... well, it's just sourdough 🙂
Ramona says
These chocolate knots look super super pretty, I love the colors on them! I am a sourdough lover so I will definitely be making these soon, thank you for sharing this recipe!
Ieva Greber says
Thank you, Ramona! I’m so pleased you like them — they do look rather lovely for something that is basically bread showing off. I hope you enjoy making them!
Izzy says
These sourdough chocolate knots are absolutely irresistible. It feels like a bakery-style indulgence that’s both cozy and a little decadent!
Priscilla says
For the chocolate knots, can I do the bulk fermentation in the oven with the light turned on?
Ieva Greber says
Absolutely! As long as the temperature in your oven doesn't go over 27°C (81°F), it will work great!
Emily says
Could they be refrigerated overnight after the second rise so they can be popped in the oven when you wake up?
Ieva Greber says
Hi, Emily! I cannot say that I've tried this; however, I believe that if your fridge isn't running much higher than 4°C (39°F) and you place the knots in the fridge a little before they're fully risen, it should work just fine. The yeast becomes dormant at this temperature, but the knots will still puff up slightly from residual internal heat. I would also expect they may taste a bit tangier if you're doing another overnight rest in the fridge. They will likely need an extra 1-2 minutes in the oven to cook from chilled. Hope this helps 🙂