
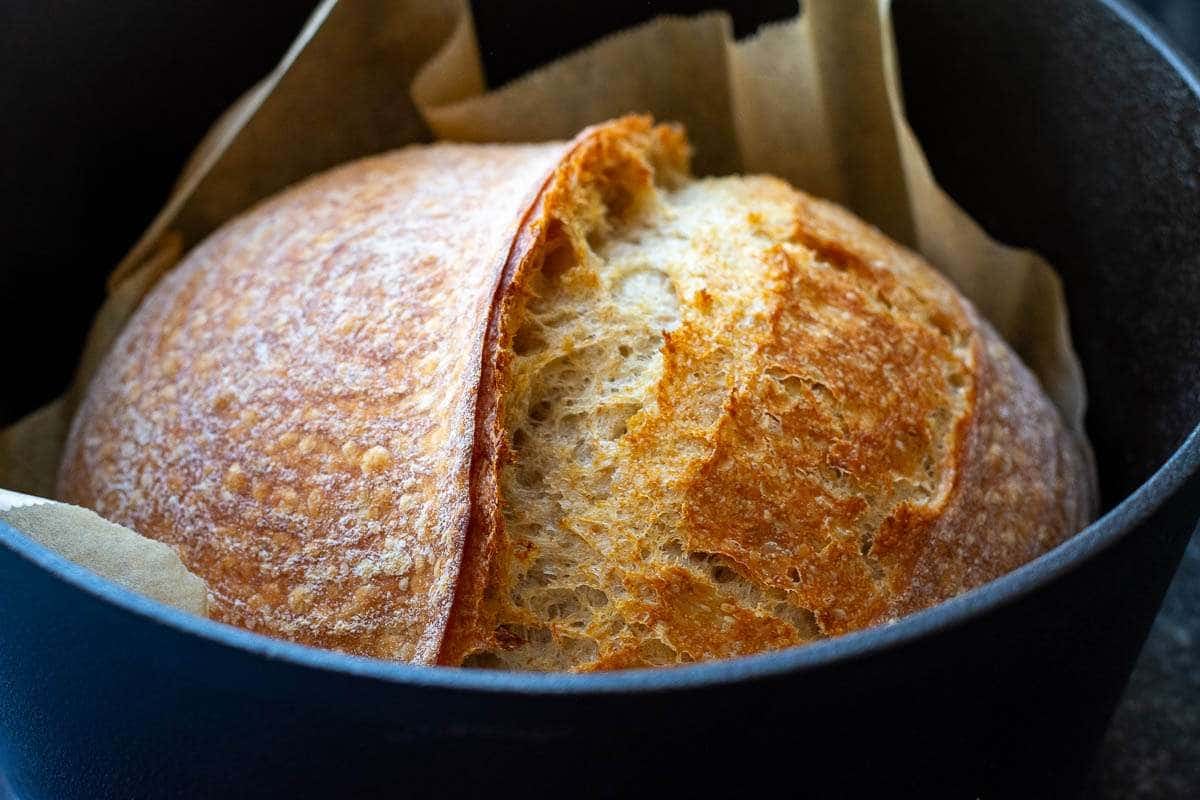
If it's your first time baking with Einkorn flour, this simple Einkorn Sourdough Bread recipe is a great recipe to start with. By mixing Einkorn with strong white bread flour, you get all the nutty, slightly sweet flavour of this ancient grain without the tricky, sticky dough that Einkorn is known for. This balance makes handling easier while still delivering the best results-a beautifully golden crust and a soft, airy crumb.

Jump to:
As an Amazon Associate I earn from qualifying purchases, at no extra cost for you! Thank you!
This recipe has been in the making for quite some time: I autolysed and I didn't, I pushed sourdough hydration, I skipped the folds, and folded right up until the end. And I had mixed results...
But this recipe is now complete and ready to be shared: only white flour is autolysed, then the final dough is folded and bulk fermented for a shorter period of time. It's delicious, and it looks great too!

Recipe Highlights
TASTER: Rich, nutty and slightly sweet, thanks to einkorn's ancient grain character, wrapped in a golden, crisp crust.
WHAT'S SPECIAL: A blend of einkorn with strong white flour gives you all of einkorn's flavour without the notoriously tricky, over-sticky dough.
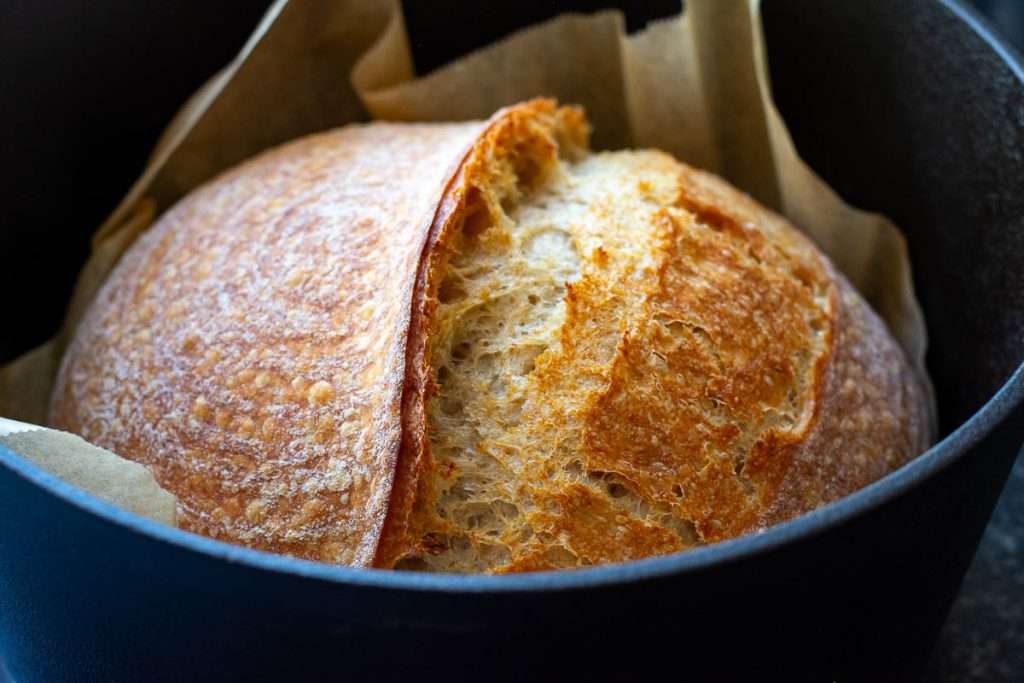
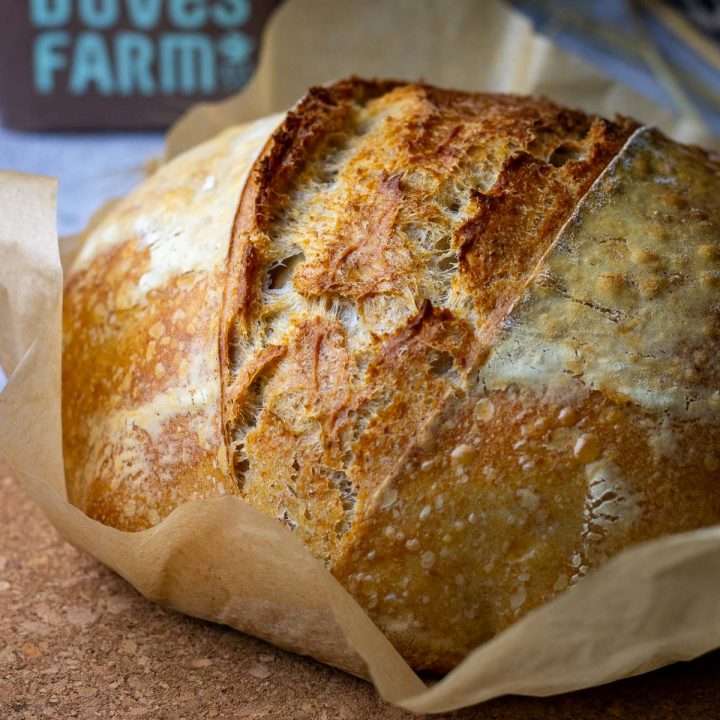
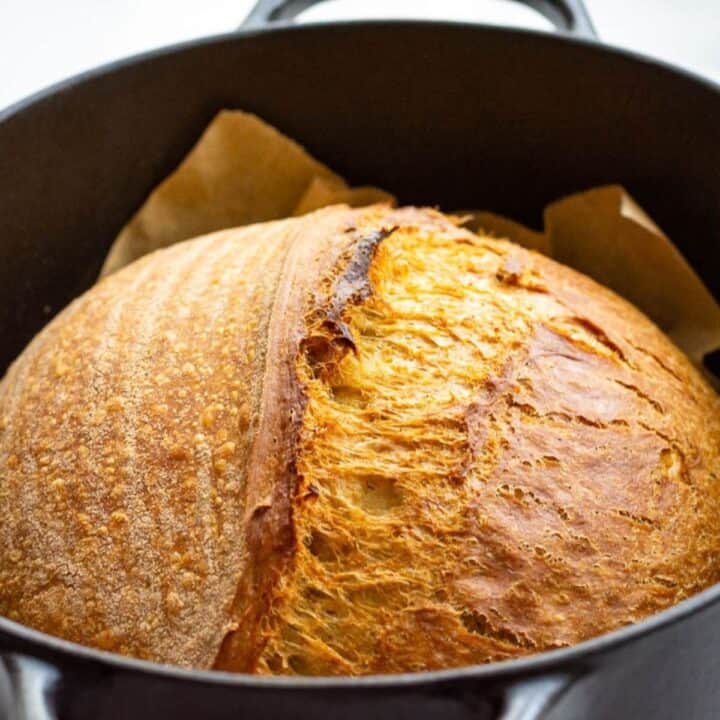
MOST IMPRESSIVE BIT: A well-blistered crust and confident oven spring, which isn't a given with a lower-gluten flour like this.

What is Einkorn?
Einkorn is the oldest known variety of wheat, often called the original ancient grain because it hasn't been hybridised or bred for higher yields the way modern wheat has. That untouched genetic makeup gives it a lower gluten content and a naturally nutty, slightly sweet flavour, which is exactly why it behaves so differently in a sourdough dough compared to the flour you're used to.
How Sourdough Baking Is Impacted By Einkorn?
Gluten. Einkorn wheat has a lower gluten content than modern bread flour, making it less elastic and more fragile. That's why we recommend only adding up to 30% of Einkorn flour to the dough if you're a beginner or if you want a lighter, airier crumb.
Hydration. Due to its unique protein structure, Einkorn flour absorbs water differently, often requiring less liquid than regular wheat. If overhydrated, the dough can become overly sticky and difficult to shape, so careful water adjustments are key.
Dough Handling. Einkorn dough feels much softer and weaker than regular sourdough dough, making it trickier to work with. Gentle handling and shorter fermentation times help maintain structure and prevent over-fermentation.
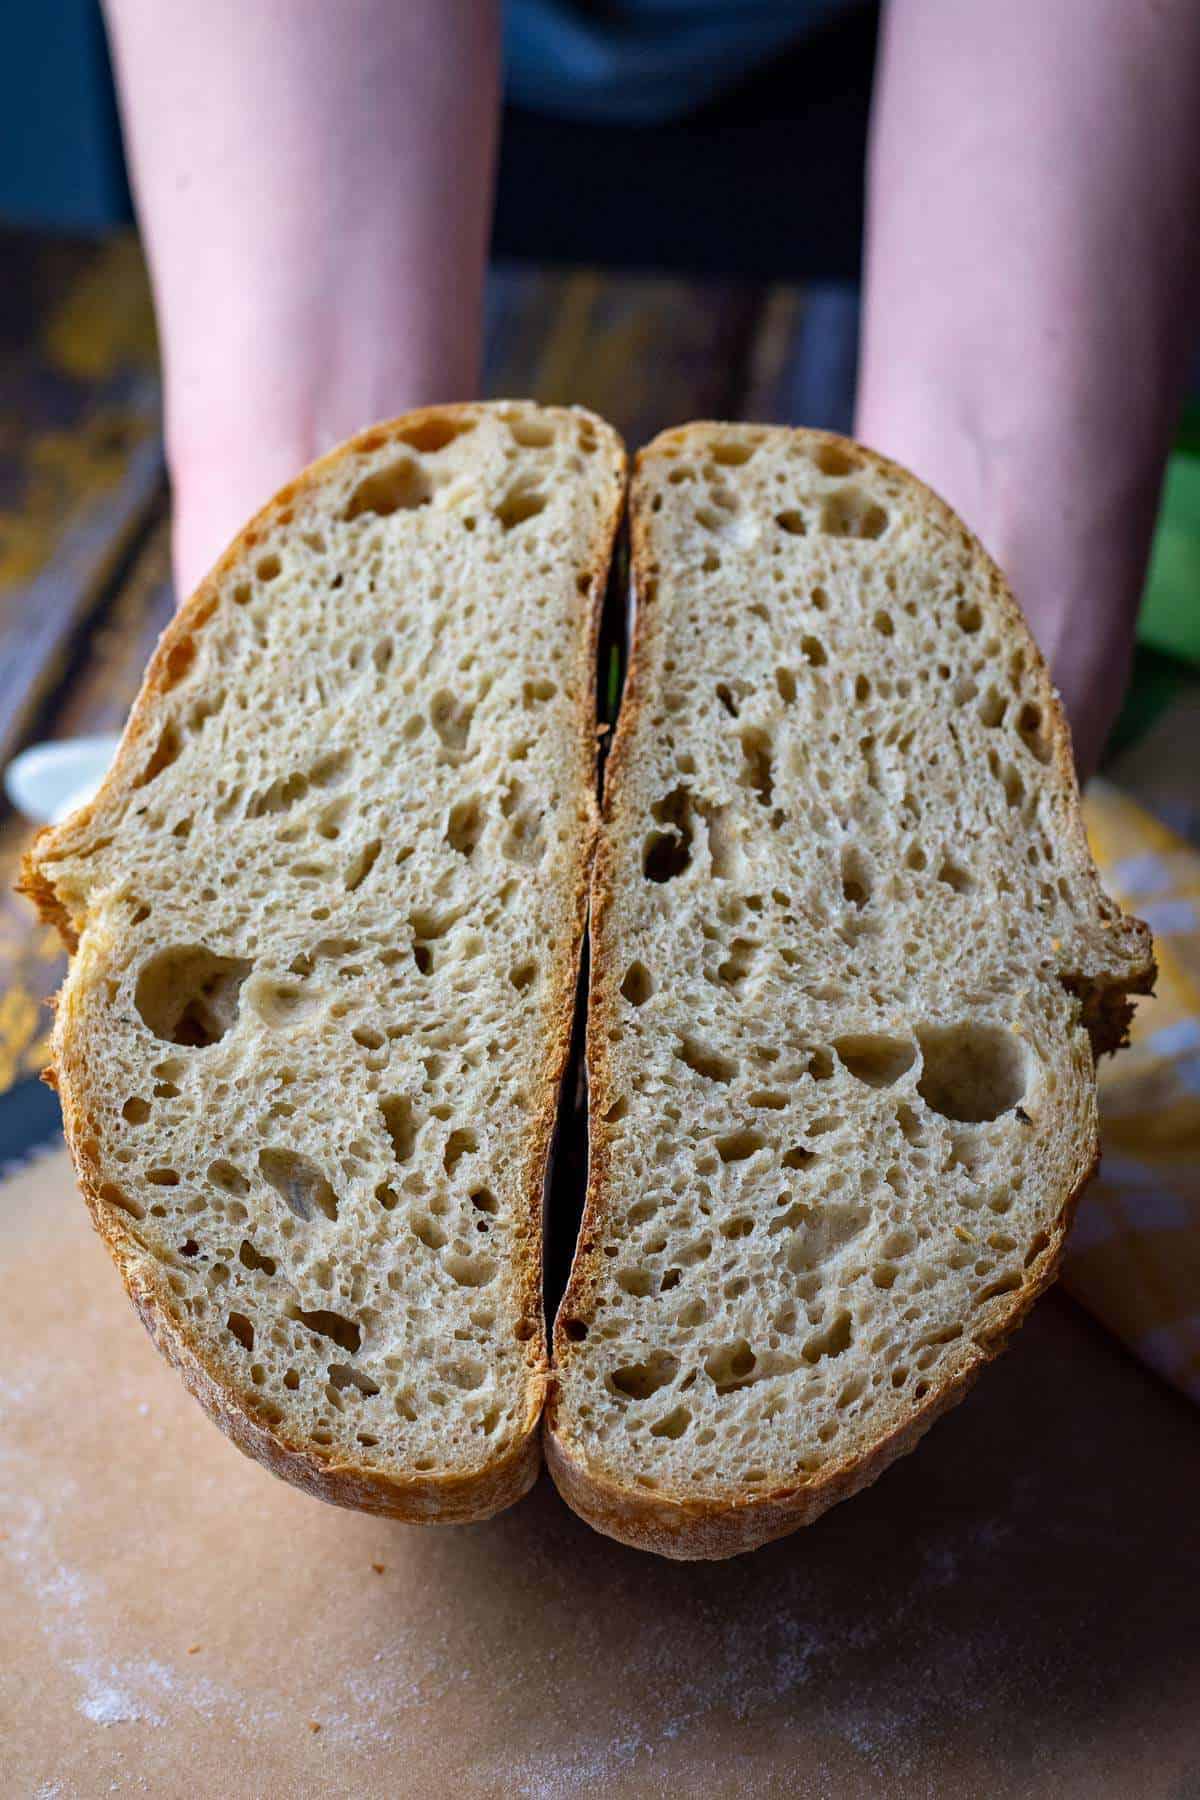
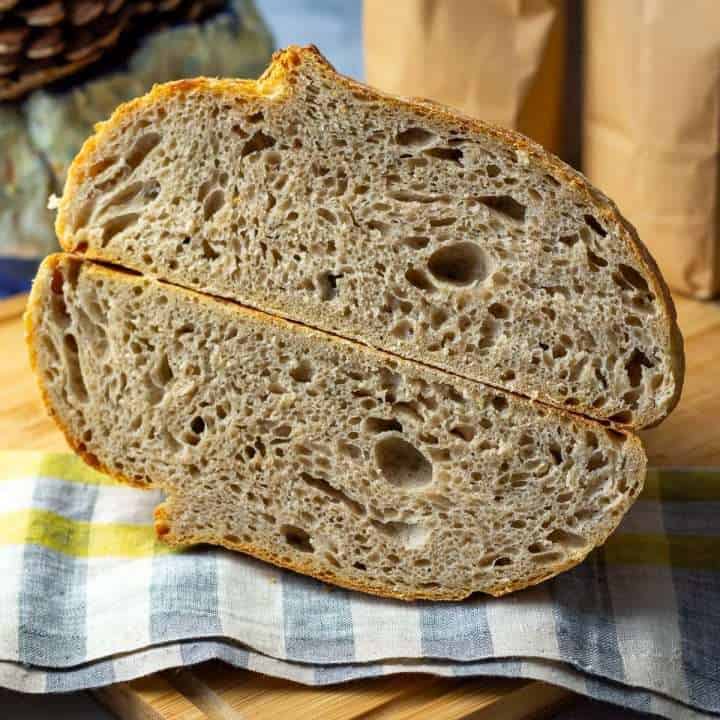
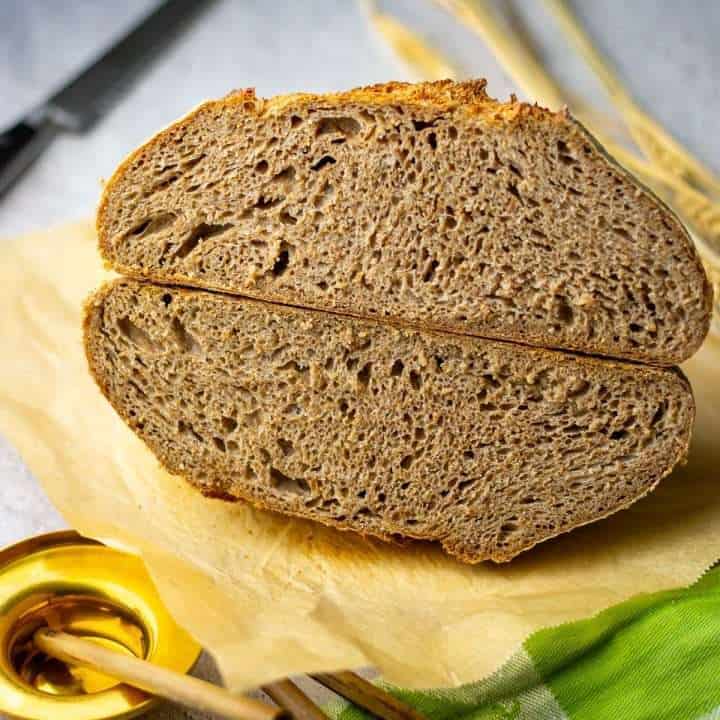
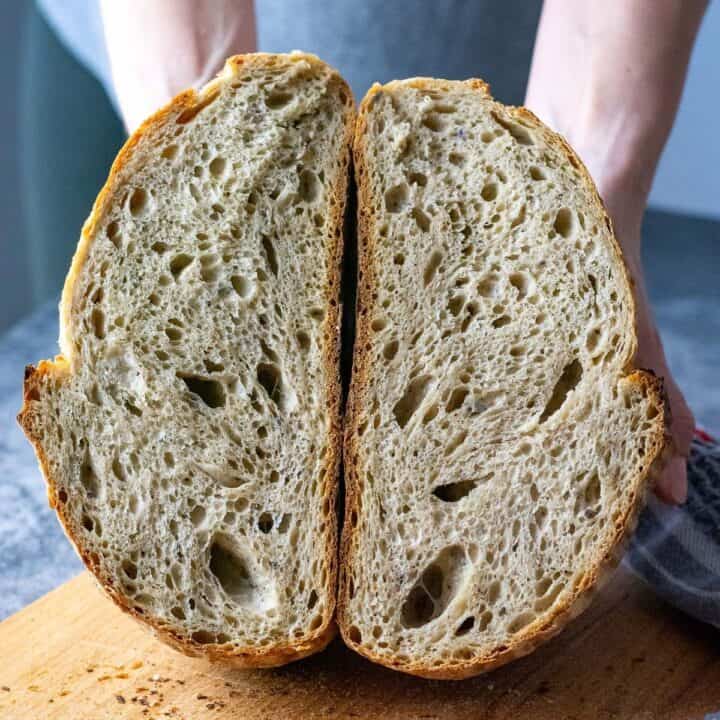
Crumb and Crust. The lower gluten in ancient wheat like Einkorn results in a tighter, slightly more cake-like crumb compared to high-gluten sourdough. However, the crust still bakes up beautifully golden and crisp, giving the bread a rustic appeal. The crust typically develops lots of blisters too!
Flavour. One of the biggest reasons to bake with Einkorn is its rich, nutty, and slightly sweet flavour. This ancient wheat brings a depth of taste that modern flours lack, making your sourdough bread stand out with natural complexity.
Mix It Up: Turn Your Sourdough into a Flavour Adventure.
Ingredient Notes
- strong white bread flour: with at least 14% protein content. Since Einkorn has less gluten than modern wheat, we highly recommend using extra strong flour (Canadian flour) to compensate. Ours has 15-16% protein. Learn more about how protein content in flour affects sourdough.
- wholemeal Einkorn flour: a.ka. whole grain Einkorn flour.
- salt.
- active sourdough starter: 100% hydration.
- water: we typically use warm water to kickstart bulk fermentation, but Einkorn ferments fast, so there's no need to warm the dough. The dough may feel stiffer than your usual sourdough, but don't be tempted to add much more water, as it will become overly sticky by the time it's time to shape.

Find the ingredient quantities, detailed instructions and nutritional information in the recipe card at the bottom of the post.
Step-By-Step Method
DAY 1
First thing in the morning, feed your sourdough starter and leave it in a warm spot (ideally, 21-27°C), semi-covered for 4 hours. Your starter should at least double in volume in this time. If it doesn't, it may need a couple of good feeds before it's fit for purpose.
Autolyse
Mix the extra strong (Canadian) bread flour with water in a bowl of a stand mixer until no dry pockets remain. Cover and leave to autolyse for 30-60 minutes.
Mixing The Dough
When the white flour is hydrated, sprinkle the salt on the surface, tip in the Einkorn flour and active sourdough starter.
Run the stand mixer, fitted with a dough hook attachment for 10 minutes, until your dough is smooth and elastic. It does not need to pass the windowpane test just yet (the gluten will continue developing when we fold the dough).


Coil Folds And Bulk Fermentation
1. Scoop the dough into a large bowl, cover with a damp kitchen towel or plastic wrap and leave it in a warm place (21-27°C) for 30 minutes.
2. After 30 minutes, with cold wet hands, perform the first set of coil folds. Simply lift the bread dough with both hands from the sides and tuck it under to form a coil (video below). Rotate the bowl a quarter turn and coil again. Cover the bowl again, and let the dough rest for 30 minutes again.
3. You should repeat the process every 30 minutes until you have done 4 sets of coil folds. Your dough will spread less with every set of folds, and by the end of it, you will have a much less sticky, very soft and elastic dough that has blisters on top of the dough.
4. For more information on how to coil fold and when to know when you've done enough folding, head to our dedicated article about Sourdough Coil Folds.
5. After the last fold, cover the dough and let the dough rise at warm room temperature for 2-3 hours to finish bulk fermentation process. Your dough should bulk up by about 75%. If you are using a see-through glass bowl for bulk fermenting, you should see a lot of activity and bubbles forming at the base and sides of the bowl.
NOTE: Watch it carefully, as Einkorn dough ferments quicker than modern wheat. Mine was ready to shape in 2 hours.
Shaping and Cold Retardation
1. At the end of bulk fermentation, scoop the dough onto a lightly floured surface. Try and make sure that the smooth top of the dough (the side that is not intact with the bowl) is placed on the floured work surface. Then swiftly fold the four corners of the dough into the centre.
2. Flip the dough seam-side down and use your hands to cup and rotate it, pulling it slightly against the worktop to create surface tension to form a smooth, tight ball with blisters coming up to the surface. If your dough is sticky, dust the surface of the dough with a little rice flour or use a bench scraper to tuck the bottom of the dough under in a circular motion.
3. Place the dough ball into a well-floured banneton basket (or any proofing basket alternatives). We recommend using rice flour for dusting your proofing baskets. The smooth side of the sourdough ball should be at the bottom, with the seam side up.

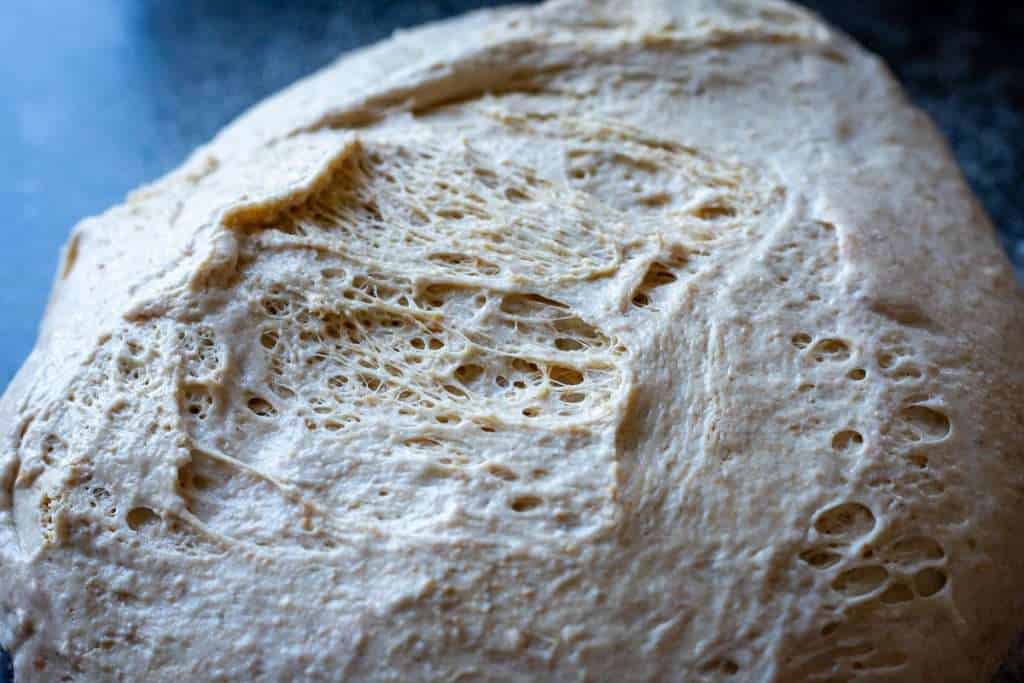
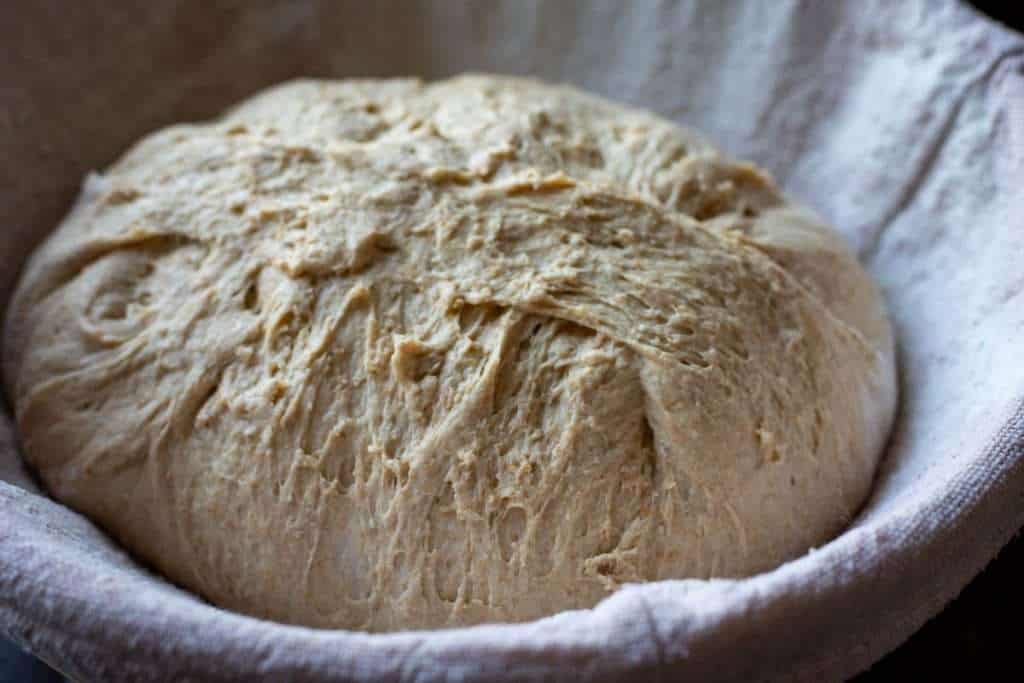
4. Pinch the seam together with your fingers, if the dough starts spreading in the bowl to make sure the dough is tight. Sprinkle with some flour, and cover the dough with a clean fabric napkin or small lightweight tea towel.
5. Place the proofing basket in a large plastic bag - it will protect the dough from drying out. Then place the whole thing in the fridge for its final rise (a.k.a. second rise) in the fridge for 12-16 hours (I don't recommend cold retarding for much longer, as Einkorn flour will tend to make a very sticky dough after a while).
DAY 2
The next day, place the Dutch Oven in the oven, and preheat it to 240°C (typically, it is the highest temperature home ovens will go to) with the Dutch oven in it. It needs to be piping hot!
Scoring Sourdough
1. Once the oven is hot, take the dough out of the fridge and out of the bag.
2. Invert the dough gently onto a large piece of parchment paper. If your dough was properly bulk fermented and shaped correctly, it should not spread much once inverted.
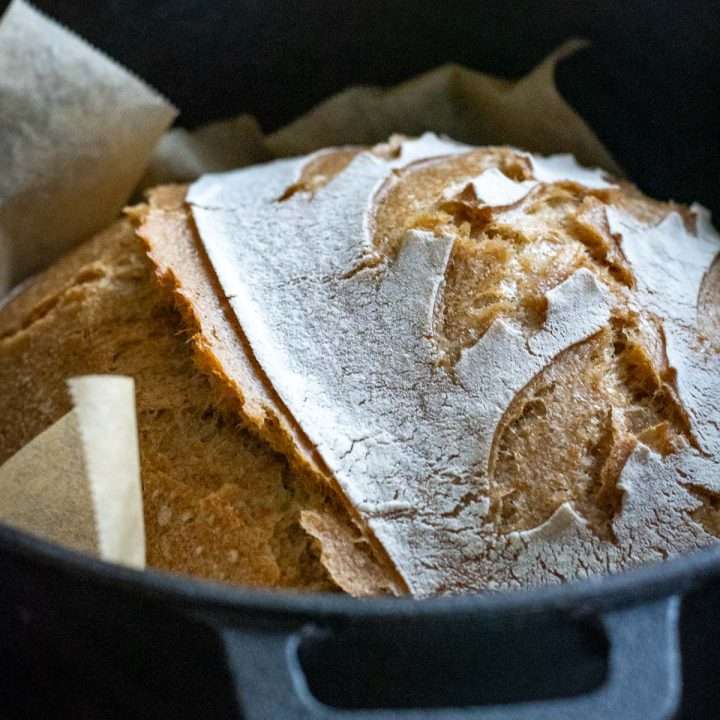
3. Dust the surface of the dough with flour. Using a bread lame or a razor blade, score the dough deeply (approximately 1cm deep) at a 30- 45º angle or one straight slash on the side of the dough (as we did in the photos).

4. Spritz the surface of the loaf with a little water for extra steam.
Baking
1. Take the hot Dutch Oven out of the oven, take the lid off, and lift the sourdough into it, holding the edges of the parchment paper. Be mindful of how you lift the paper. Sometimes, the scored slash can begin to close up during this process. To prevent this, lift the parchment from the sides that won't push the two edges of the scored dough back together.
2. Place the lid back on the Dutch Oven and place the bread into the hot oven for 30 minutes.
3. After 25 minutes, reduce the temperature to 200°C, take the lid off, and return the sourdough to the oven for another 20 minutes.



Cooling
1. Once baked, take the Dutch Oven out of the oven. Lift the bread out by holding the corners of the parchment paper. Place the bread onto the wire rack, and slide the parchment paper from underneath the loaf.
2. Leave the Einkorn sourdough bread to cool down to room temperature before slicing.
Recipe FAQs
No, you don't need an Einkorn sourdough starter for this recipe-any mature starter will work, whether it's fed with rye, white, or whole wheat flour. Just make sure it's active and bubbly for the best rise and flavour.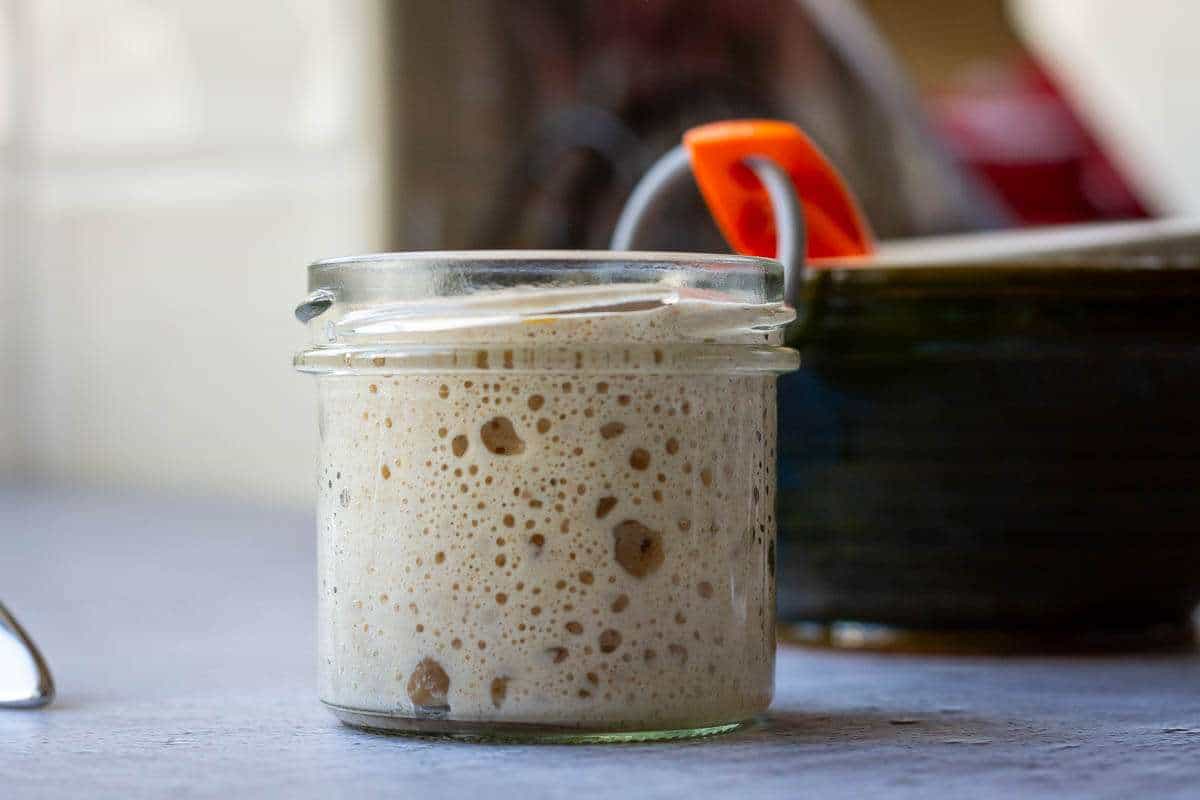
Dough with Einkorn flour starts off stiff, but resist the urge to add more water at the initial dough mixing stage - it naturally becomes "looser" as it ferments. Or it could be overfermented, as Einkorn flour ferments faster than modern wheat. Try reducing hydration, fermentation and cold retardation time to keep it easier to handle.
Absolutely! We have plenty of tips on how to bake sourdough in a loaf pan.
Einkorn's protein and enzyme structure is different from modern wheat, which speeds up fermentation. Keep a close eye on bulk fermentation rather than going by the clock alone. In this recipe, that's usually 2 hours, not the 3-4 hours you might expect from a standard sourdough dough.
This recipe is built around a beginner-friendly ratio, with just enough einkorn to add flavour without losing the structure that strong white flour provides. Pushing the einkorn percentage higher changes the hydration and handling significantly, so it isn't something this particular recipe is written for.
Storage
The best way to store your Einkorn loaf is in a bread box or a breathable bread bag at room temperature for up to 3 days. For longer storage, freeze a well-wrapped loaf of bread whole or in individual slices in ziplock bags for easy thawing.
Sourdough Bread With Various Types of Flour
I hope you enjoyed this einkorn sourdough recipe for beginners. Want to experiment with other types of flour in your sourdough? Here are some great recipes to start with:
LOVE BAKING SOURDOUGH WITH ME?
You can now add Somebody Feed Seb as a preferred source on Google. It only takes a tick box, and tells Google you'd like to see more of my recipes when relevant.
Einkorn Sourdough Bread
Equipment
- Bench Scraper
- Proofing Basket
- Razor Blade or Bread Lame
- Cooling Rack
Ingredients
- 300 g strong white bread flour with at least 14% protein content
- 100 g Einkorn flour we used wholemeal Einkorn flour
- 7 g salt
- 160 g active sourdough starter 100% hydration
- 230-240 ml water
Instructions
DAY 1:
- First thing in the morning, feed your sourdough starter and leave it in a warm spot (ideally, (21-27°C)), semi-covered for 4 hours. Your starter should at least double in volume in this time. If it doesn't, it may need a couple of good feeds before it's fit for purpose.
Autolyse
- Mix the extra strong (Canadian) bread flour with water in a bowl of a stand mixer until no dry pockets remain. Cover and leave to autolyse for 30-60 minutes.
Mixing The Dough
- When the white flour is hydrated, sprinkle the salt on the surface, tip in the Einkorn flour and active sourdough starter.
- Run the stand mixer, fitted with a dough hook attachment for 10 minutes, until your dough is smooth and elastic. It does not need to pass the windowpane test just yet (the gluten will continue developing when we fold the dough).
Coil Folds And Bulk Fermentation
- Scoop the dough into a large bowl, cover with a damp kitchen towel or plastic wrap and leave it in a warm place (21-27°C) for 30 minutes.
- After 30 minutes, with cold wet hands, perform the first set of coil folds. Simply lift the bread dough with both hands from the sides and tuck it under to form a coil (video below). Rotate the bowl a quarter turn and coil again. Cover the bowl again, and let the dough rest for 30 minutes again.
- You should repeat the process every 30 minutes until you have done 4 sets of coil folds. Your dough will spread less with every set of folds, and by the end of it, you will have a much less sticky, very soft and elastic dough that has blisters on top of the dough.
- For more information on how to coil fold and when to know when you've done enough folding, head to our dedicated article about Sourdough Coil Folds.
- Once all the folds have been completed, cover the dough and let the dough rise at warm room temperature for 2-3 hours to finish bulk fermentation. Your dough should bulk up by about 75%. If you are using a see-through glass bowl for bulk fermenting, you should see a lot of activity and bubbles forming at the base and sides of the bowl. NOTE: Watch the dough carefully, as Einkorn ferments quicker than modern wheat. Mine was ready to shape in 2 hours.
Shaping and Cold Retardation
- At the end of bulk fermentation, scoop the dough onto a lightly floured surface. Try and make sure that the smooth top of the dough (the side that is not intact with the bowl) is placed on the floured work surface. Then swiftly fold the four corners of the dough into the centre.
- Flip the dough seam-side down and use your hands to cup and rotate it, pulling it slightly against the surface to form a smooth, tight ball.
- Place the dough ball into a well-floured banneton basket (or any proofing basket alternatives). We recommend using rice flour for dusting your proofing baskets. The smooth side of the sourdough ball should be at the bottom, with the seam at the top.
- Pinch the seam together with your fingers, if the dough starts spreading in the bowl to make sure the dough is tight. Sprinkle with some flour, and cover the dough with a clean fabric napkin or small lightweight tea towel.
- Place the proofing basket in a large plastic bag - it will protect the dough from drying out. Then place the whole thing in the fridge for its final rise (a.k.a. second rise) in the fridge for 12-16 hours (I don't recommend cold retarding for much longer, as Einkorn flour will tend to make a very sticky dough after a while).
DAY 2:
- The next day, place the Dutch Oven in the oven, and preheat it to 240°C (typically, it is the highest temperature home ovens will go to) with the Dutch oven in it. It needs to be piping hot!
Scoring Sourdough
- Once the oven is hot, take the dough out of the fridge and out of the bag.
- Invert the dough gently onto a large piece of parchment paper. If your dough was properly bulk fermented and shaped correctly, it should not spread much once inverted.
- Using a bread lame or a razor blade, score the dough deeply (approximately 1cm deep) at a 30- 45º angle.
Baking
- Take the hot Dutch Oven out of the oven, take the lid off, and lift the sourdough into it, holding the edges of the parchment paper. Be mindful of how you lift the paper. Sometimes, the scored slash can begin to close up during this process. To prevent this, lift the parchment from the sides that won't push the two edges of the scored dough back together. Spritz the top of the loaf with a little water for extra steam.
- Place the lid back on the Dutch Oven and place the bread into the hot oven for 30 minutes.
- After 25 minutes, reduce the temperature to 200°C, take the lid off, and return the sourdough to the oven for another 20 minutes.
Cooling
- Once baked, take the Dutch Oven out of the oven. Lift the bread out by holding the corners of the parchment paper. Place the bread onto the wire rack, and slide the parchment paper from underneath the loaf.
- Leave the Einkorn sourdough bread to cool down to room temperature before slicing.
Video
Nutrition


Mary Moylan says
HI, I'm going to try this recipe but wonder about the nutritional information given. "Calories: 1629kcal" means over 1600 calories per WHAT? One slice? The entire loaf? I'd really like to know!
Also, running the mixer for 10 minutes at what speed? That seems an awful long time for something with einkorn flour in it. I will go no higher than #2 on my mixer.
I've never used a stand mixer for the einkorn loaves I've baked so this will be interesting.
I'll let you know how it turns out.
Thanks,
Ieva Greber says
Hi Mary. Yes, I never use a stand mixer for 100% einkorn flour loaves, but since this one uses just a small proportion, I am aiming to really help the gluten develop in the bread flour to help with shaping and oven spring. I use #3 on my Kenwood stand mixer, but, of course, every mixer is different, so baker's intuition always helps here :). Really keen to hear how it turned out!
NigeB says
Another winner! I used Khorasan rather than Einkorn - because it's what I happened to have in - but it still gives a lovely, nutty flavour. The resulting loaf turned out beautifully.
Ieva Greber says
Thank you so much for a lovely comment! And also for the inspiration to try Khorasan - never baked with it before (very intrigued...)